[reviewed/revised 18 Oct 2021]
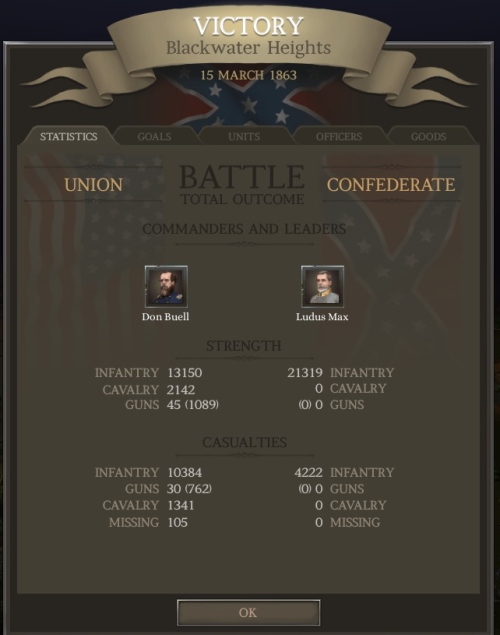
You can bring up to 20 brigades to this CSA assault on a fortified Union position across a river or stream. The map is basically identical to the “Alexander’s Bridge” map at the opening of Chickamauga.
I find that an infantry force with maybe a few melee cav units works well.
Move your brigades up at the start and get them into running position near the bridge. Beware of two or three skirmisher units on the CSA side of the river, near the east edge of the map.
Put one or two of your better-shooting CSA brigades on the river bank, just east of the bridge and adjacent to the east end of the foremost Union fortification–and use skirmisher units to protect it from Union skirmisher attacks from the NE. Your shooter brigade should rout the Federal brigade in that fortification across the river. The rest of your brigades can then march or run across the bridge, and can rush the main Union positions on the left. It isn’t really necessary—you can capture the flag by capturing the wood to its left—but some of your brigades after crossing the river can move E carefully along the river bank to flank the fortifications positioned across the field and then roll up the Union left flank all the way to the flag.
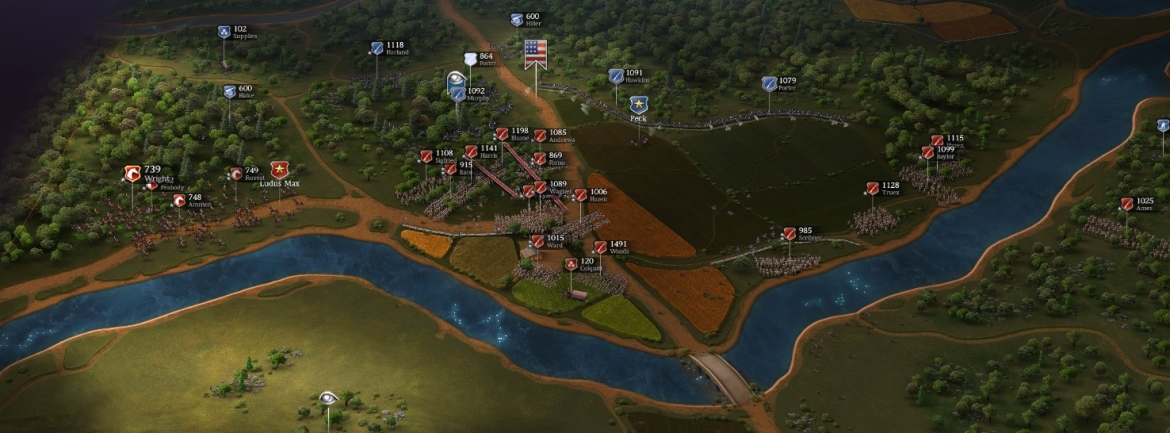
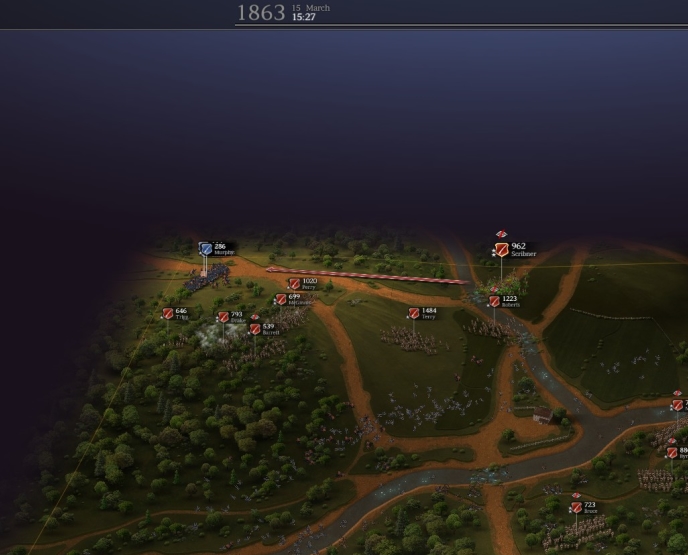
Push forward quickly when Union units retreat, to keep up the pressure. Take the flag and consolidate your defenses. If you want to maximize Union casualties, spread out and move gradually in a line up to the top of the map, capturing or shattering every Union brigade you find.
J & P Rebalance Mod (1.27.4.3) BG
The same strategy works, and although the USA force is better dug in, CSA gets 24 brigades and should outnumber them greatly.
♠♠♠