[reviewed/revised 18 Oct 2021]
Antietam was one of the toughest battles of the early war for General Lee, whose forces were outnumbered more than 2 to 1, and in keeping with that reality, the historical version of this battle in UGCW is a genuine challenge even at BG level. However, CSA should have a much easier time at Antietam in the BG campaign, because it can build a better force, and can reduce the Federals better beforehand.
CSA will have slots for three corps of up to 20 brigades each.
The corps that will form the CSA left flank at the north should be the strongest, with sizable brigades (1200+ men) and good rifles. It will be mostly maneuvering/encircling/annihilating so won’t need artillery as much as men who can run and shoot and not rout easily. A strong melee cav unit will be really handy at the start, to help delay the Federals’ initial southward lunge and then harry their artillery and supply units. You can also include one or two rifle-equipped cavalry units in your first division, to get more quickly into the eastern part of those northern woods.
The corps holding the center should be strong in infantry and should have at least a couple of artillery units, to help at the bridge below the Sunken Road position, plus 3-4 full-strength (750) melee cav units.
The corps that is revealed last, and defends the CSA right flank at the S part of the map, can be weakest but should have 2-3 decent artillery batteries and at least a couple of strong melee cav units.
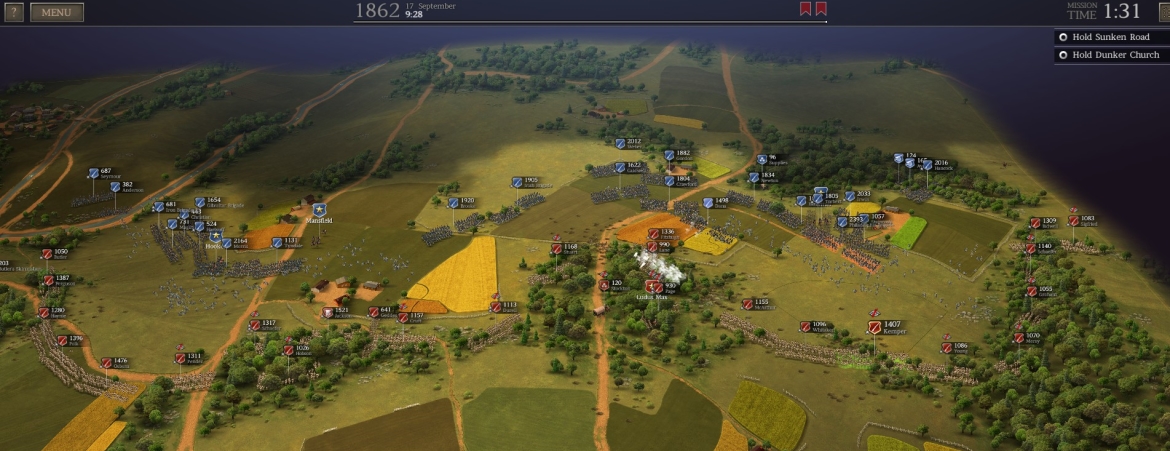
At the start, run your left-flank corps to the northernmost major line of woods above Dunker Church, as shown in the image. You will have to force some Federal units out of those woods in initial combat, and may incur significant casualties doing so. But once your units are established at the N edge of those woods and the Federals are under fire out in the open, they are doomed and the Battle of Antietam effectively will have been decided.

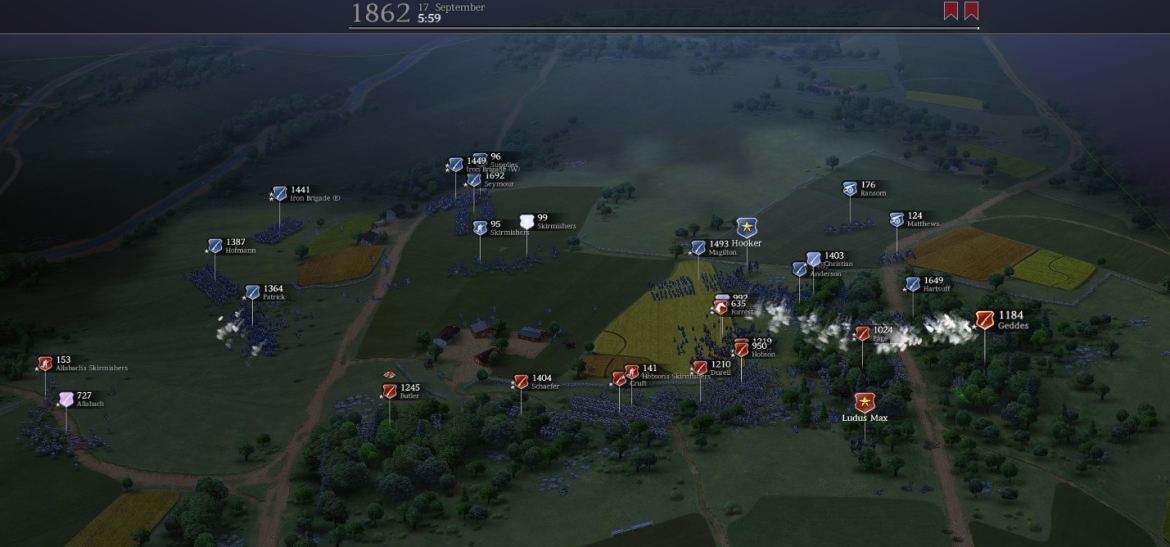
Stay in cover and defend against Federal charges. Note that you don’t start with all of your left-flank corps—the remaining units will arrive from the S part of the map after an hour or so; run them north to beef up your line and extend your flanks.
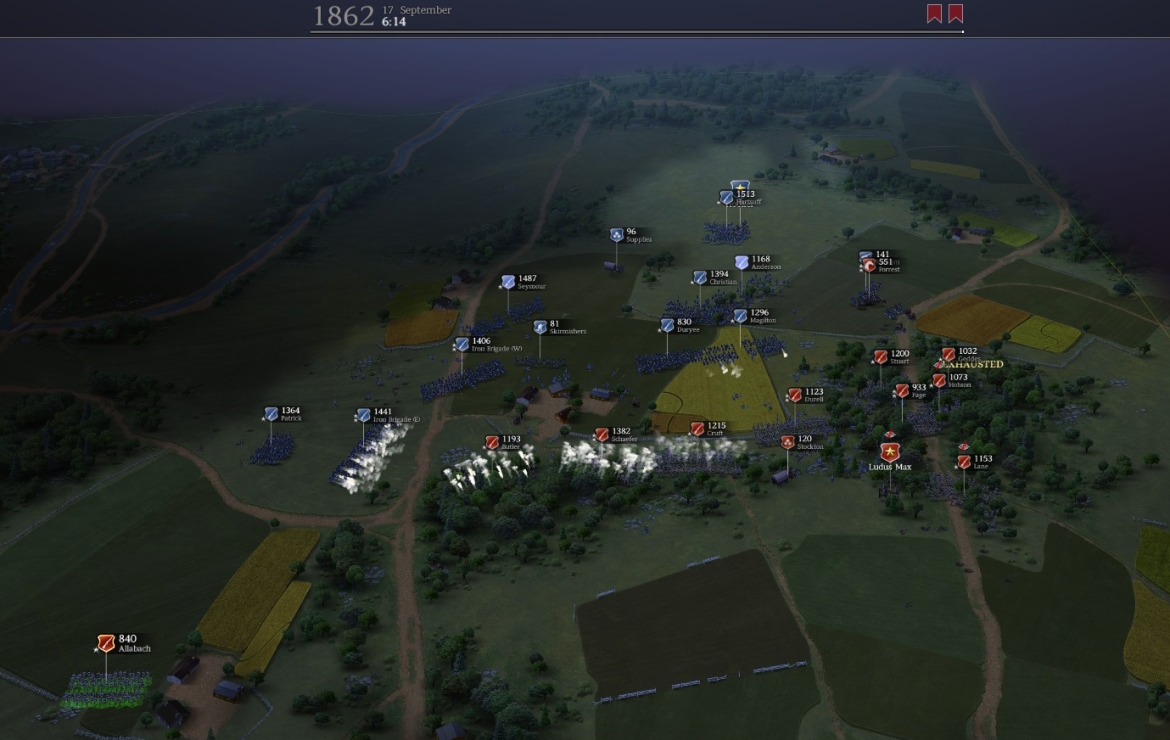
After a few hours the map opens to the south and the CSA center corps is revealed, at roughly the same time that a large new Union force comes down from the NE. About 10 brigades of infantry from this center corps should run north/northeast to block the newcomers’ route south.
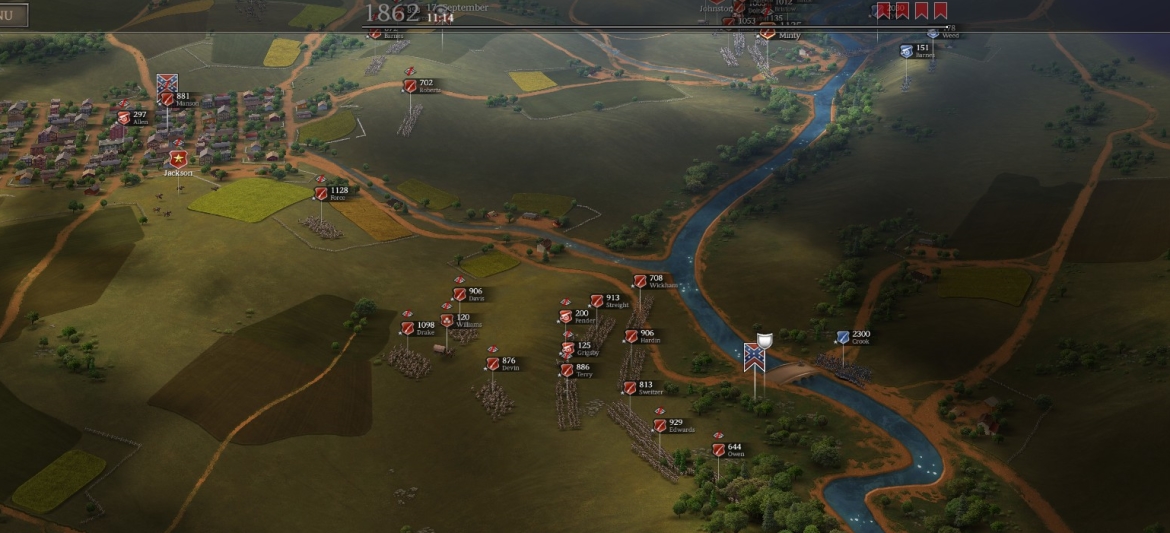
The rest of the infantry from this center corps, plus all the artillery and cav, should form a strong defense line, facing E, near the bridge below the Sunken Road. A skirmisher unit or two can guard the Dunker Church and Sunken Road flags.
At about 0830, two large Union cavalry units will arrive from off-map just N of the Sunken Road bridge, so have your cav units ready to intercept them. Union infantry and artillery will follow in strength, though you should be able to stop them.
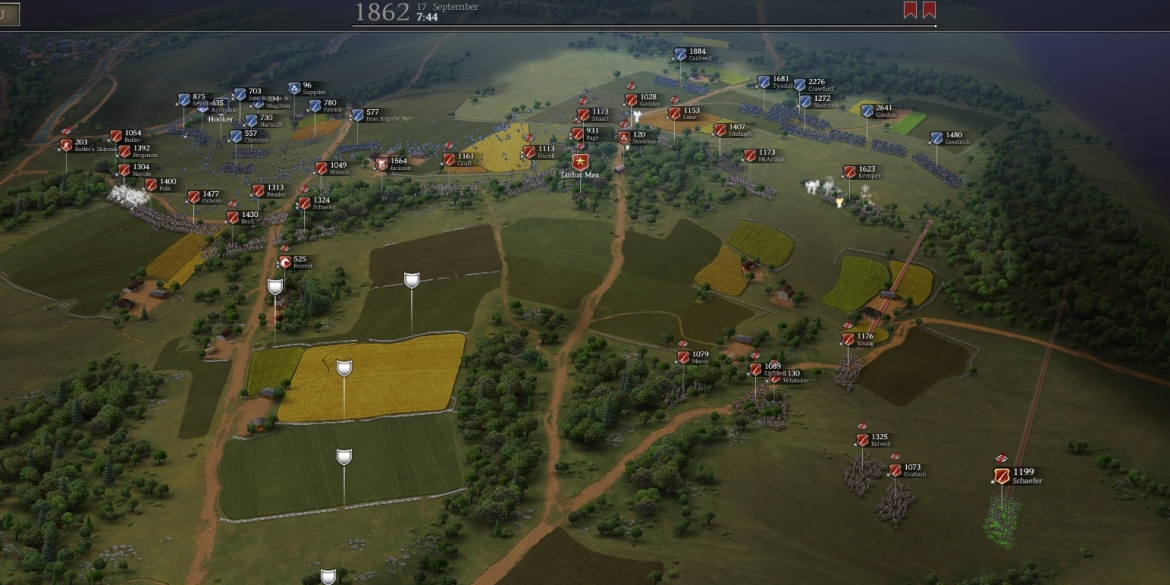
Your northern force should by now have considerably worn down the Union units opposing it. Make sure your brigades have ammunition, etc., and rotate out / recombine badly shot-up units.
Your right-flank corps, when it is revealed, can help out at the Sunken Road bridge but should focus mainly on defending the crossing at the lower, flagged bridge, “Stone Bridge.” Large numbers of Union reinforcements may now show up to try to cross one or both bridges. Keep at least one unit to guard the flag in Sharpsburg town. Note that you don’t need to hold the Stone Bridge flag—it is just a convenient spot for blocking the Federal advance.
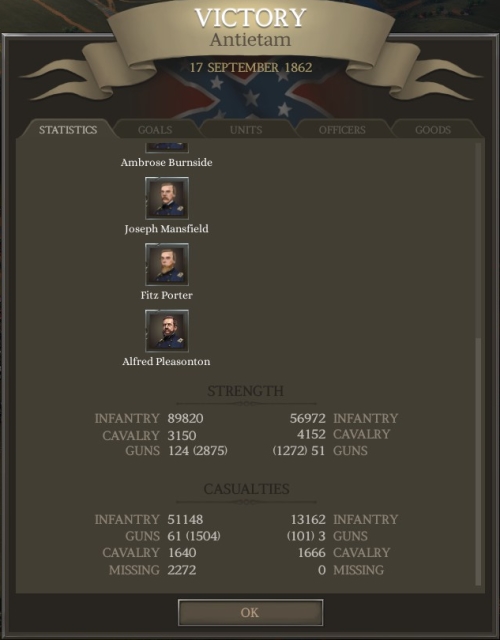
Play defense as nimbly as you can. Use your melee cav units to chase down any uncontained Union units, as well as routing units and supply wagons. By early afternoon your northern force, assisted by cav, should be able to advance and capture/shatter the remaining Union units before it. Near Sharpsburg, you should have no trouble repelling Union attempts to cross the bridges. The final result, when the battle ends at 1600, should be pretty lopsided.
J & P Rebalance Mod (1.27.4.3) BG
The strategy outlined above works fine when using the mod. In fact, cavalry is so powerful in the mod that you will, on BG level, have a considerably easier time wiping the map.
♠♠♠