[updated 24 July 2023]
Theater of War Mission Pack: Operation Barbarossa
Mission: Encirclement at Smolensk
The 2 v 2 “Encirclement at Smolensk” mission is engaging but can take well over 30 minutes to complete. The objectives are to capture one heavily guarded point almost immediately; then, after a buildup, to take two even more heavily guarded points to complete an encirclement; lastly to defend against an attempted breakout by Russian armor and trucks. The two middle objectives are by far the hardest ones. I guess that it is not especially challenging if your ally is a human player. However, when you have a CPU-ally, it struggles to achieve its first, easiest objective, then, unless you give it plenty of help, it typically gets overrun by Russian armor and elite infantry, base-rushed, and finally base-wiped, at least until you kill the Russian units in its base area so it can rebuild. The bottom line is that it is really up to you to achieve most of the mission objectives, so your forces will always be stretched very thinly. That said, it’s definitely doable.
From the Lower base (default)
First objective: lower watchtower point
Get two HMGs, then a mortar squad. Send your three starting gren squads to cap territory points near your base; the gren capping the one to the left of your base has to retreat immediately after capping or be shelled by Russian 203mm super-heavy artillery. Send your pioneers about 100 m to the NE of your base, where they’ll find an abandoned T-70 and can repair and crew it (you should also reinforce what’s left of the pio squad). Upgrade at least one of your gren squads with LMGs.
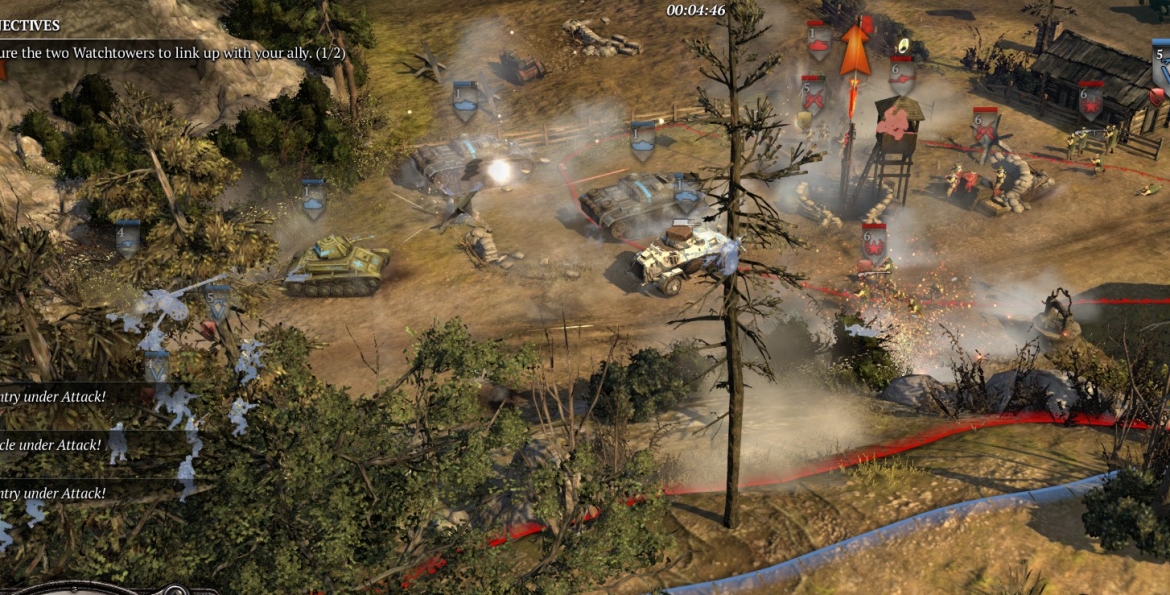
When you have done all that, send your units, vehicles in front, to the W, below the cliffs where the nearest Russian 203mm artillery piece is. Use your pios, on the way, to cap the point on the road. Once your force is assembled and not far to the W of the lower/left watchtower point, they should attack that point (see image above). Your HMGs can go near your vehicles and should suppress/pin the Russian infantry in the point; your grens can go in the buildings to the SE and E of the point. Your AT gun can position itself behind your armor, to hit the Russian T-70 that is likely to attack, late in the battle. You will lose at least one vehicle and much of your infantry, but your HMGs/LMGs and maybe rifle grenades should win this skirmish for you. You should finish the battle 6-7 minutes into the mission.
Cap the point, and get the rest of your infantry (except for your mortar unit) away from the area, which lies under the 203mm guns as well as a ZiS-3 gun. Use your mortar unit, sited against the bottom of the cliff, to kill all three artillery pieces on the bluff. The rest of your force should heal up. If your CPU-ally has taken the other watchtower point, you can use your pios or grens to build bunker-HMGs guarding the escape route (via a bridge over a creek to the W of the upper watchtower point) from the northern Russian base. The pios should lay mines on this road too. The Russians will keep running T-70s and T-34s, with infantry, along this route to attack both German bases, if you let them.
Bring in one or two more Paks (you start with one), and at least one other mortar squad or mortar halftrack. You should have at least 2 Paks, 2 mortar units, 2 MG42s, some grens, and some vehicles.
Second objective: lower Russian base
Assemble your force on the road to the E of the lower Russian base. There is a small hill that forms an “island” in the road immediately to the E of that base, and your force should wait on the E end of that island. Lay mines asap, since the Russians will soon send T-34s, T-70s, and infantry to try to escape along this road to attack your base and your CPU-ally’s. Note that they will often linger in the fog of war (unnaturally close to you—a core COH2 cheat) and spring out the moment your crewed weapons are no longer in firing position.
Block the portion of the road below the island with one of your StuGs, a bunker, or tank traps. Make sure you have an HMG or bunker-HMG covering the E portion of the island. Now inch the rest of your force W along the road above the island until you contact the enemy. Ideally, Russian infantry will be suppressed by your HMG and killed by your mortars and LMG-grens, while Russian armor will be killed by your Paks, AT-nading grens, and StuGs. The “light artillery barrage” that is available with some commanders also can be useful here.
When you have killed all the Russians at this base, take the point and destroy the base buildings. The base is a field hospital, so your units can heal here. Build 3-4 bunker-HMGs near the W end of the “island,” and lay plenty of mines on the road nearby, to slow/stop breakout attempts to the E. Leave maybe one (or one half-strength) pio squad to repair bunkers as Russians damage them. Russian infantry will make periodic weak attempts to break out, and though your bunker-HMGs usually will handle them automatically, the Russians sometimes will come with ZiS-3s and use them to attack your bunkers, so you will need the capability of decrewing those, e.g., with flamethrowers. Unfortunately, the cheats in COH2 include near-immortality for CPU-Russia ZiS-3 gun crews.
Third objective: upper Russian base
The rest of your forces should now go from the captured lower Russian base to the NE portion of the map, between your CPU-ally’s base and the upper Russian base. If the Russians are in your CPU-ally’s base, you will have to wipe those units to allow your CPU-ally to recover.
Tech up and build at least one Panzer IV. There is a small bridge over a creek to the E of the upper Russian base, and you want to get your units across that onto the W side to take the territory point there. Before attacking the Russian base, you should have 3 Paks, 2 HMGs, 2 mortar units (foot or halftrack), 2-4 grens with LMGs, 1-2 tanks, and at least one pio squad.
This objective is difficult, and you will have little help from your CPU-ally. The Russians frequently will run a couple of T-70s or T-34s, followed by lots of infantry, sometimes including ZiS-3s, down the road to get out of the base. You need to be able to stop them—using Paks, AT-nades, and mines (and tank traps, if you have the capability) for the armor, and HMGs/LMGs/mortars for the infantry.
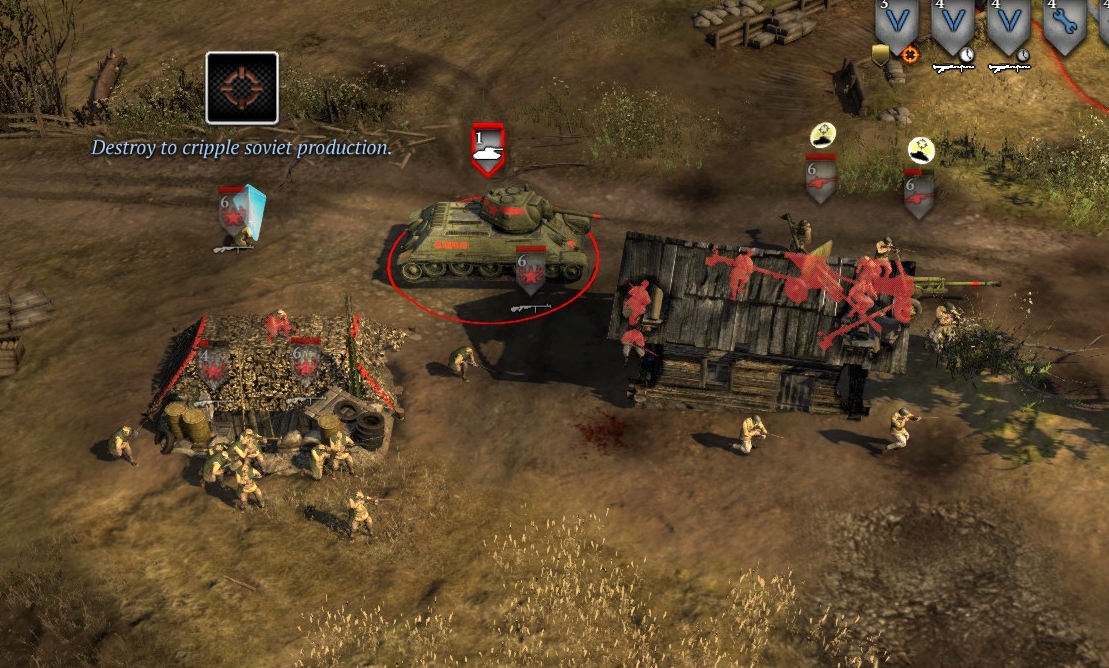
You also need to be able to keep moving forward until you can lay mortar or other artillery rounds on the ZiS-3s and hyperpowered Guards Rifle units guarding the base (see image below). Might take a few attempts to kill them all. If you can fully capture that base by 30 minutes into the mission, you’re doing fine.
Note that there is a “side door” entry to the Russian base from the E, below some woods. You may need to block this somehow (to keep Russian units from flanking you) if you don’t send units through it on your approach; easiest way is with a bunker-HMG (physically blocking Russian vehicles too), though tank traps plus a bunker-HMG would be better.
Once you have capped the upper Russian base (a vehicle repair facility) and destroyed its base buildings, build maybe one bunker-HMG covering the entrance to the base across the bridge from the Russian-held area to the W, and lay some mines in that area—and on the road over the bridge/creek to the E of the base.
Send all your units down to the area E of the “island” next to the lower (former) Russian base.
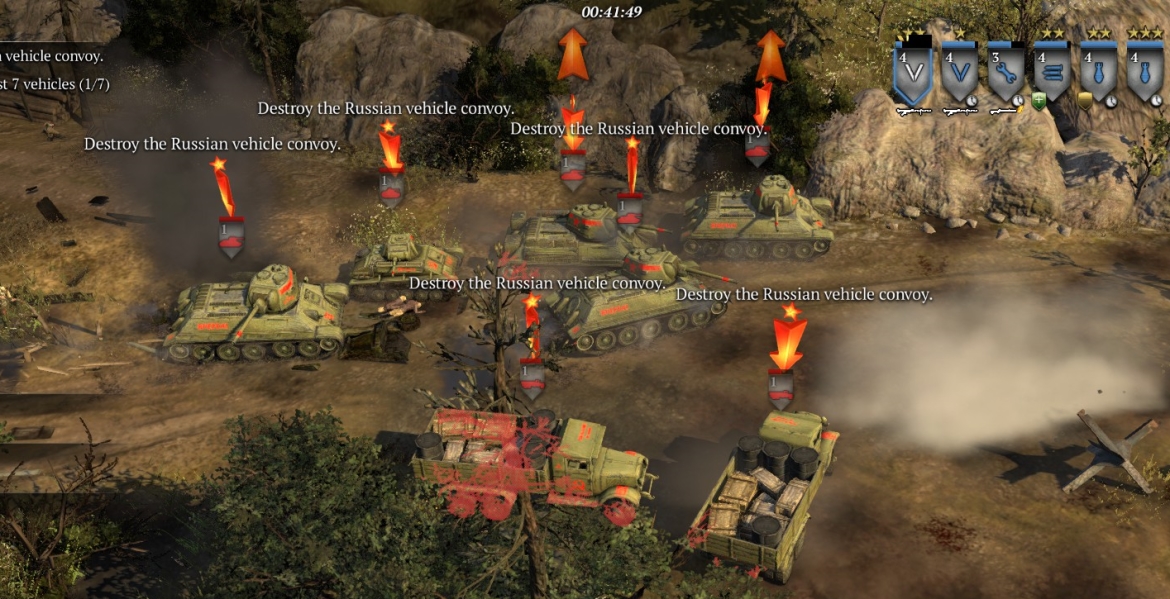
Fourth objective: stop the breakout
After a minute or two to allow you to prepare, a column of Russian tanks and trucks will appear from the W edge of the map. Almost always their breakout attempt runs through the lower base (now your field hospital), so cover that route (from the area E of the “island”) with all of your units. If you want the breakout attempt to take the northern route, block the southern route with tank traps.
Your specific objective is to kill just seven Russian vehicles in this column. Usually your mines and CPU-ally will account for at least one or two of those. If you have a few Paks/tanks and an HMG (or bunker-HMG) set up E of the island, you should find it easy to kill the rest.
From the Upper base
Your CPU-ally seems to totally lack the coding needed to accomplish the lower-base objectives. Thus, playing from the upper base, you would end up having to do all the objectives yourself, with even less help than you would get when playing from the lower base. And if you tried to take the upper Russian base first, leaving your fake-AI ally to suicide itself at the lower one, you’ll be base-rushed with T-34s. Unless you’re looking for an unusual challenge from a broken mission, playing from the upper base is something you should try only when you have a human-player ally.
♠♠♠