[updated 27 July 2023]
Theater of War Mission Pack: Operation Barbarossa
Mission: Blitzkrieg
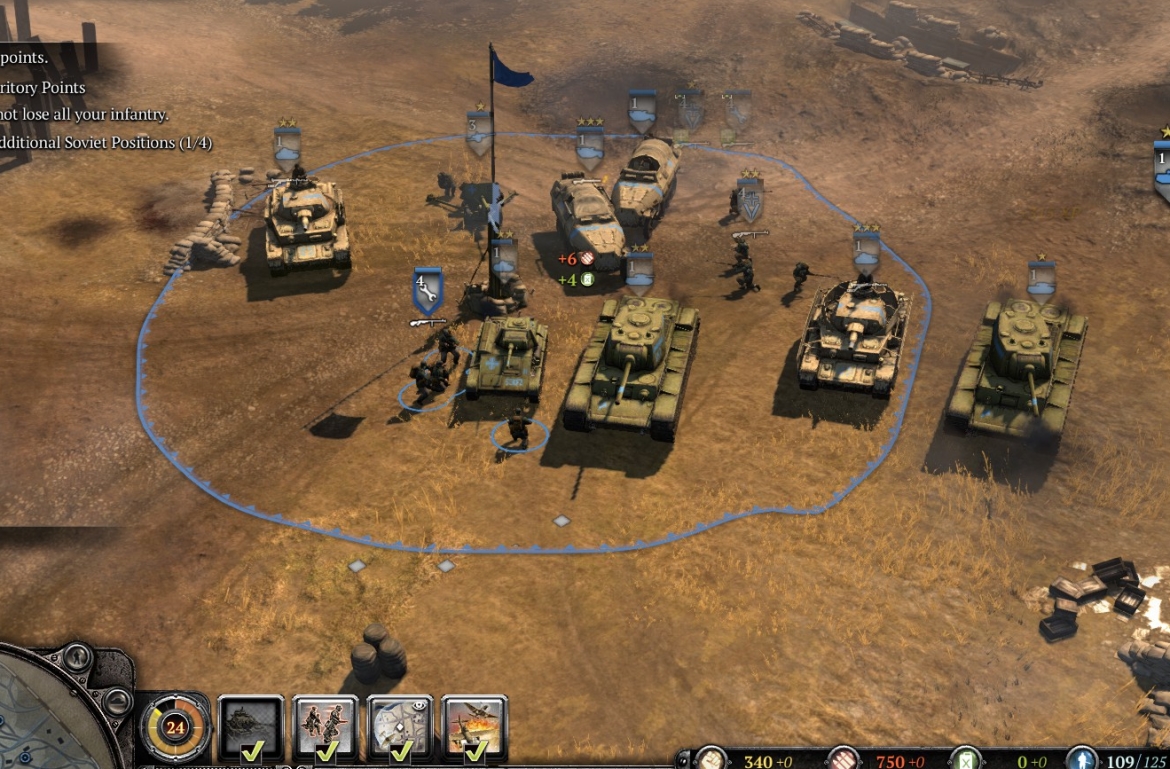
Your task in the Blitzkrieg mission is to run around the map, capping points against Russian opposition. Once capped, points stay capped. The Russians have a set of large artillery pieces at the north of the map, so you need to spend the first part of the mission out of range of that artillery, capping points lower down the map, vetting up, reducing the enemy, and capturing more weaponry. You also need to be aware of significant cheats that will make this mission harder than it probably looks at first. These include Russian tanks popping out of the super-close fog of war (as if you were blind), Russian tanks having impossible resistance to AT fire (7-10 hits to kill a T-70), a map littered with vet-3 super-elite Guard Rifle infantry, a frustrating slowness of your own vehicles, and the absurdity that CPU-Russia sees and largely anticipates your every move even though the mission supposedly is all about the element of surprise.
Here is an image that shows a good order of points to capture:
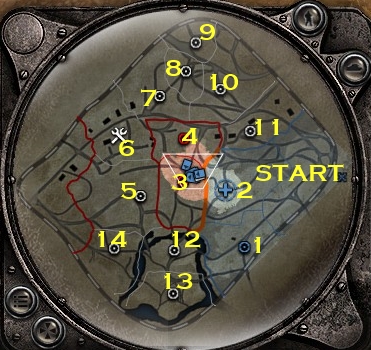
At the start of the mission, send your force, tanks in the lead, to point 1 (kill some trucks and engineers, destroy a booby-trap on the point). Resistance will be light here. Next, point 2 which is a field hospital. There will be more resistance here, and there will be a few counterattacks by Russian infantry after you take the point. For point 3, you need to use extreme caution, because Guards Rifle squads with PTRSs are behind cover on the hill to the W—keep your vehicles 10-20 m to the E of point 3, and use one of your panzergren squads to cap the point. Once you’ve capped it, you can send a 251 with infantry to point 4, which is usually unguarded. Don’t venture north of the point—you will draw artillery fire from point 9.
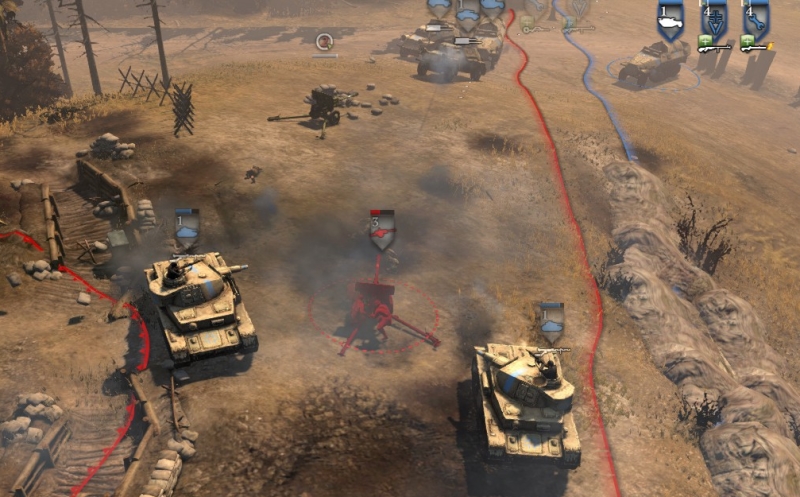
Point 5 has the aforementioned GR squads, plus some random infantry, plus a crewed ZiS-3 gun just E or SE of the point. Generally your best bet is to poke/retreat from the NE with your tanks (your scout cars will be instantly destroyed by PTRSs, so should stay back), repairing as needed, until you have killed the GR squads, then run your tanks from the N to either side of the ZiS-3 gun, to decrew it, while your scout cars and 251s deal with the rest of the garrison and cap the point.
Crew the ZiS-3s. Repair your damaged vehicles and reinforce squads as needed. You will have to deal with some Russian infantry counterattacks—maybe also Russian scout cars—from all sides, so be ready. Keep your softer units where they can hide if necessary. Upgrade one of your 251s with a flamethrower.
Note: German Panzer IVs on this map are very nerfed until they get to vet-2 or vet-3. Two vet-0 Pz4s will struggle to kill a vet-2 T-70.
Head NW to take point 6, the vehicle repair depot. Along the S edge of this area there are uncrewed KV-1s (on the W end) and T-34s (E end) awaiting repair. (Uncrewed T-70s are on the N side of the point area.) You need to try to stop the Russian engineers from crewing the tanks before your pios can do so, which means you should attack with your tanks and your flamer-251 in the lead. This is difficult, and CPU-Russia will often be waiting for you with several tanks already repaired/crewed, waiting to hit you. In any case, you definitely will need to get your captured ZiS-3 guns in position to help out against Russian armor.
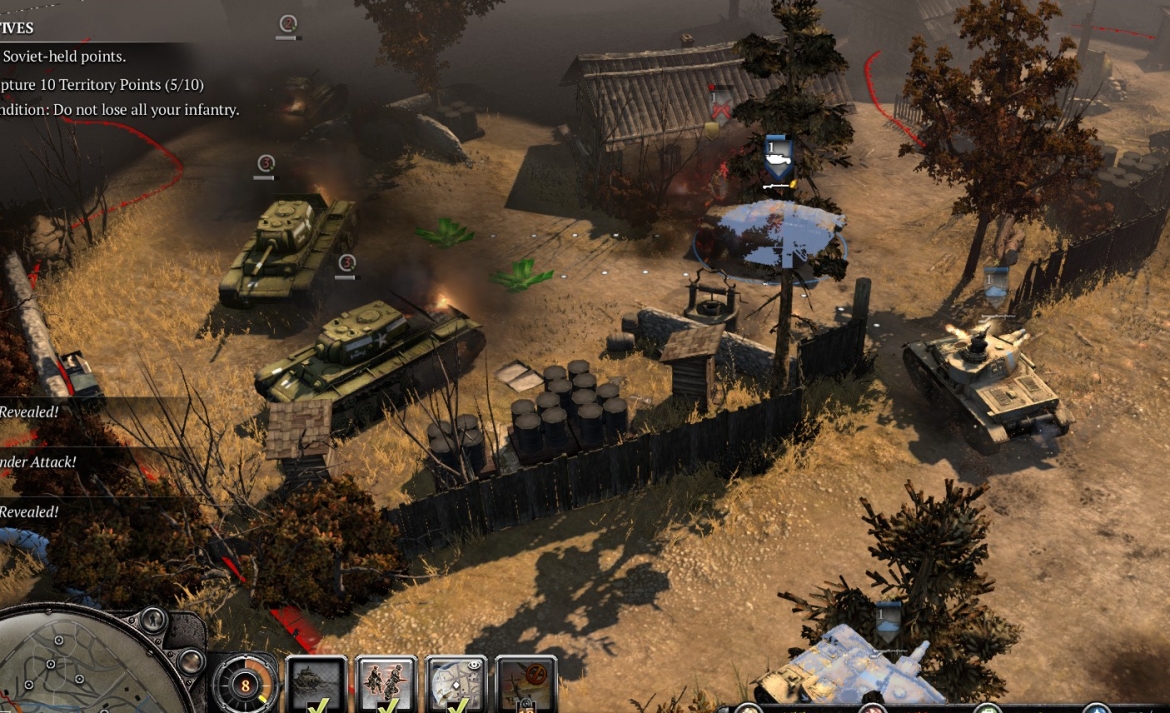
Try to crew at least three Russian tanks. You will need them, and even T-70s are useful. Note that when you try to crew some of the T-70s, several other T-70s and at least one T-34 may attack along the road from the SW. In general, you have to take care not to leave your more vulnerable units unprotected from sudden Russian thrusts out of the fog-of-war.
When you have capped the point and have reinforced/repaired as needed, move to point 7 with at least three tanks in the lead. There will be a T-34 just to the NE of that point, so you will have to kill it before/while capping the point. You’ll be in range of artillery from point 9, so watch out for that too.
Once the artillery salvo is done and you’ve eliminated all Russian units visible inside the f.o.w., move with your entire force on point 9. A small unit or two, such as one of your ZiS-3 guns and a panzergren squad, can take point 8 while the rest are at point 9.
Point 9 has several 203mm artillery pieces, some GR infantry with PTRSs (priority #1 among your targets), and assorted other infantry. This point isn’t that hard to cap, now that you’ve cleaned out so much of the rest of the map, including the vehicle repair depot. There are more infantry to the E of point 9, and they are AT-capable, so use massed armor to overwhelm them. Then send a unit or two to cap point 10, just below—but do not stray past point 10 into the minefield there.
You have now fulfilled the victory condition. For a bonus you can take the other four points on the map.
At this stage, as you finish capping points 9 and 10, you will be attacked from more or less all sides by ZiS-3s, elite infantry, snipers, and Russian tanks. This is where the nerfed slowness of your tanks becomes especially annoying. Anyway, keep your force together below point 9 until you have dealt with every threat. Then heal up, make sure to go around the minefield below point 10, and take point 11 with overwhelming force (you will face more GR squads, regular conscripts/frontoviki, shock troops, HMGs, and I think a mortar team).
Points 12 and 13 on the “island” at the bottom of the map are fairly well defended, with uncrewed/damaged tanks on the points, and T-34s/KV1s nearby. You will need to take these points one at a time, using overwhelming, concentrated force both times. If you have a reasonably powerful force, you probably shouldn’t try to salvage more Russian tanks. The longer you stand on this island, the more attacks will hit you. Best to move onto point 14 asap.
Point 14, immediately to the W of the island, is normally the hardest point on this map, as it has ZiS-3s, HMGs, 120mm mortars, T-34s and KV-1s, plus many AT-capable infantry squads. Upgrade your other 251 with flamethrowers, if you still have it, and get ready for a significant firefight. Try to approach from multiple angles, prioritizing targets that can hurt your tanks. This is a good place to use your recon and call-in CAS capabilities.
♠♠♠