This mission, like the one before it, is largely tutorial in nature, though the setting here is rural and the battle is defensive.
Battle actions you will learn in this mission include: using conscripts to reinforce by merging with more powerful squads such as shock troop squads; throwing Molotov cocktails; laying mines; and setting buildings on fire.
The scene is an unnamed village near Moscow in the autumn of 1941. German infantry are at the edge of the village and will soon overrun it. Your small force has to buy time for valuable items to be removed from the town and for the town to be destroyed (“scorched earth” tactic, like the one the Russians also used against Napoleon).
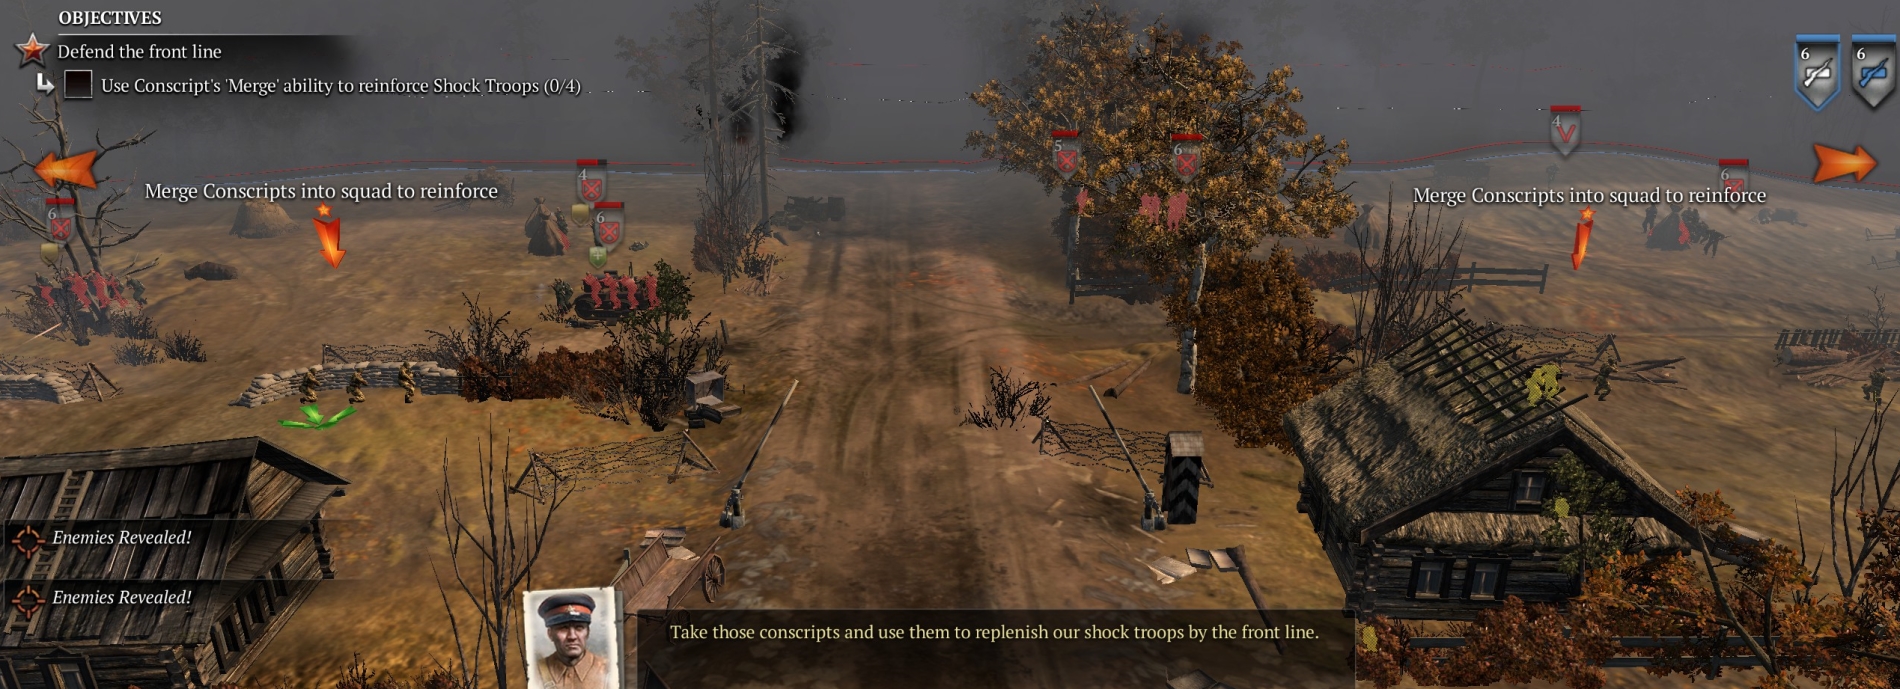
Your first task is to use raw conscripts to reinforce (merge with) the four shock troop squads that are manning defenses near the top of the map. Since the shock troops have body armor and SMGs, they are quite robust, and will quickly shred German squads that get close.
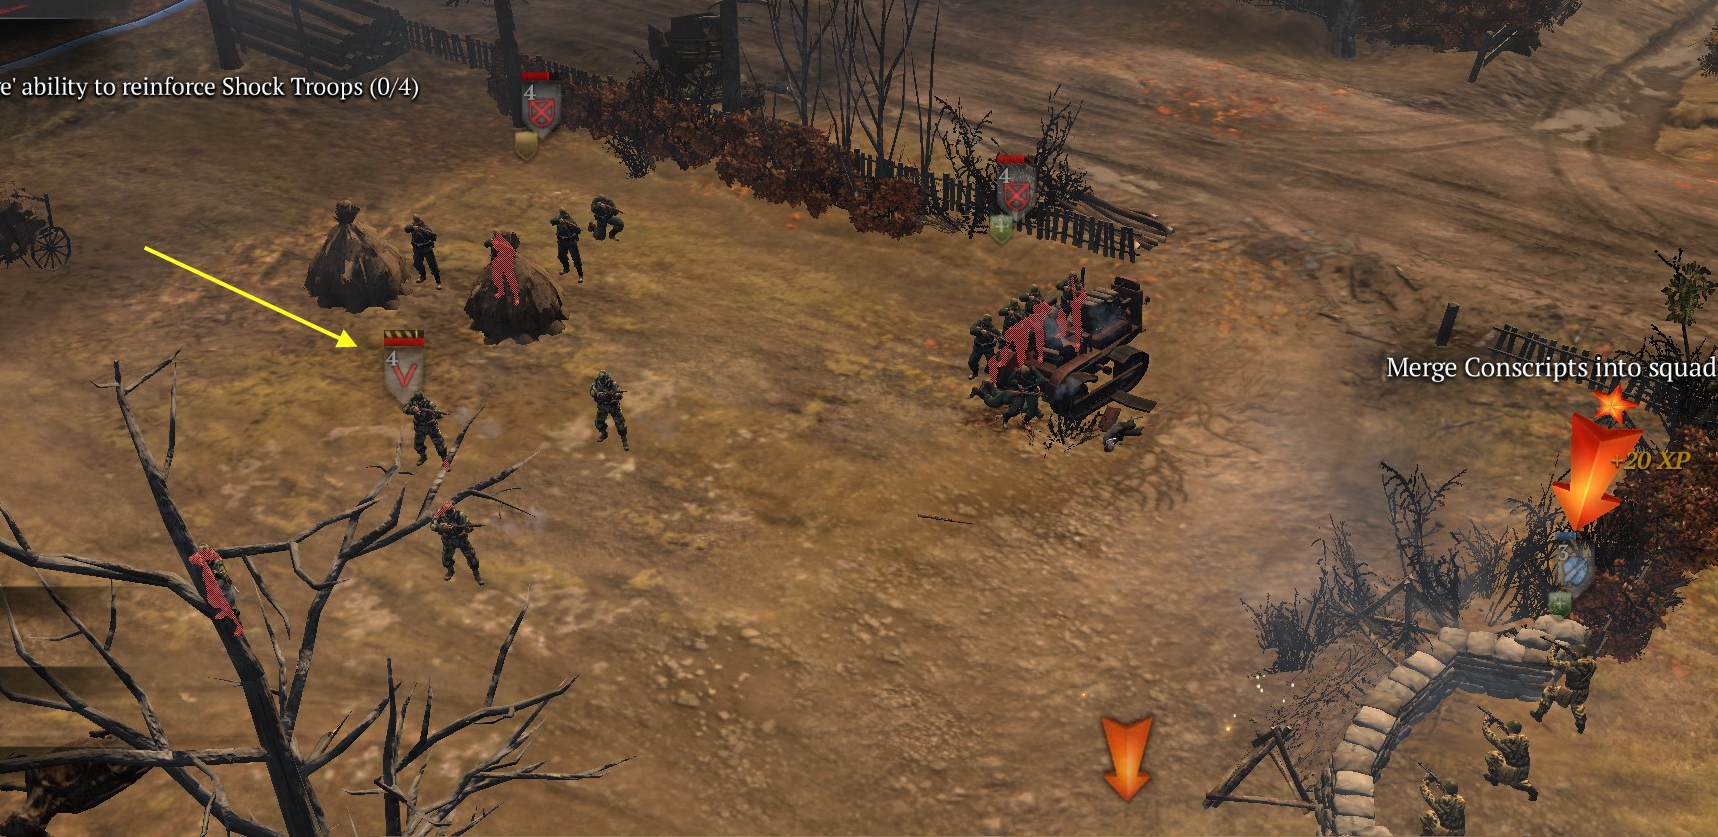
However, shock troop squads like other Russian squads are very vulnerable to German grenadiers firing rifle grenades, so look out for the tell-tale sign of a rifle-grenade firing (see image below) and make sure your squads change their positions when you see it. In general, you want to target grenadiers first, with ordinary gunfire or grenades, and can worry less about Osttruppen, which are not very effective.
Soon you should have new conscript squads available even when your shock troops are fully reinforced. Have these extra conscript squads come up the main road between the two main defense positions, and cover that road route. Note that there is a munitions box near the bottom of the map at your base, and one of the conscript squads should grab it on its way to the front line.
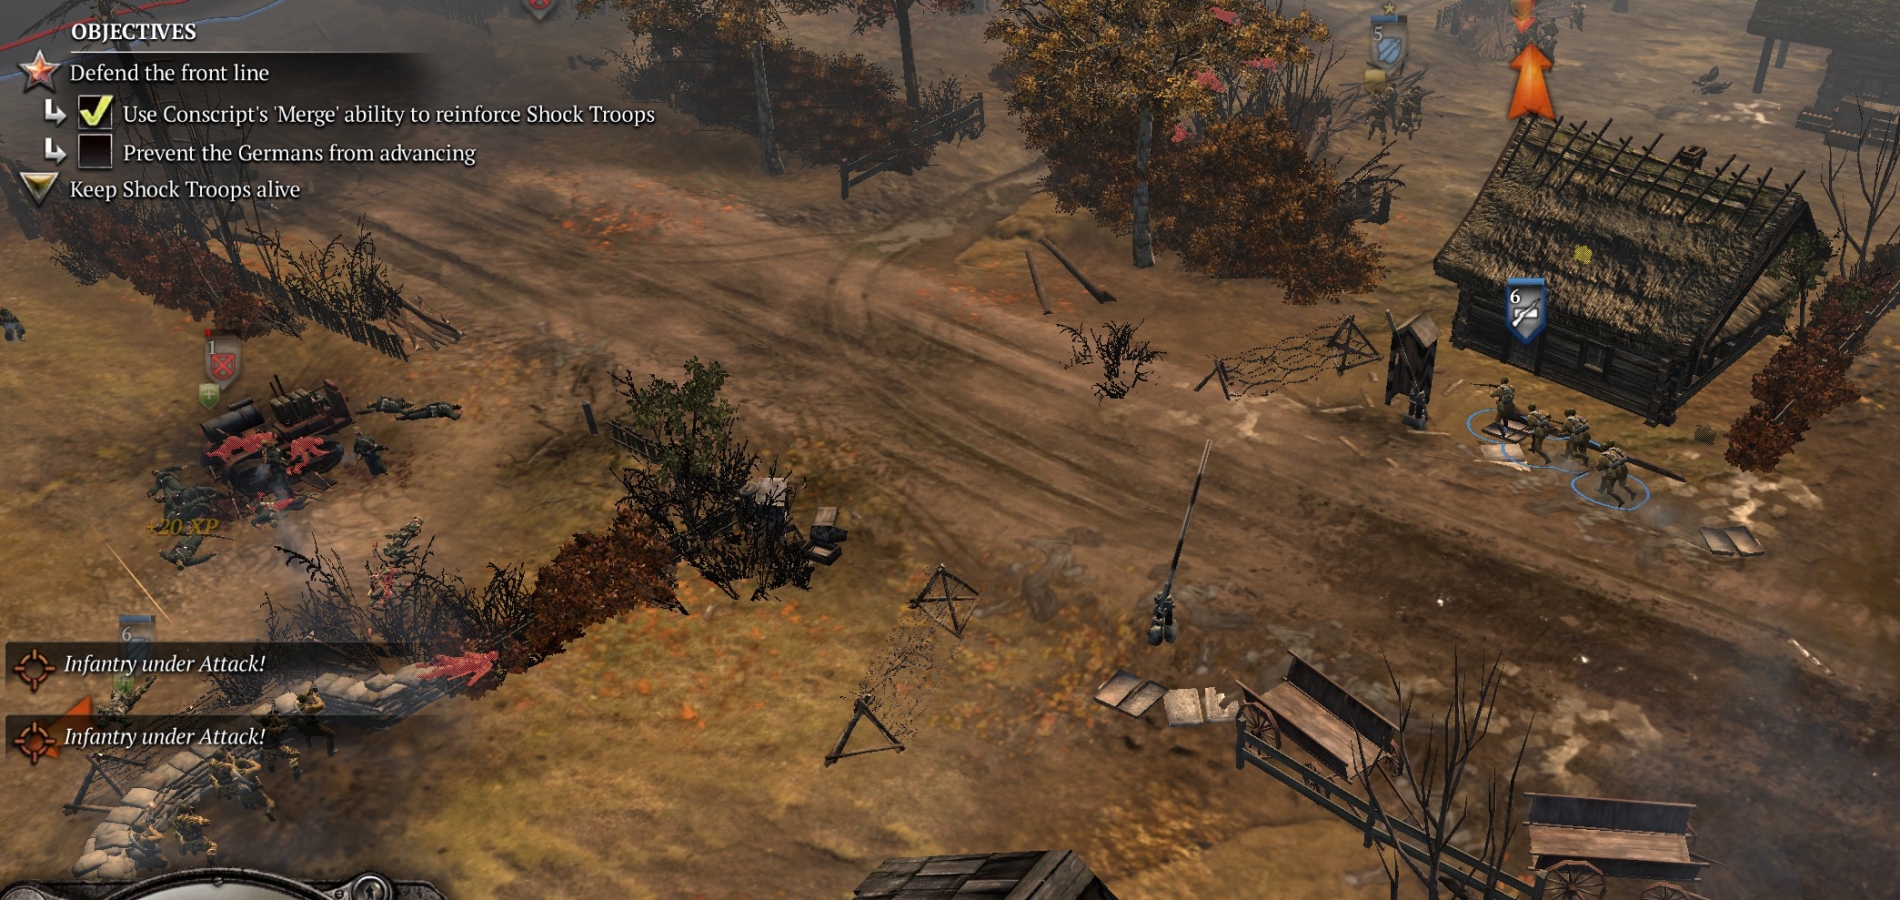
After a while, assuming your defense line holds, the German infantry will suddenly retreat, to mark the end of the first mission phase.
Next, a Stuka will pass over the map, parallel to the front line, and destroy some houses. Then a larger German infantry force, with more grenadiers, will move up and try to flank your defenses on your right.
You must now fall back 50 meters or so, to where the supply trucks are parked. Find cover—sandbags are best—but avoid buildings because they are magnets for German bombs and rifle grenades. Always watch out for grenadiers and their rifle-grenades, and always toss your own grenades on grenadiers who move within grenade range. Use the pause button as needed (a lot) to minimize the chance that your squads will be wiped when you’re not looking.

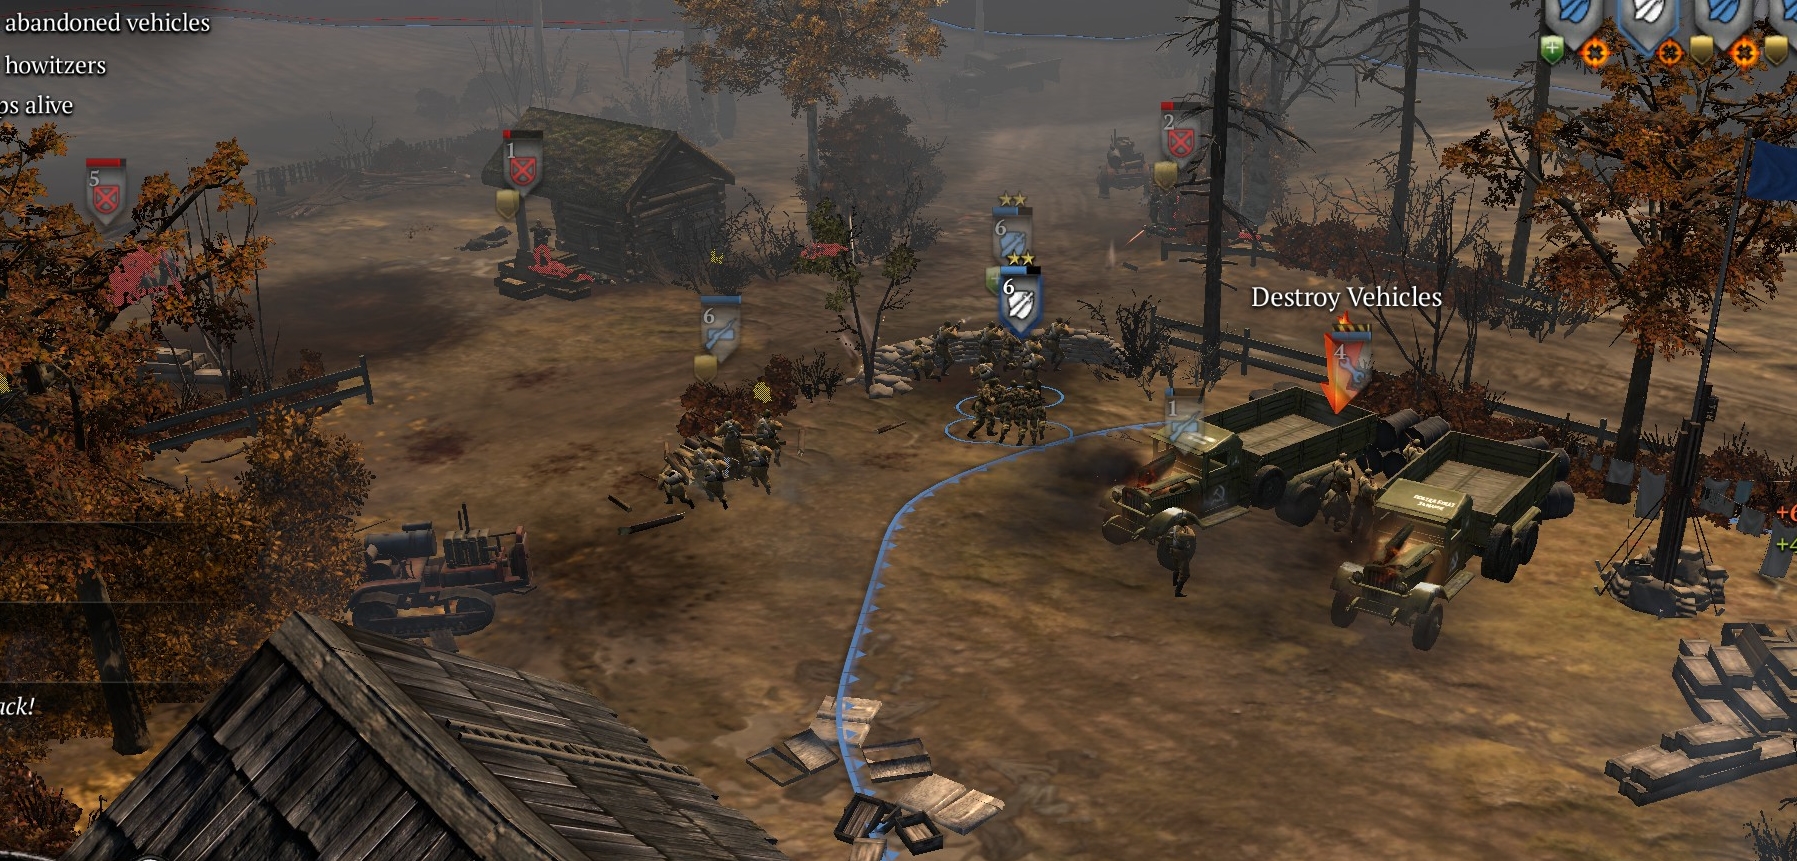
After a few minutes of defending this new line, the UI will announce that the supply trucks are ready to go, and you will get engineer teams for laying explosives to destroy the artillery pieces and unused trucks just behind your line. Lay the explosives between the trucks/guns–one bomb works for two items.
If you have spare munitions points, your engineers also can lay mines on the road approaches to your base. By now, you also should have activated the field hospital at your base, so that your units heal automatically when in base.
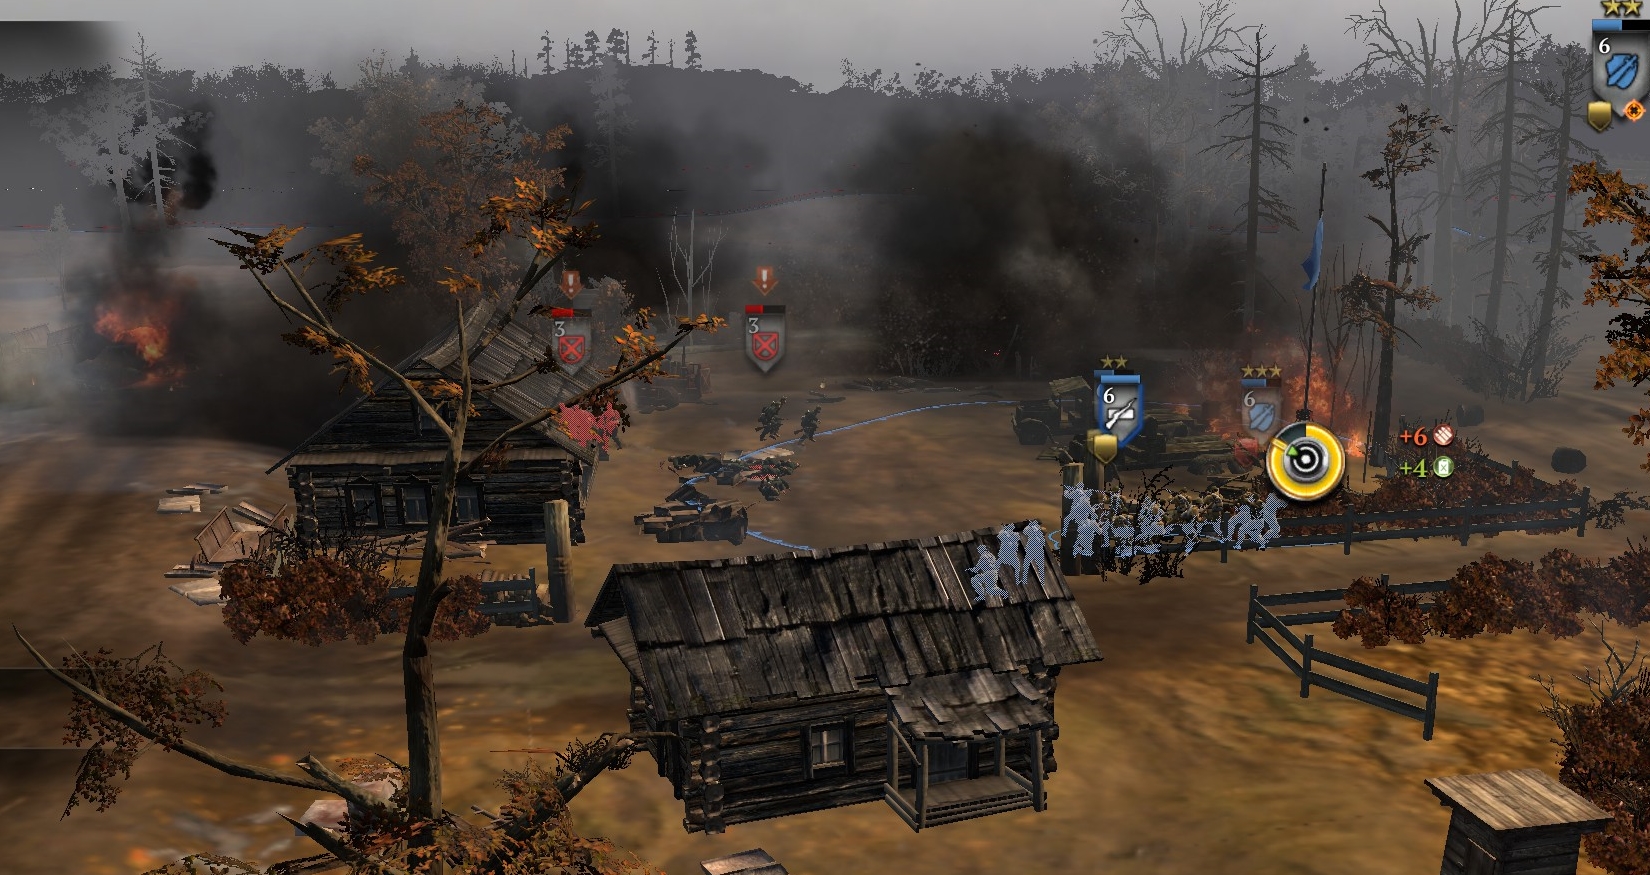
When you blow the trucks/guns (left-click on detonator symbol), the Germans will be seriously pressuring your line, and you may have had to retreat one or two units that were taking casualties (always try to reinforce the irreplaceable shock troop squads so they are not annihilated). The UI will announce that German vehicles (scout cars) are now attacking. But then a bunch of (Russian) bombs, especially in buildings, will go off on the upper portion of the map. Make sure your units are not in or near buildings when this happens, though try to keep from losing any territory points (and thus losing munitions flow). After all the bombs go off, the German infantry will retreat.
In the next phase, the UI will inform you that your engineers now need to grab flamethrowers (in your base) and burn four buildings. Torching a building generally takes two “flame attacks” costing 30 munitions points each—these can be done serially by one engineer unit, or simultaneously by two units. You will have only two flamethrowers but a third engineer squad, so if you have the munitions points to spare, use the third squad (again) to lay mines on the approaches to your base and even inside, including the southern approach.
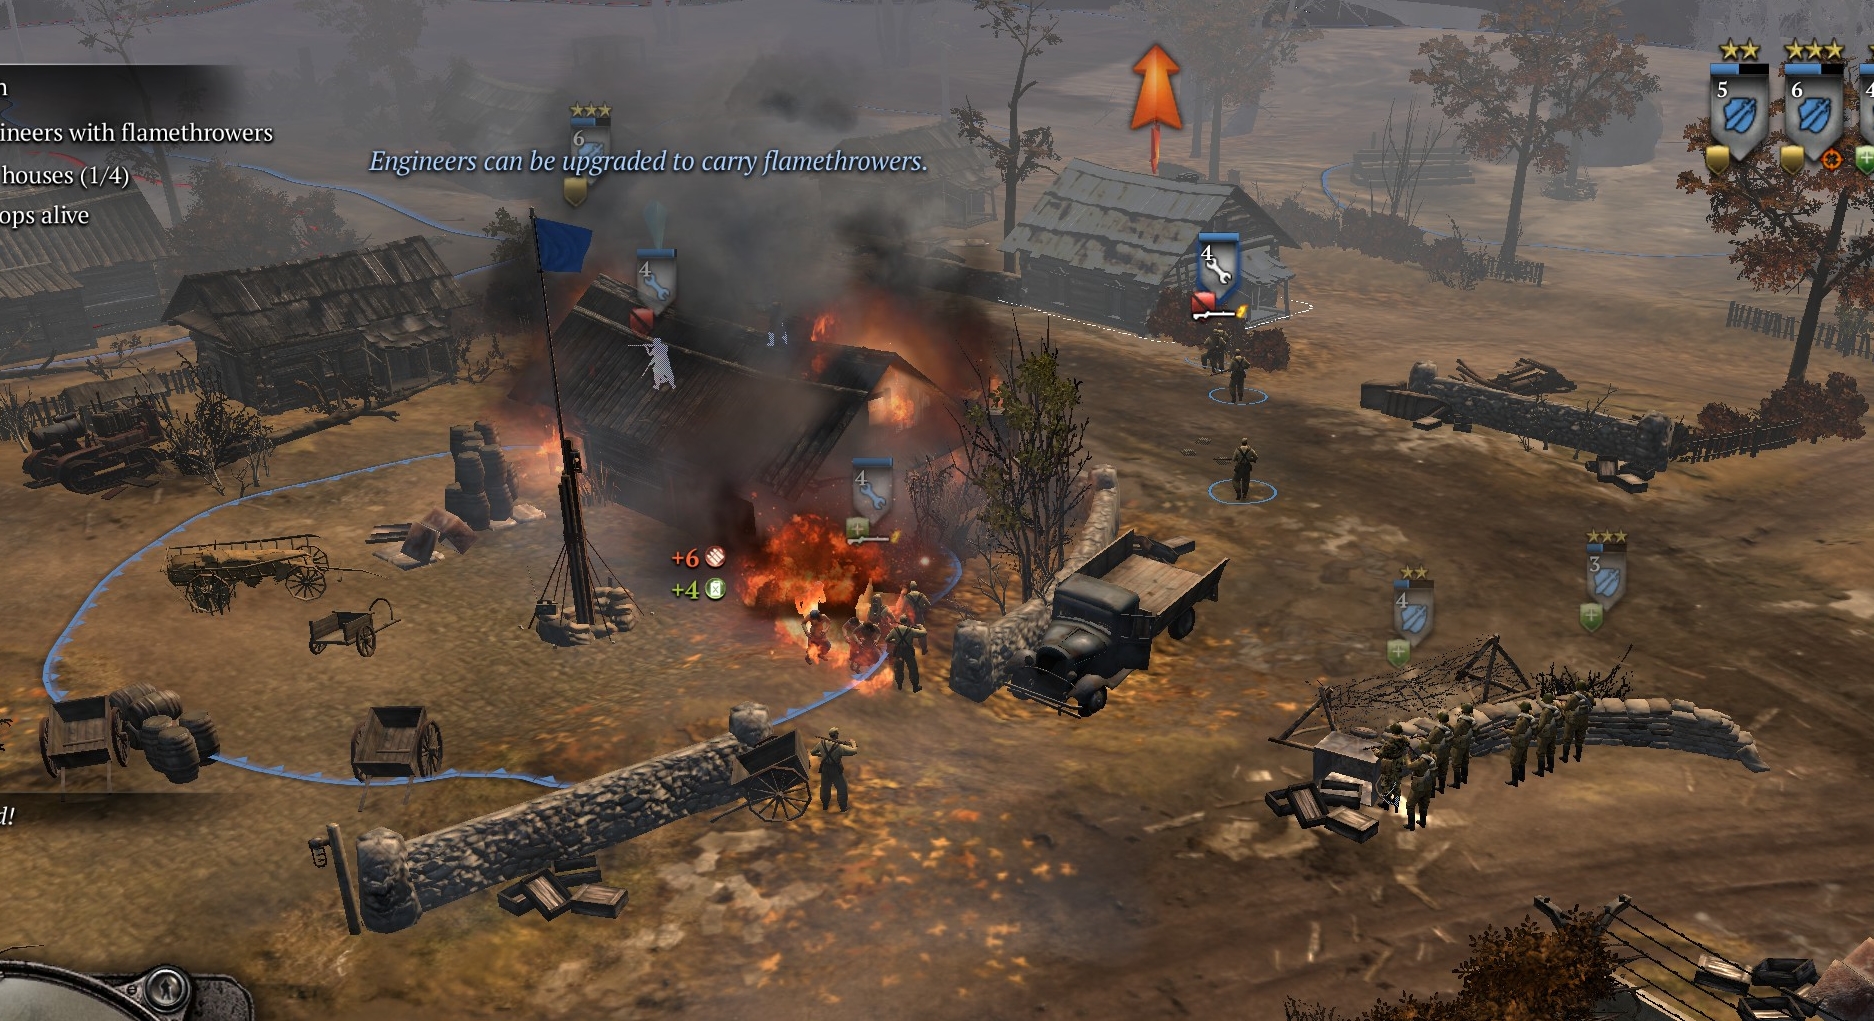
Your shock troops, which by now should be well vetted, must accompany the engineer squads to protect them. Retake territory points where possible, to sustain a high flow of munitions points.
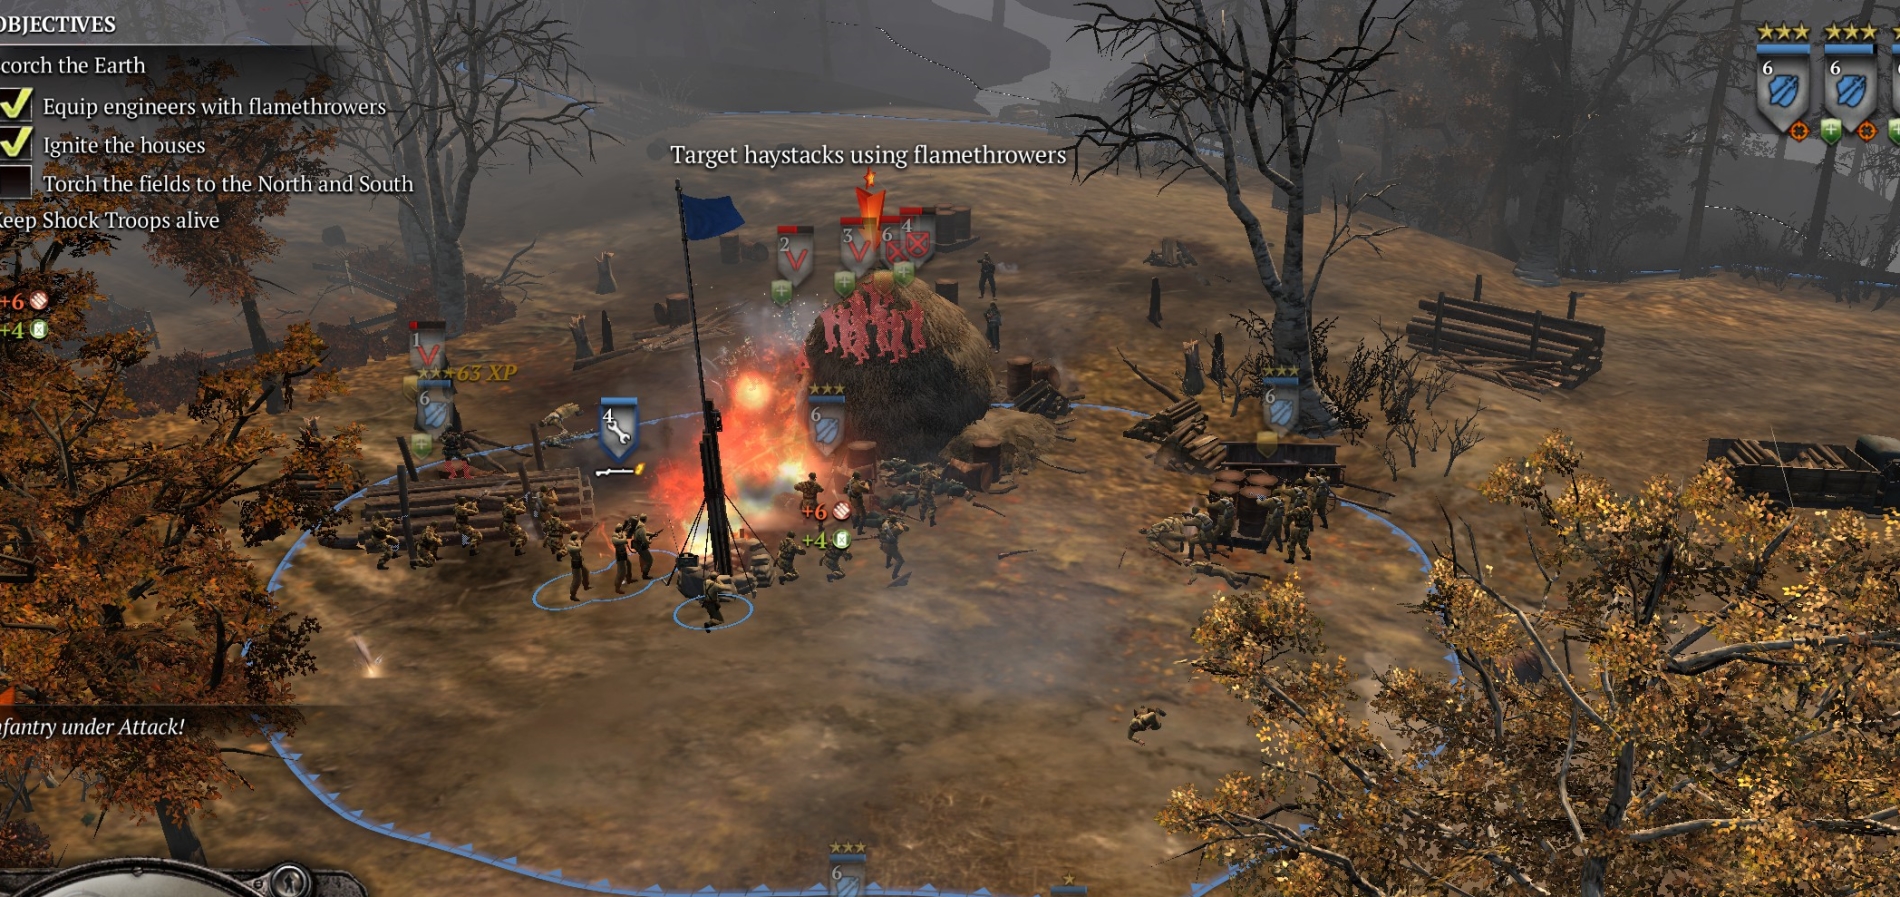
After you have successfully set fire to the four indicated buildings, you will be told to set fire to the fields NE and SW of the road. Again, your shock troops will need to protect your engineer squads as they do one field and then the other. Igniting the fields takes only a moment of flame-attack (or even regular flamethrower use with attack-ground command) and the spreading fire will consume all your nearby forces unless they retreat immediately to base—so make sure they do that. Your spare engineer squad can continue to lay mines as muni points allow.
After this, your forces will mostly be in your base, engineers laying mines on near approaches (again, don’t forget the southern approach to the base area) and both engineers and shock troops defending against infantry swarms.
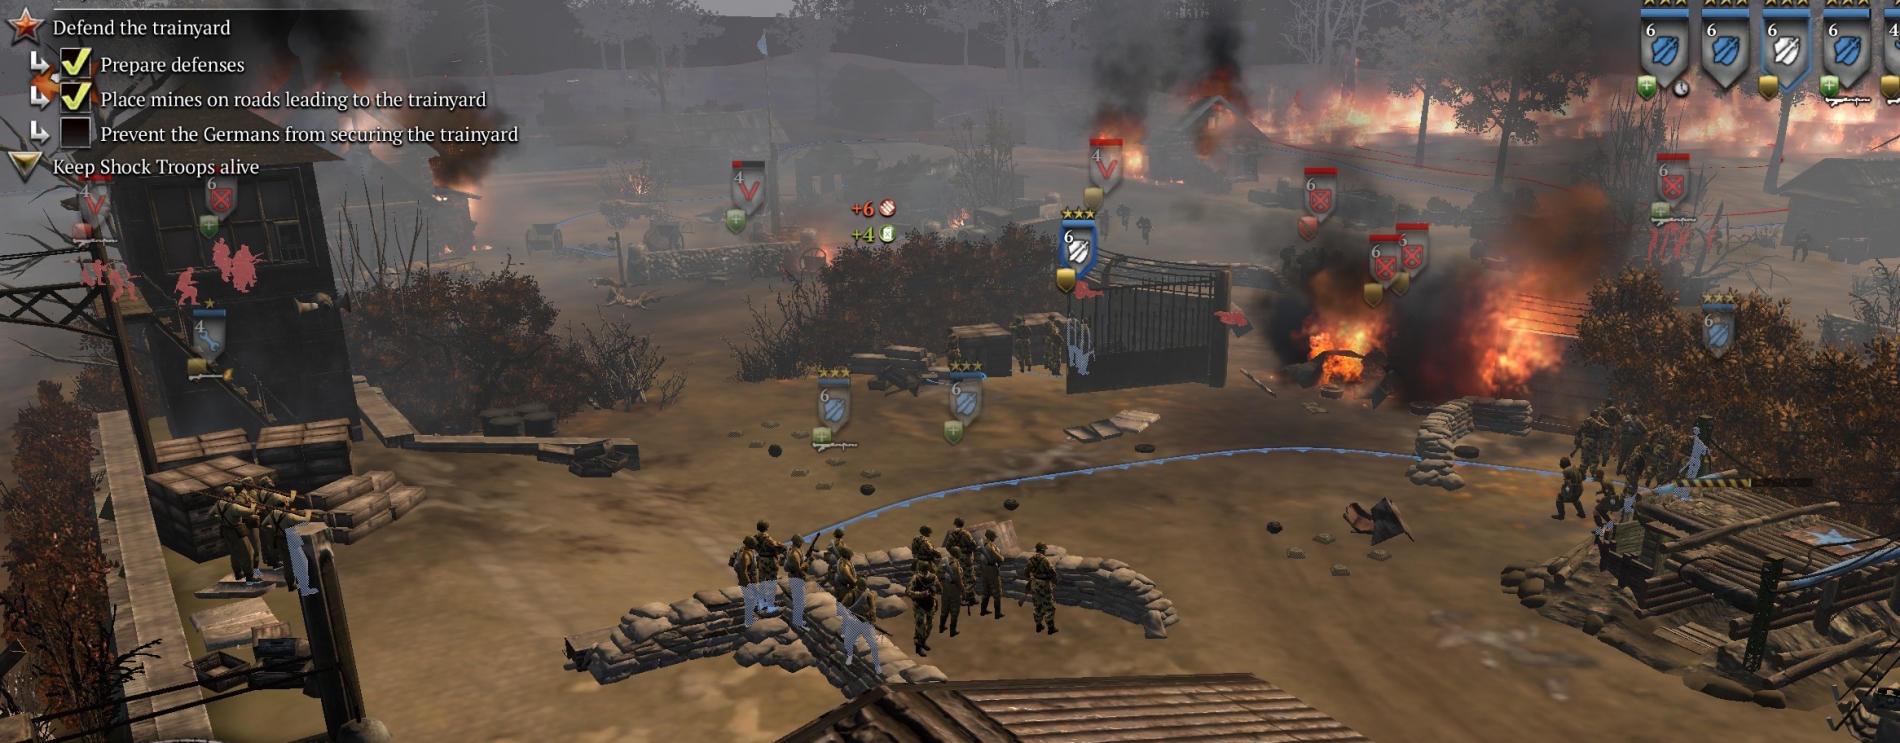 If your forces stay in cover (note the tower in the NW corner of the base) and are quick to move when German grenadiers prepare to fire rifle grenades, they will dispatch the attackers pretty quickly. But the swarms will keep coming, and soon will include lots of scout cars and even 251 halftracks. If you have mined the two northern entrances to the base and further in, and the southern entrance, you will kill most of those vehicles. But they will keep coming, faster than you can lay mines, and when you’re out of mines your only option will be hitting the vehicles with grenades and LMG fire, which are not efficient. Anyway, stay in the base to prevent the German units from capturing it.
Eventually, Panzer IV tanks will come down the road and, since you have no way of stopping them, the UI colonel will order your forces to retreat to the bridge south of the village. At this point, clicking the retreat symbol for each unit will send them fleeing back to the bridge. Once you do that, the mission will end with a cutscene illustrating Russian desperation at this stage of the war.
***