This is another, inherently messy cityscape assault, though it’s more heavy-duty and armor-intensive compared to Lublin.
GET INTO POZNAN AND CAPTURE THE FIRST POINT
Use your 120-mm mortar team, protected by your shock troops and sniper team, to kill the Pak-40, MG42 and howitzer immediately across the canal to the left of your base. You can even send a shock troop squad over (far left side) to de-crew the Pak directly.
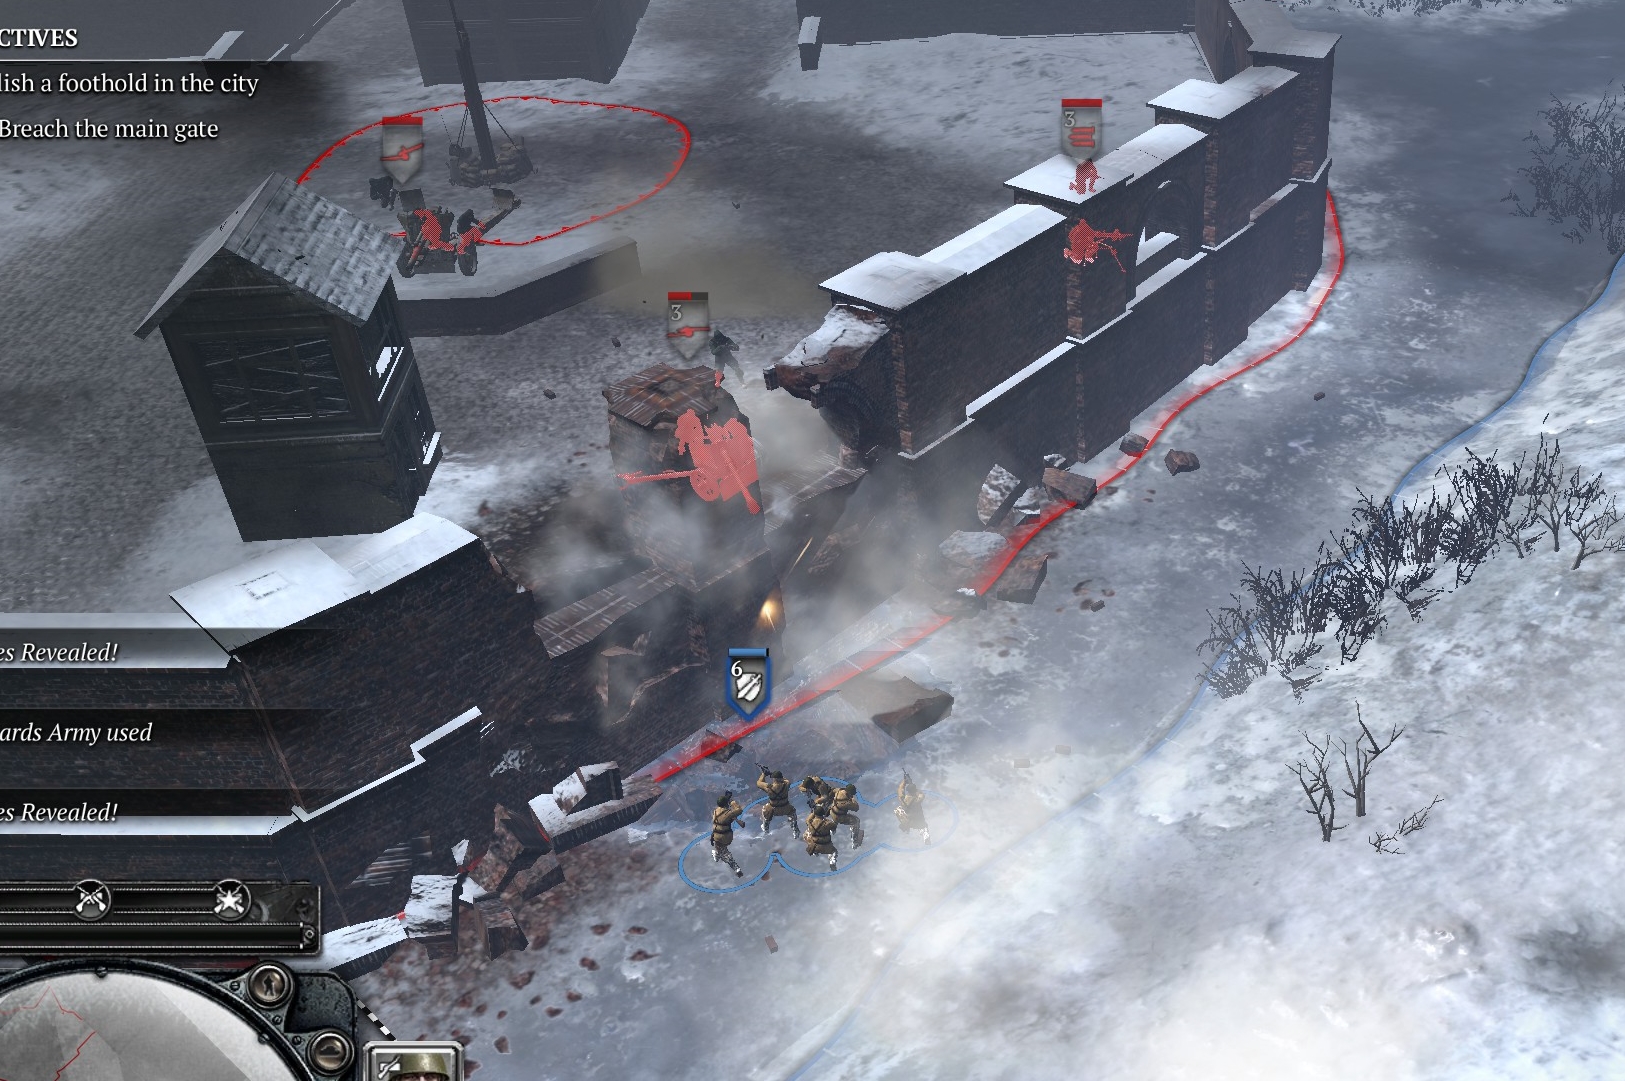
Your Su-76s can start shelling German infantry, MG42 and Pak positions directly forward of your base.
Try not to break the ice between your base and the Poznan city wall. You will almost immediately get an ISU-152 for blasting open the city wall, and it (and the rest of your force) will have to cross the ice to get where it needs for be for this mission.
Use attack-ground to make the ISU-152 (positioned on the bank on the side of your base) blast the wall where the UI indicates (to the left of the main gate directly in front of your base).
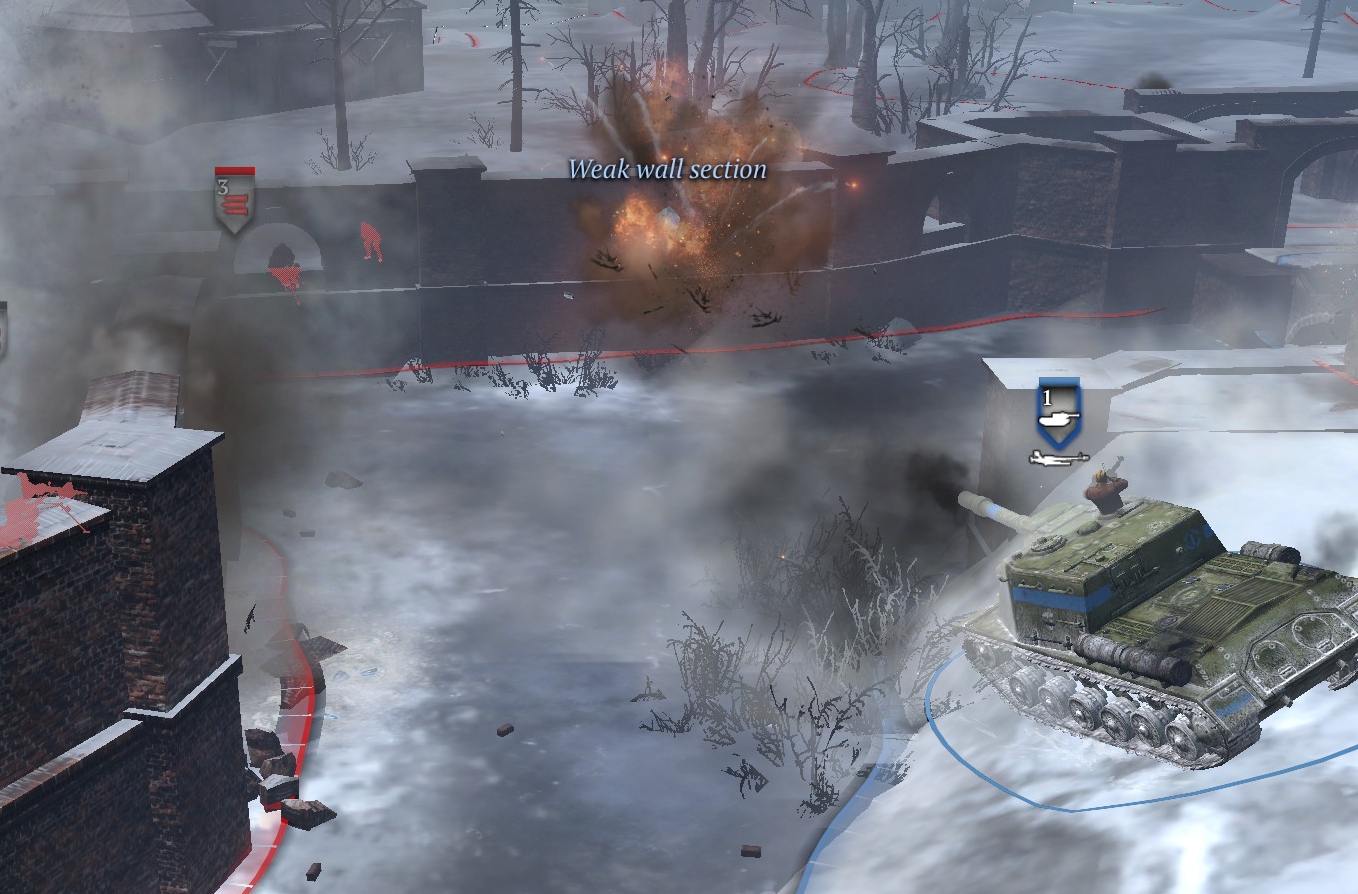
When the wall is open, wait for the ice to re-form if it has been broken in a way that prevents passage through the wall. Meanwhile use the passing recon planes to help your Su-76s and mortar team target German units, especially Paks, behind the city wall.
There are other places—indicated by the UI—where you can break the wall if needed.
When possible, move your ISU-152 through the gap in the wall.
Note that allied Su-76s and other equipment will frequently get in the way of your units.
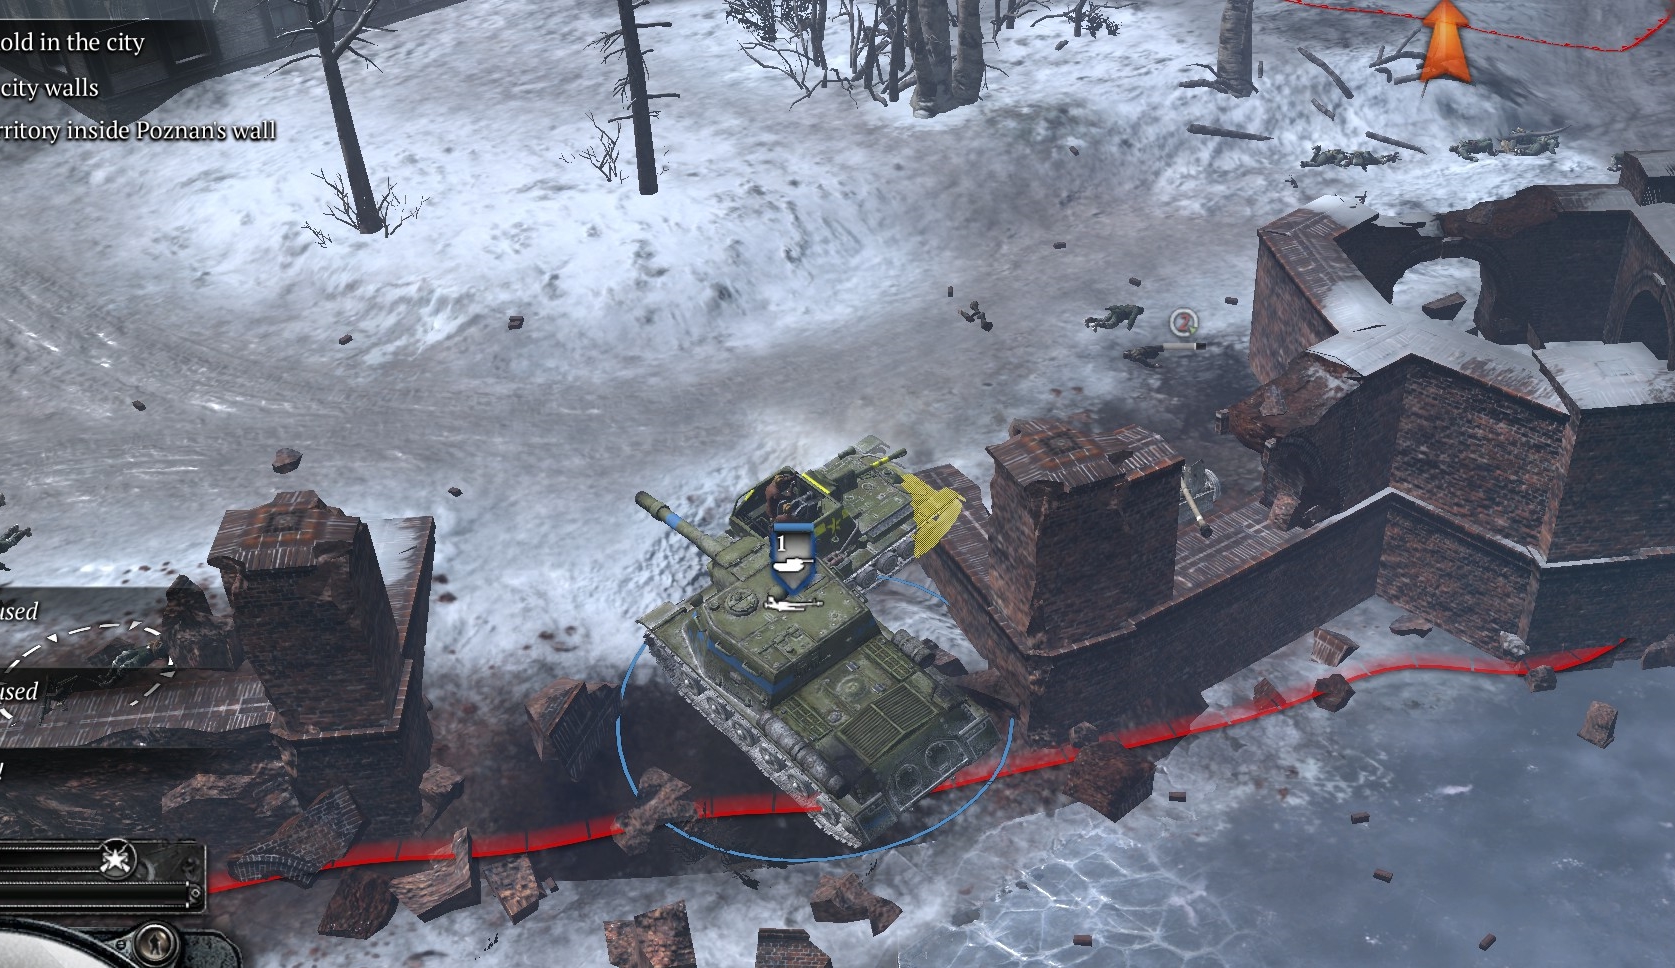
Your other units should follow closely. Your mortar team can provide valuable support, but you need to protect it from German infantry. Your ISU-152 and Su-76s can take out the German StuG and Panzer-IV guarding the territory point (first objective) just inside the wall.
Send a unit or new conscript squad to cap the point at the howitzer you killed with mortar fire in the beginning.
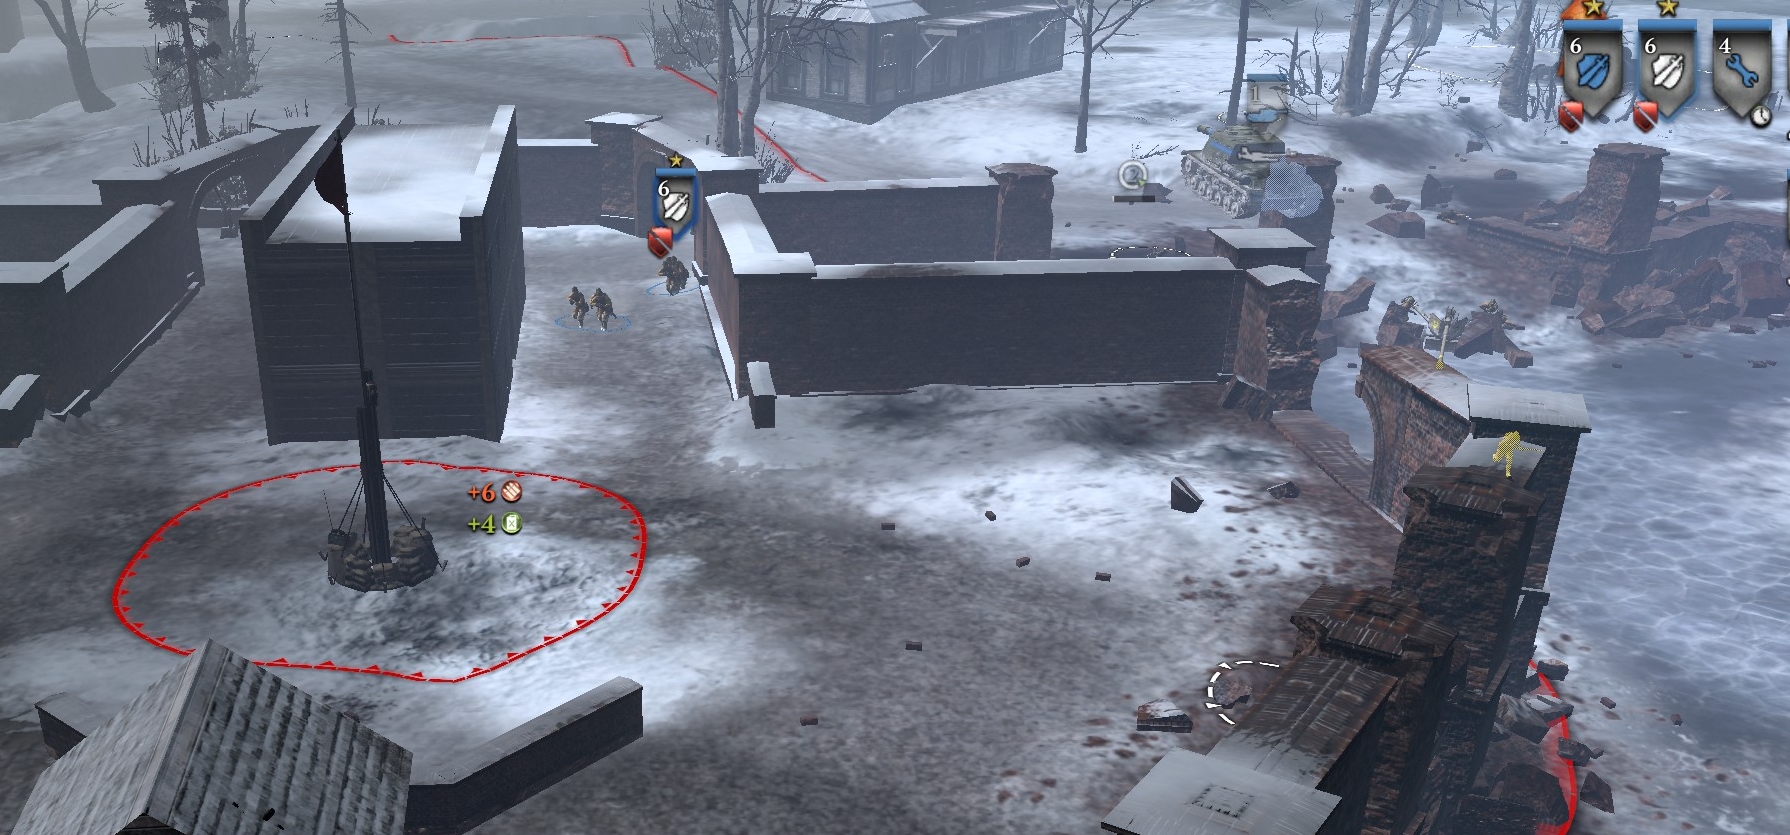
When the German armor is gone, have one of your infantry units cap the first-objective territory point, if allied units are not there already.
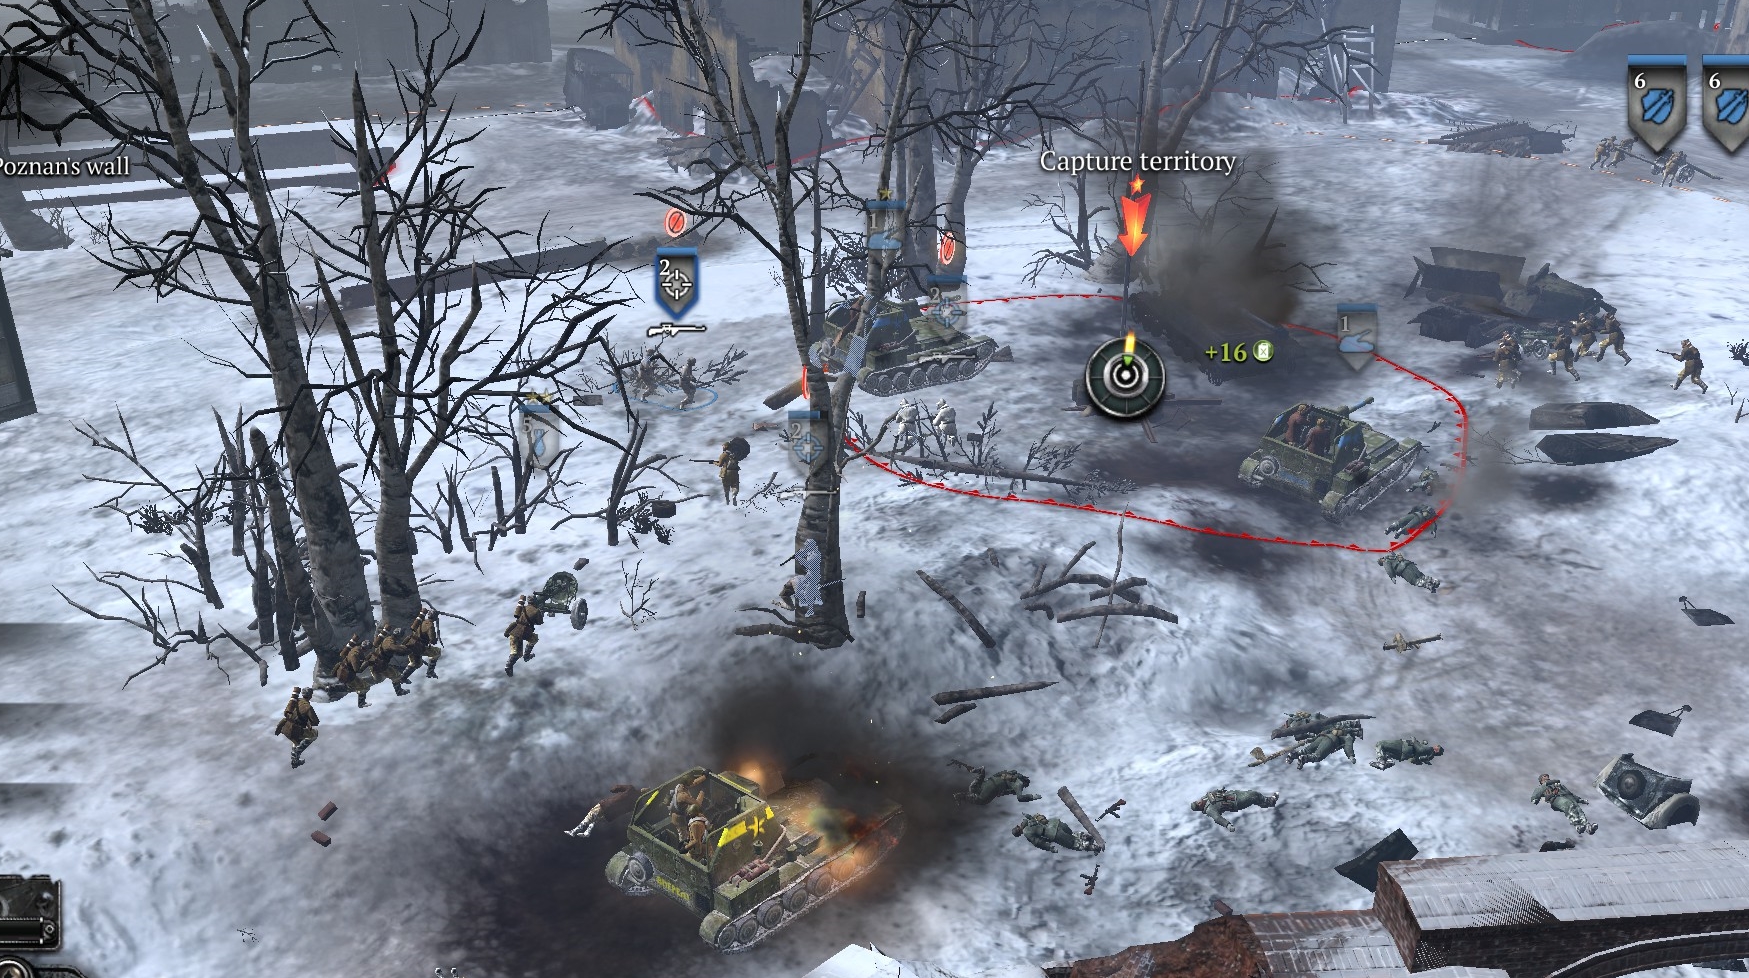
Capping that point will trigger a phase-change, and the map will open up northward, exposing the main part of the city.
Bring in an Su-85 or another ISU-152.
CAPTURE THE WESTERN SQUARE
The UI will indicate this next objective, which is roughly NW from the point you just took.
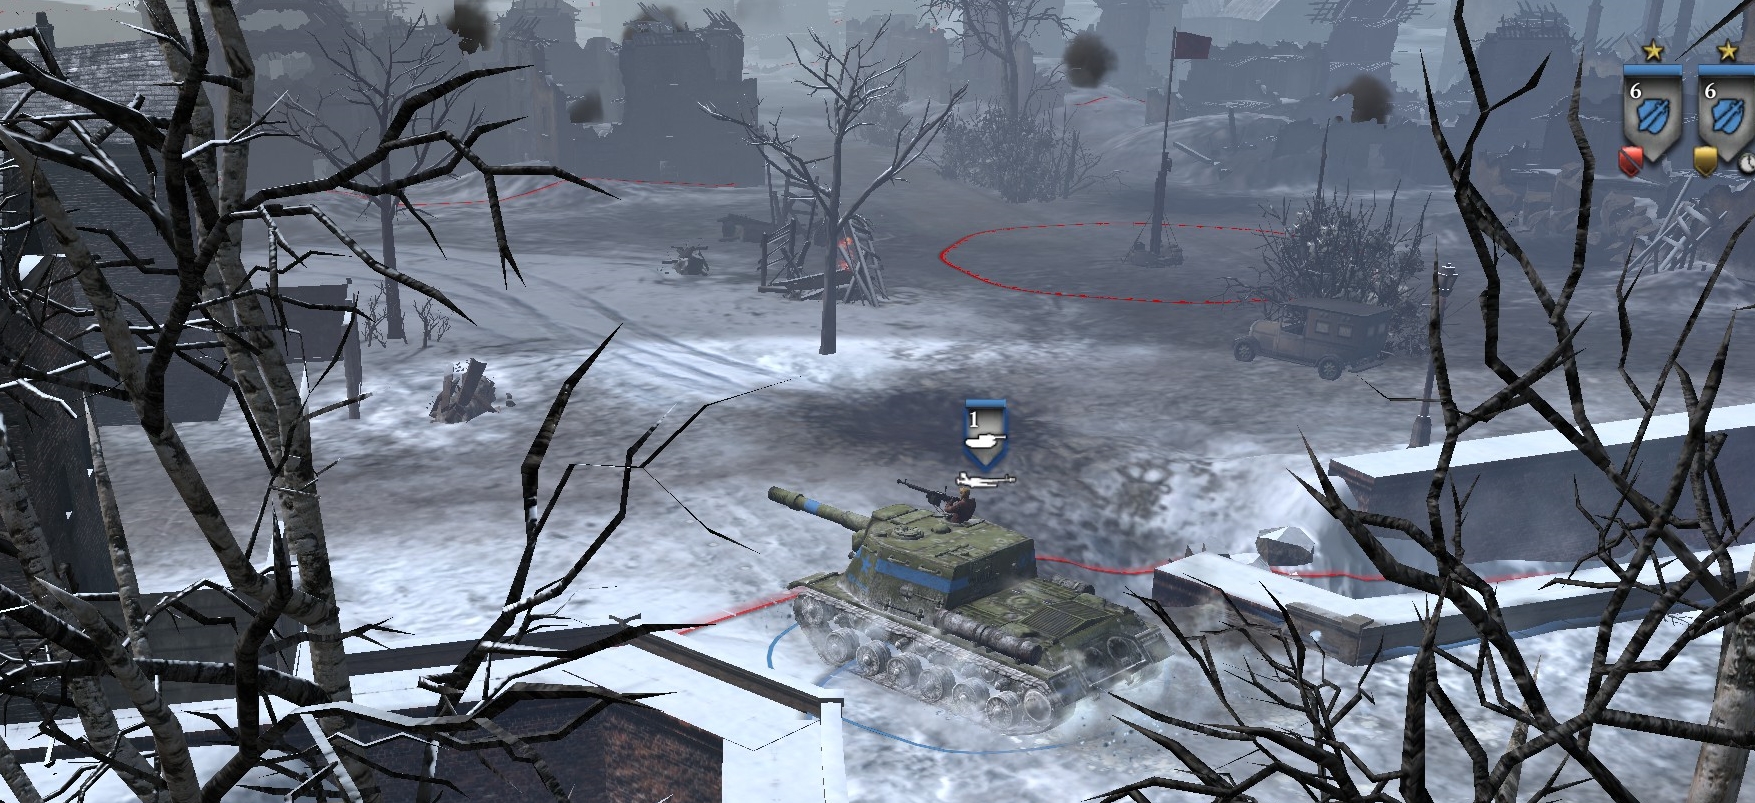
As you cross into the area just SE of this square (where there is another territory point you can take) you will be attacked by a StuG from the north and flamer-251 from the west, so be ready for that by leading with armor, not infantry. Infantry alone to the SE of that territory point will also be vulnerable to sudden attacks out of the fog-of-war from the east.
Inside the square, the main threats are two Tiger tanks. You can scout with a conscript squad, scout car, or snipers on stealth (“hold fire”) mode. If you bring in conscripts, they can also crew a de-crewed Pak-40.
You can flush out the Tigers with your mortar team, Su-76s, or even by having your engineers build a 152-mm howitzer near the territory point you just capped, and shelling the square.
Your ISU-152, combined with the Su-76s and another ISU-152 or Su-85, with proper flanking techniques, should be able to handle both Tigers. Your infantry and sniper(s), with mortar support, can take out German infantry that appear, which will include schreck-equipped panzergrens.
When you cap the Western square, you will get four penal squads with flamethrowers and a bump up in pop cap.
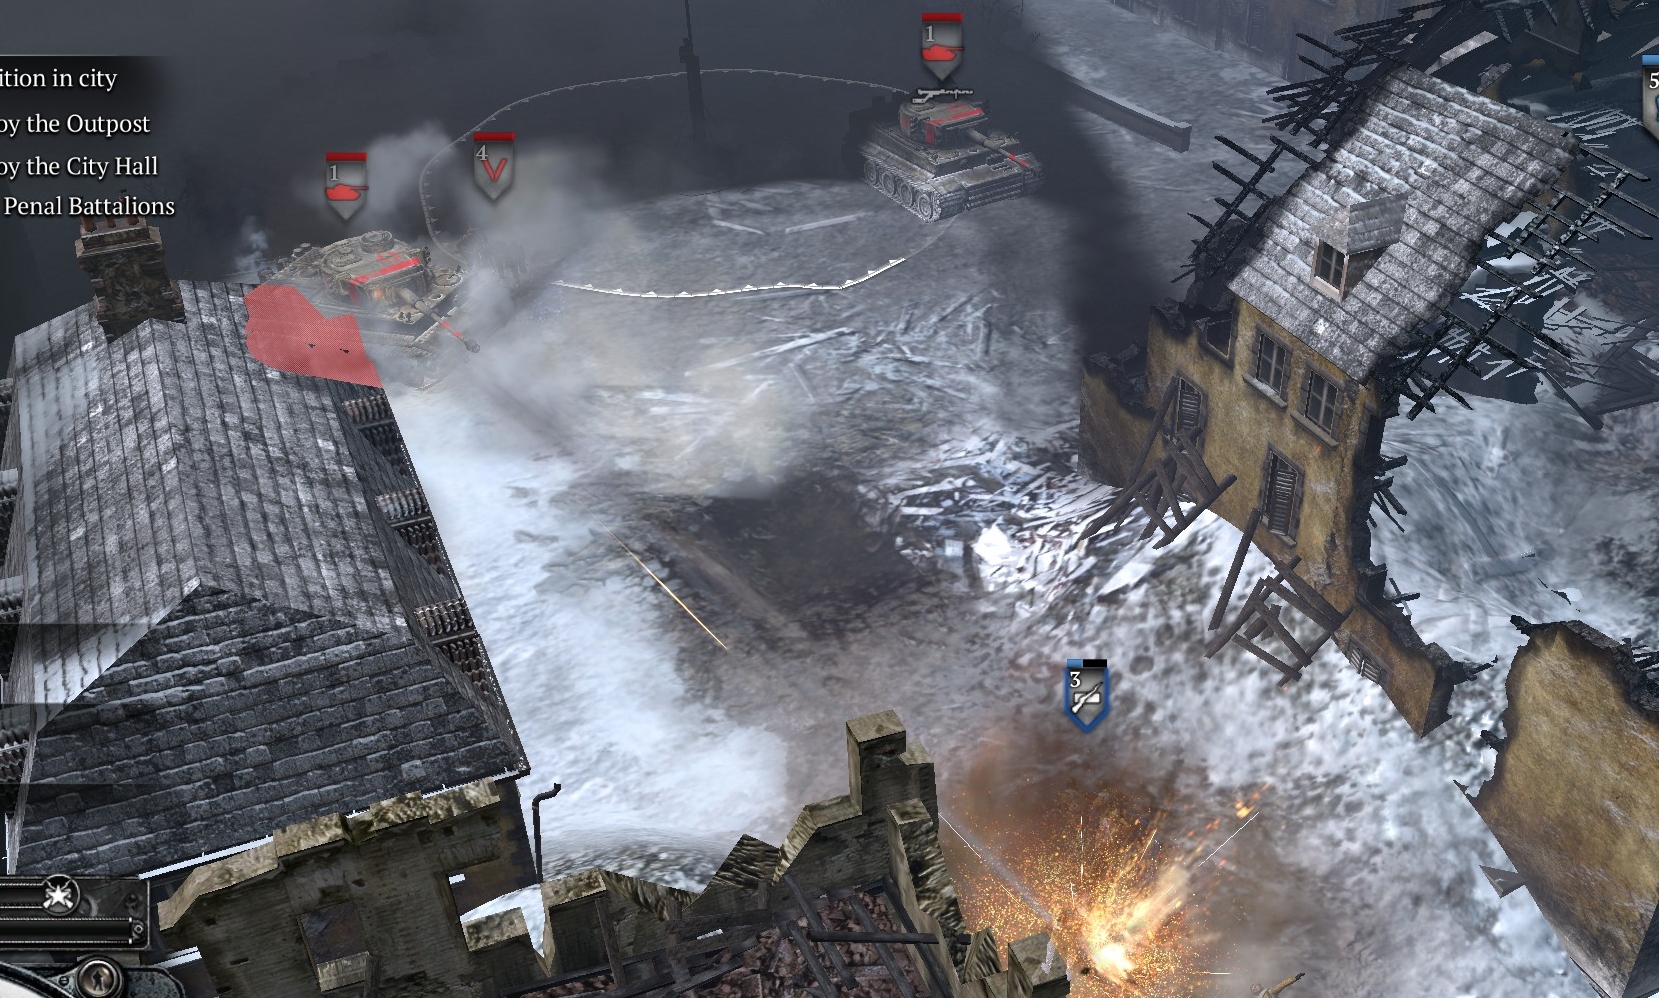
CAPTURE THE EASTERN SQUARE
The north-south road that runs to the east of the Western Square, and the road going in from that to the Eastern Square are full of (or will fill with) powerful German infantry units including Paks, MG42s and schreck- and LMG-equipped grens and panzergrens. Also a StuG will show up at some point. You will need to use snipers, mortar, Su-76s, shock troops, and penal squads to clear all that out in preparation for the assault on the Eastern square.
You also can send an armor force up and around to flank the Eastern square from the north—ditto for the south. In and around the square are at least three Panzer IVs and a Tiger.
IL-2 CAS can help here. Putting infantry into buildings near the City Hall building also helps distract German tanks while your armor pounds them.
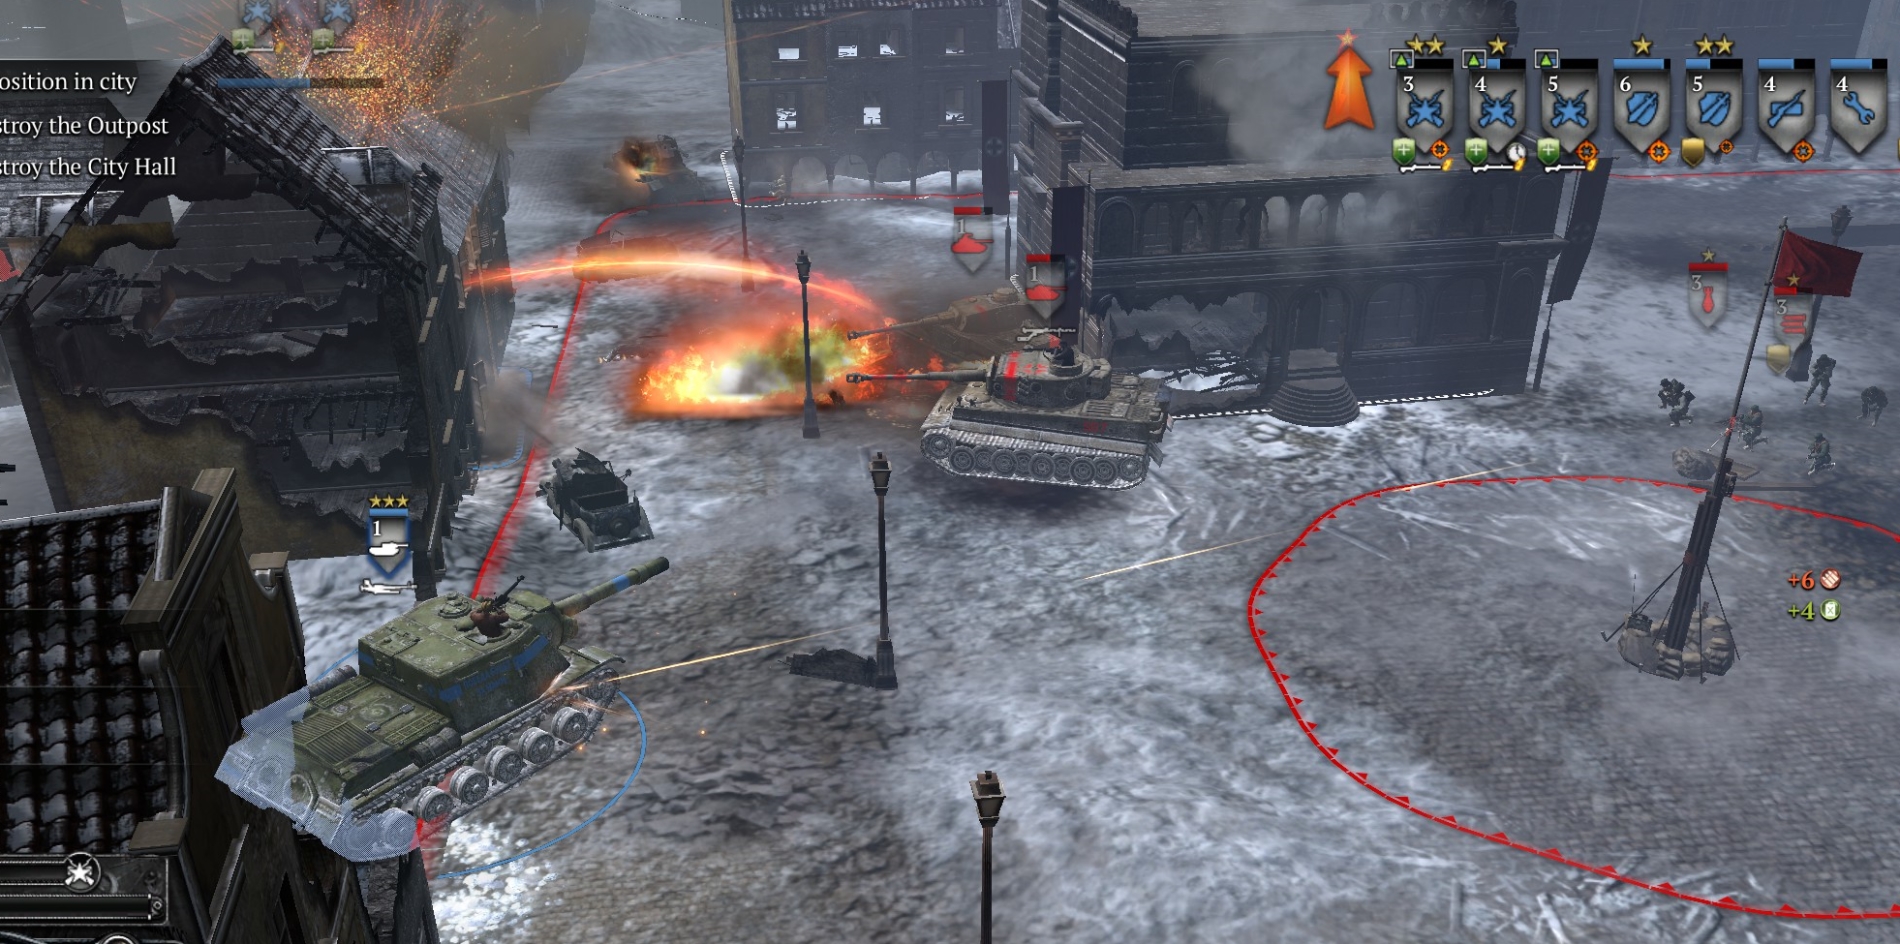
Once you have killed the tanks guarding the Eastern square, and your own tanks are firing at the city hall building, the phase will end and German units will flee this square. Oddly enough, you can also conclude the phase by leveling the City Hall, even before the German tanks are dead—there will be a phase change and suddenly the German tanks won’t be there anymore.
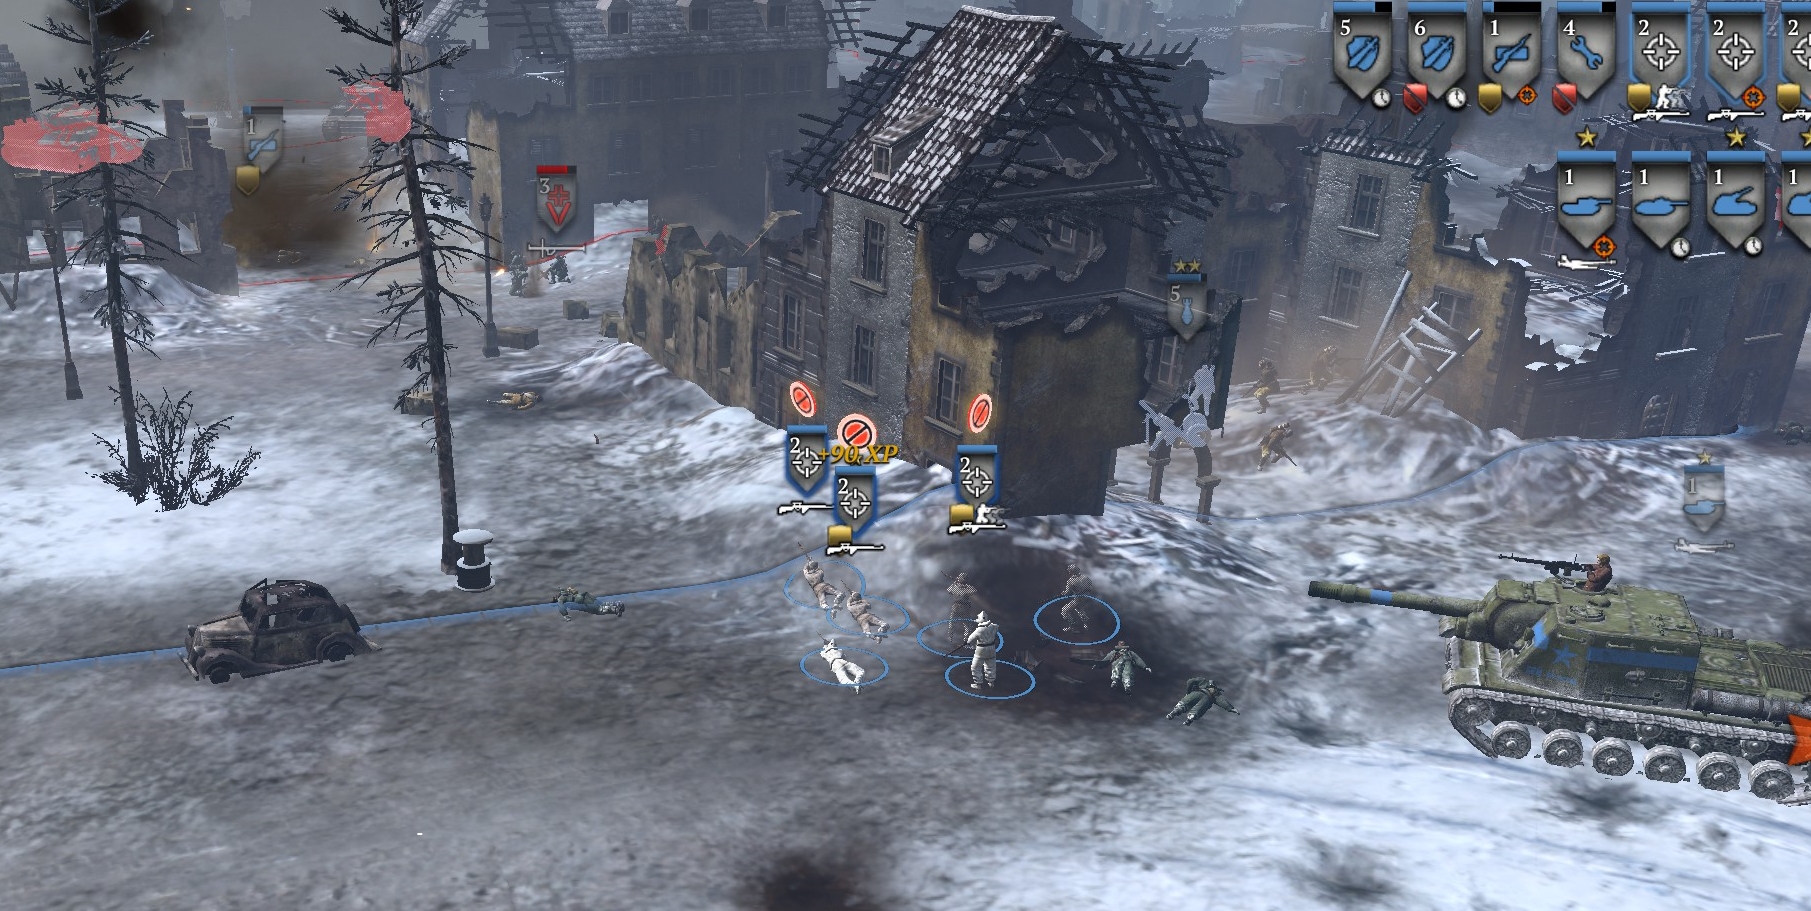
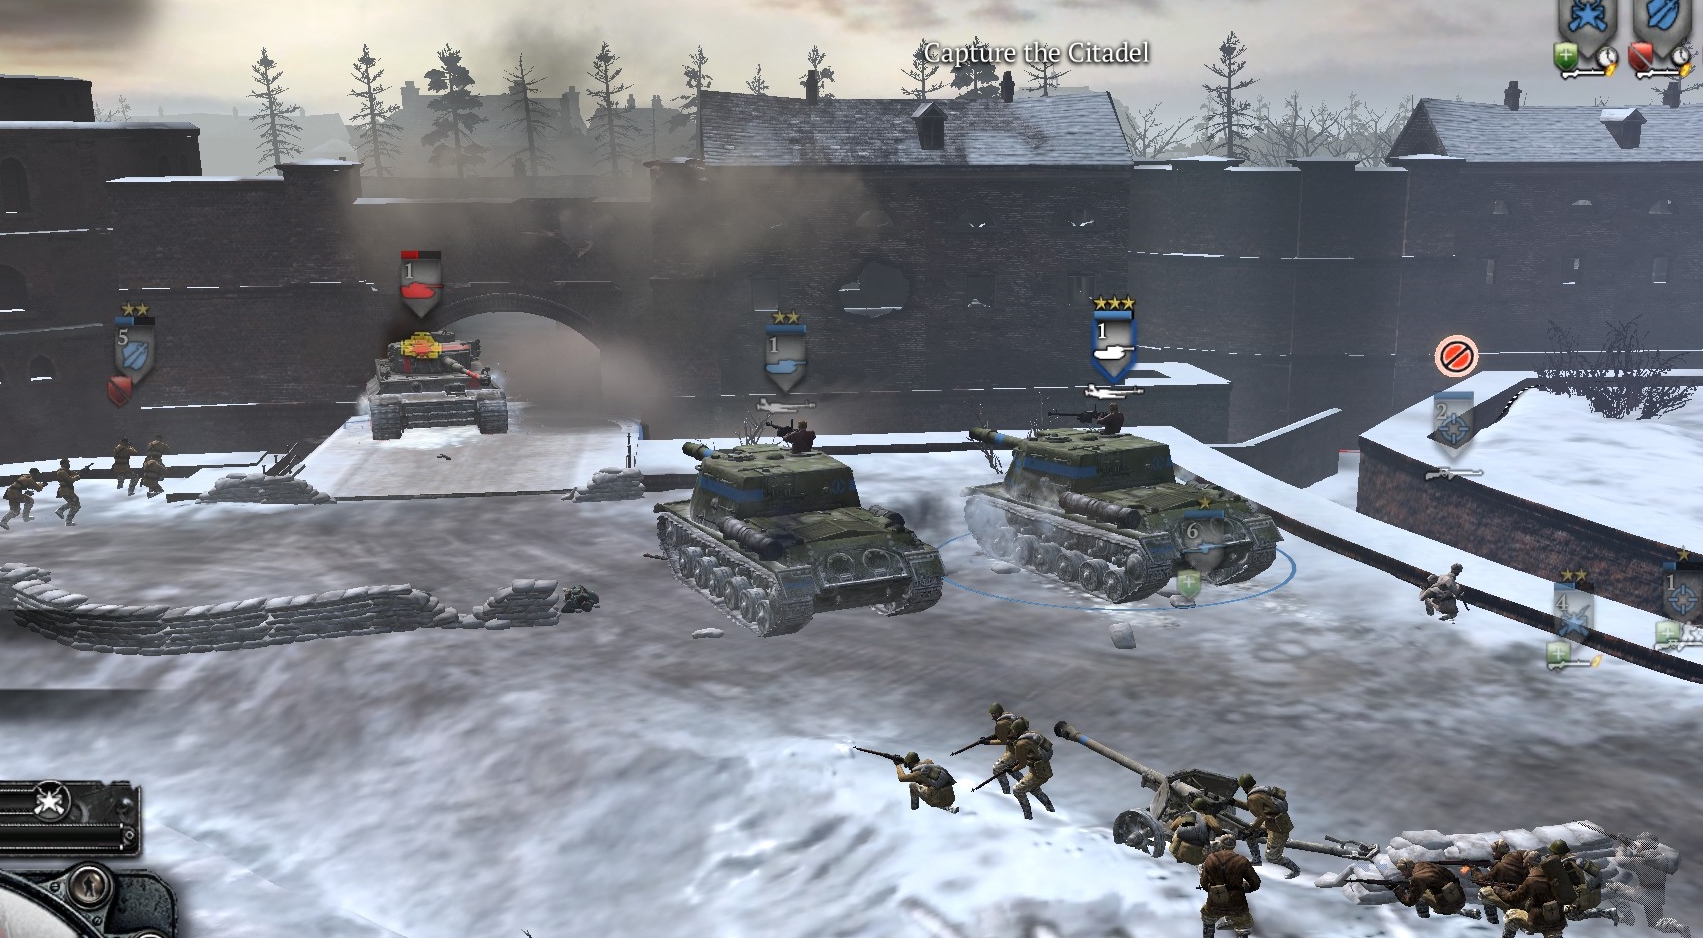
CAPTURE THE INNER CITADEL
At the north end of the map, protected by more stone walls, lies the inner Citadel and main German HQ.
The UI will give you a time-limit for capturing the Citadel, though it is fairly generous so most players can safely ignore it—and can always ignore the ludicrous UI commentary and hassling.
You will first need to clear out German units just to the south of the Citadel.
Next, move to the right-side entrance to the Citadel and kill the Paks and MGs guarding that entrance. A Tiger will poke out of the entrance—kill that too (or force it to retreat) with your ISU-152s and whatever other anti-armor tools you have.
From here, it’s tricky. The courtyard just past the entrance has two Pak-40s, MG42s in tough buildings, and schreck infantry. You need to soften up those defenses with your mortar, preferably killing the Paks, then run in with all your armor and head for the right-side exit from the courtyard. Follow with infantry—they can be useful against Paks and schreck infantry. Try to get quickly past, and kill, the Pak-40 that is about 40 meters to the east and is trained on that exit.
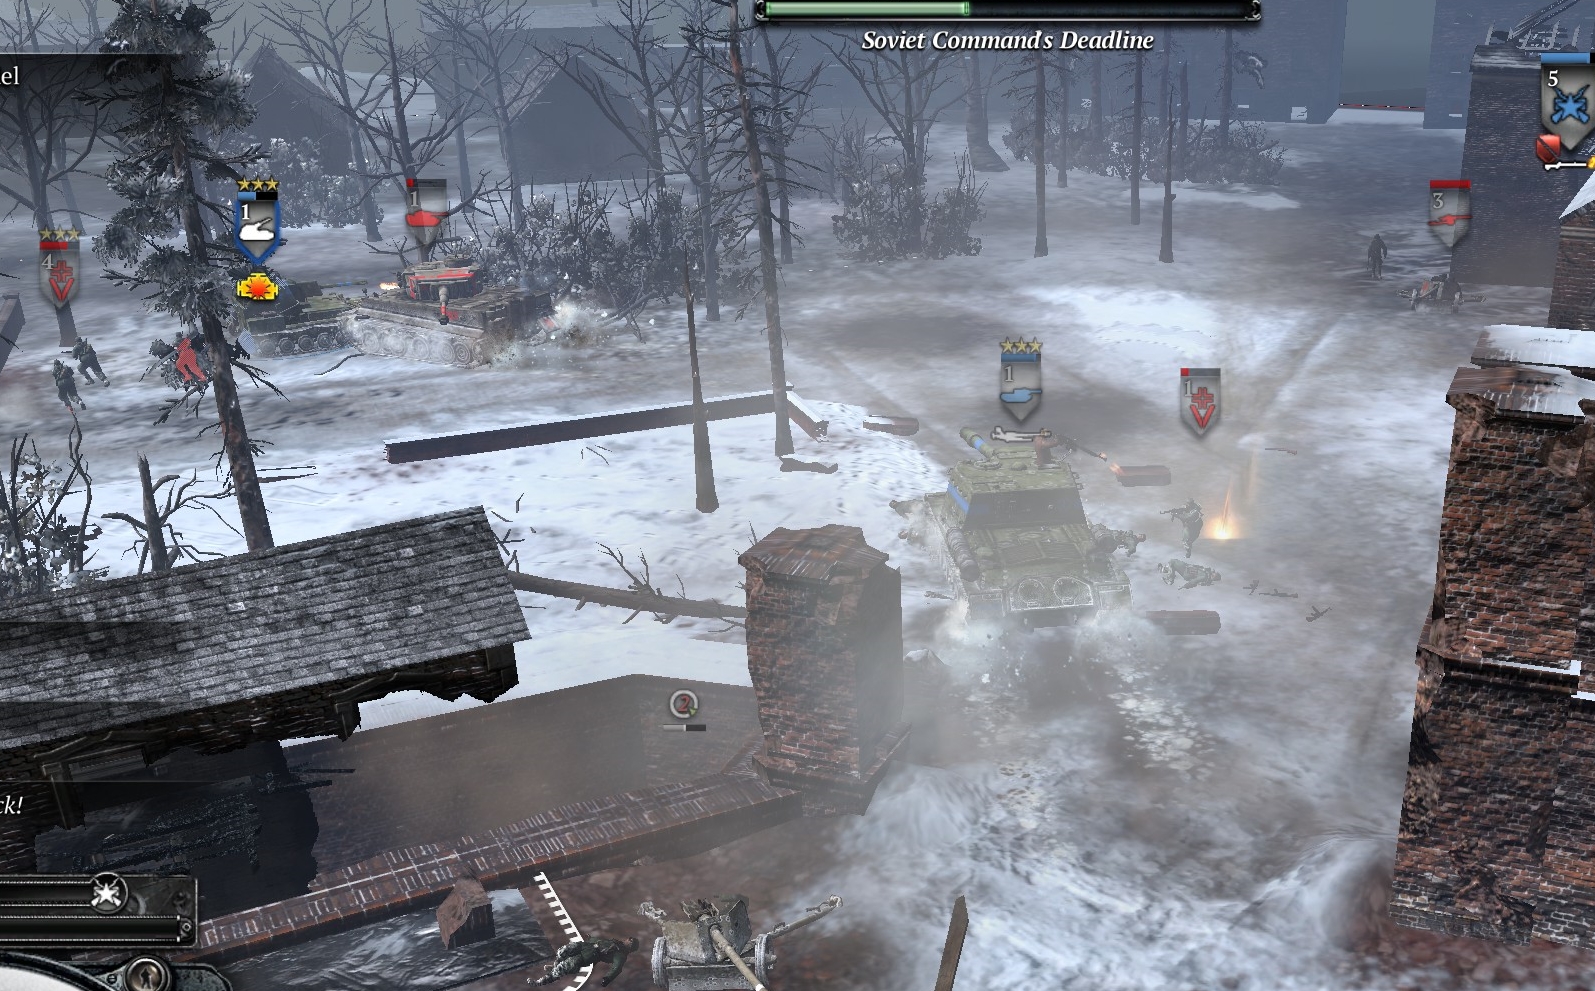
Once a significant part of your armor has made it in past the major anti-armor defenses, do repairs if needed, and then move toward the main HQ building, which has another couple of Tigers as well as Pak-40s and a howitzer. By now you should know enough to be able to focus your anti-armor assets on German tanks, even Tigers, for reasonably quick kills. Use mortar fire on all crewed weapons near the HQ. Similarly to the previous phase, once you are in front of the main German HQ building and firing at it with your tanks, the German commander will surrender.
***