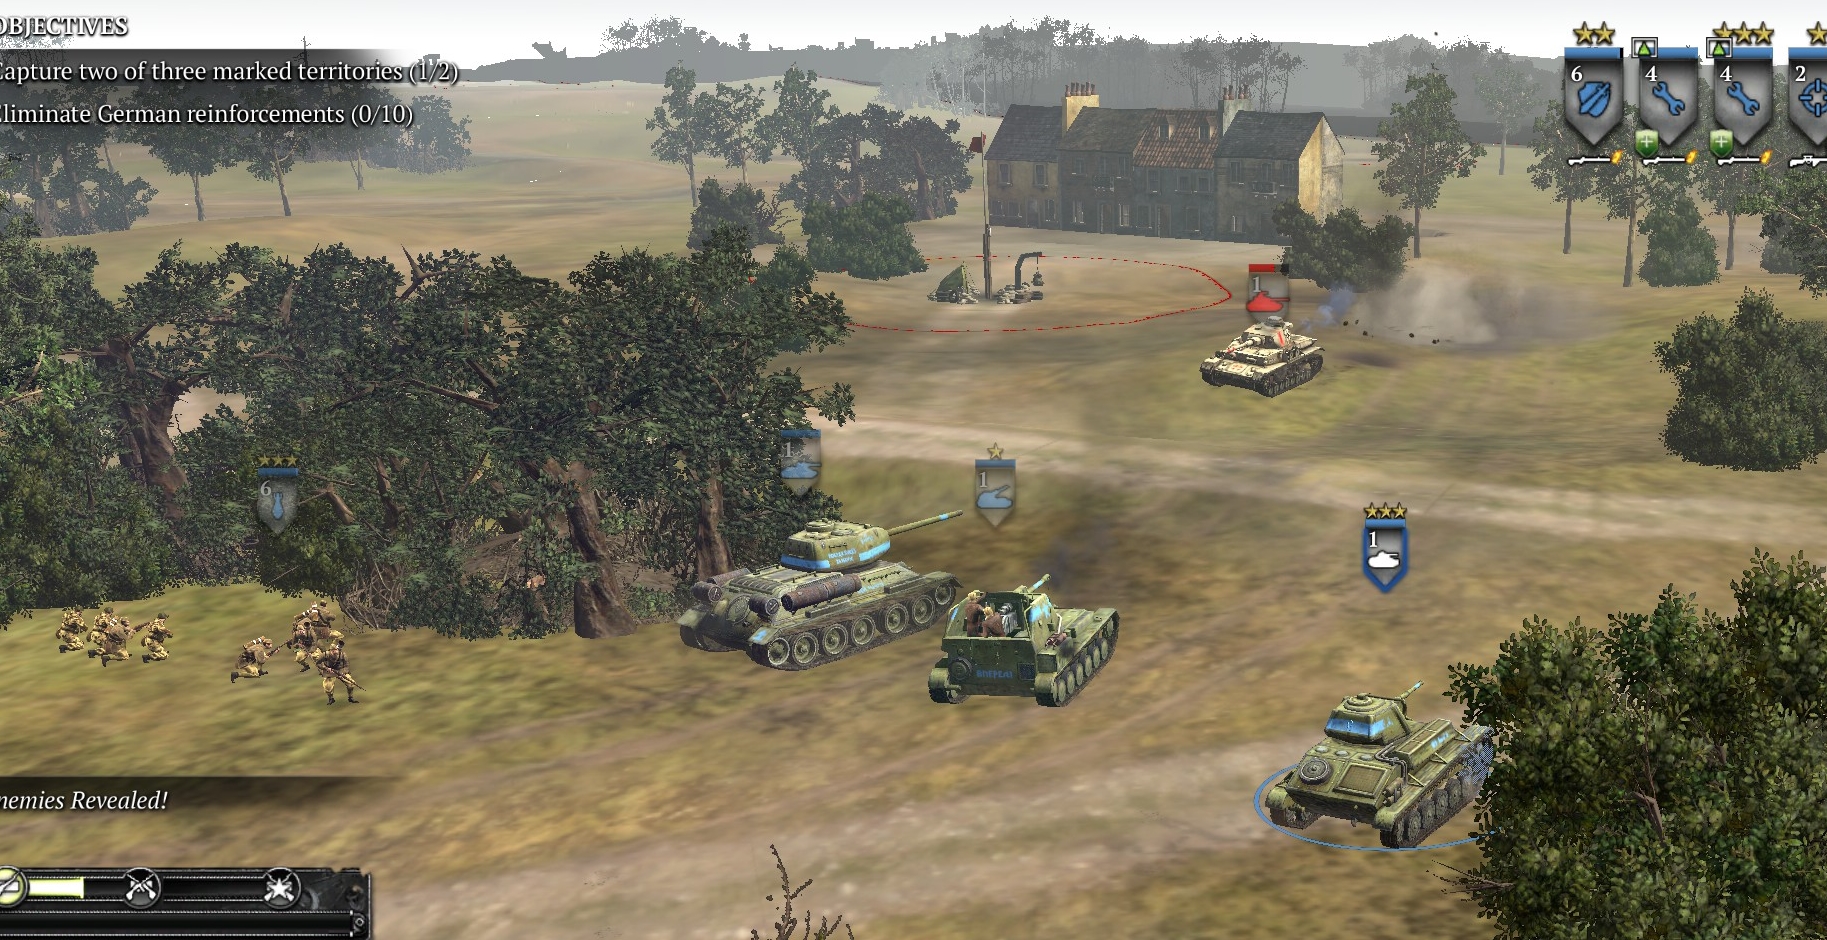
In this mission you face urban combat in the German-held Polish city of Lublin. First you have to fight your way to a central point and cap it. Next you have to attack and cap two out of three VPs, which are situated in the west, east and north corners of the map. For the VPs you will face Pak-43s, nebelwerfers, or heavy armor, depending on which VP. Throughout this, you will have to defend against mindlessly suicidal and repetitive attacks on your base. After you have taken two VPs, you will be given two enormous ISU-152 self-propelled assault guns, with which to break into a castle where POWs are imprisoned.
In general, it is an unpleasant and somewhat broken mission. Snipers necessarily are central to your force but they struggle to hit anything and have ludicrously short range. You supposedly have call-in incendiary artillery as well as IL-2 CAS, but they are usually disabled when you could most benefit from them, and although you can build 150mm artillery it has a range of only about 100 m—what a joke. At many places on the map your vehicles will be afflicted by significant pathing/movement problems that may compromise their survival. The nerfage of your units is extreme—for example, it will take 5-6 hits for an Su-85 to kill a thin-armored Ostwind. The premise of the mission is that you need to “clear out” areas of Lublin, but the devs have coded it so that reinforcements come in constantly and, really, you can never clear out anything—so the whole thing feels pointless. Lastly, when you get to the castle you are told to blow the front doors open quickly to have a chance of freeing POWs within, but that appears to be a lie—the prisoners always die.
GENERAL STRATEGY
The urban portion of the map contains mines, snipers, MG42s, Pak-40s, mortars, and many grenadiers, panzergrenadiers, and Osttruppen, some with LMGs and some with schrecks. These German units are not spread sparsely around—they are dense on the map and collectively they always outnumber you by a lot. There is no easy way to get through them, but in general, you should proceed slowly with your T-70 and stealth-mode snipers—or even expendable conscripts—as scouts, backed closely by more snipers, shock troops, and mortars, and followed by engineers (upgraded with flamethrowers) in the M5. Mines are a constant hazard but usually a single mine won’t kill a full-strength vehicle, so it can stay still and shoot until repair is possible.
The strategy suggested here is to proceed as described in some detail below, which involves the capping of the east and north VPs. I don’t think capturing those VPs is significantly easier than taking, say, the west and north VPs, but because the east side of the map is mostly open country, it’s less claustrophobic. Attacking the German armor concentration also helps vet up your armor for the climactic battle at the castle.
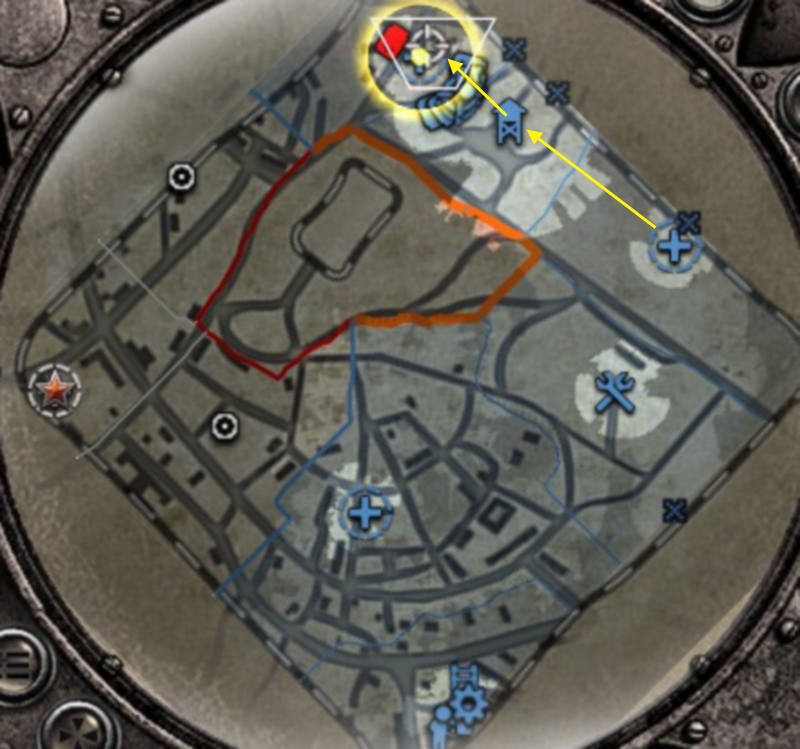
CAPTURE CENTRAL SQUARE POINT
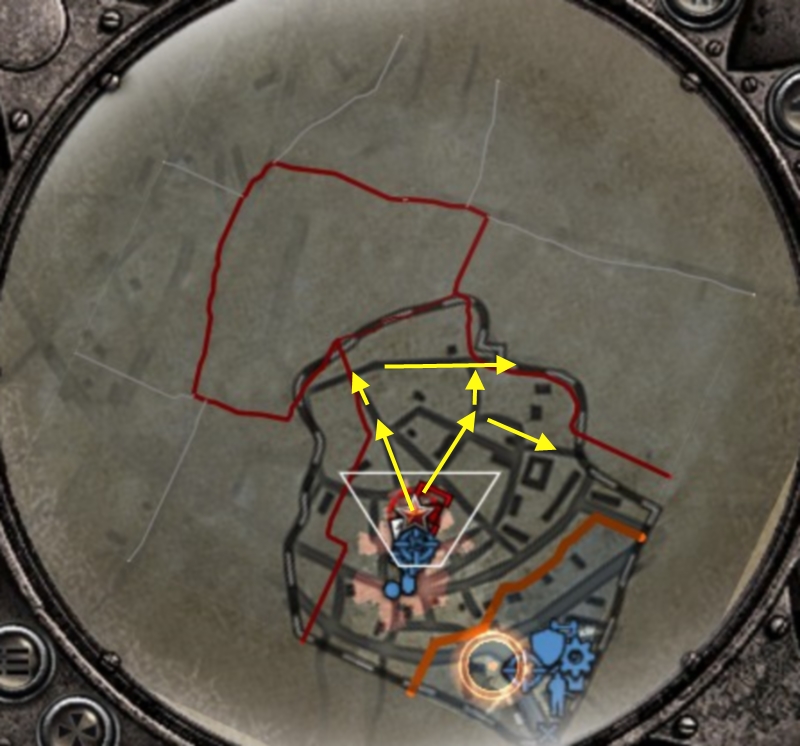
Proceed as shown in the tac map, moving north to the targeted point but also clearing side streets on your way.

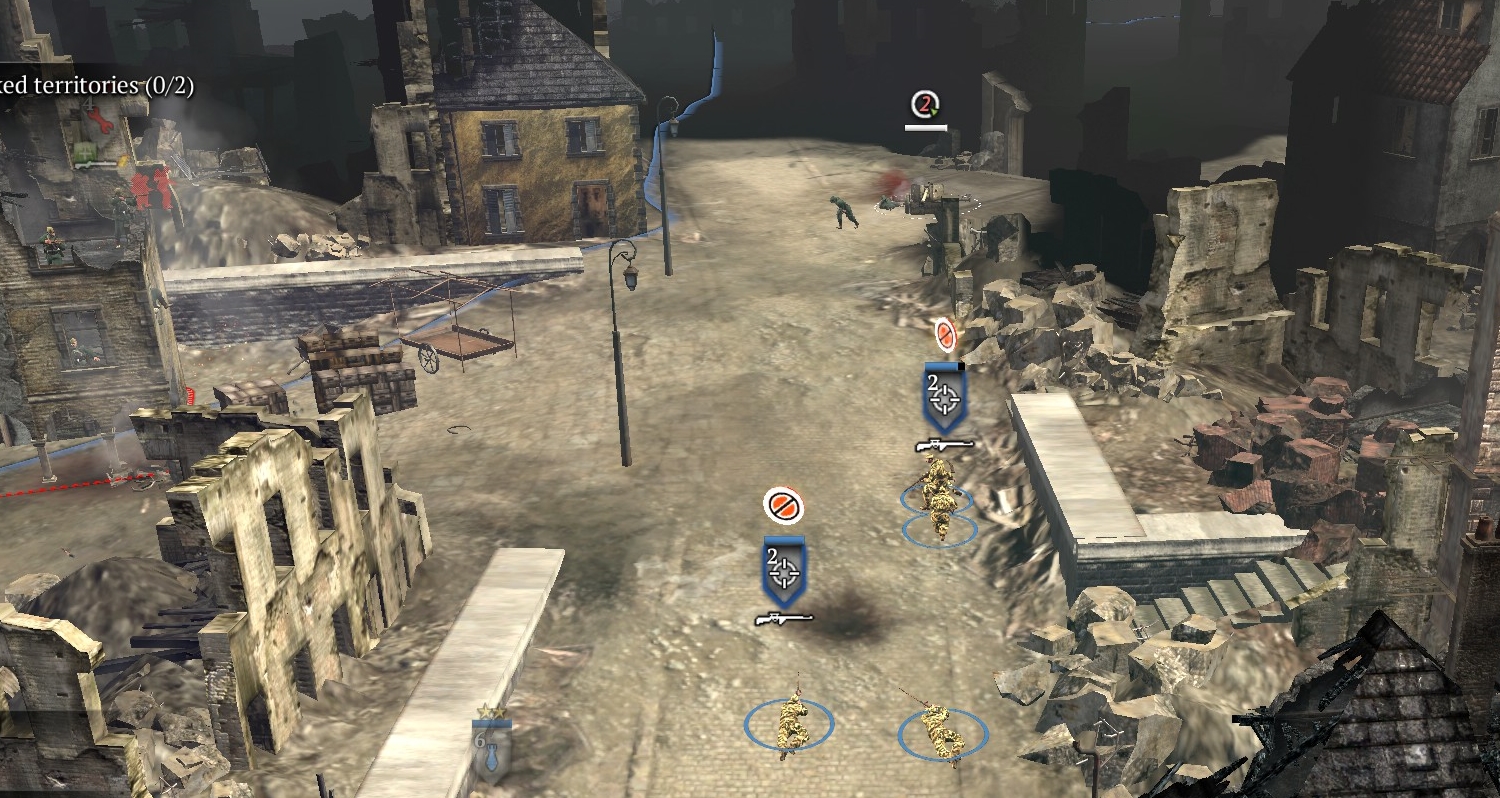
Note (image below) the German units positioned in the open space to the west of your base—which you must pass through when leaving your base: there is a (usually invisible) sniper, an MG42, a mine in the road a few meters NE of the sniper, and several infantry squads here and there.
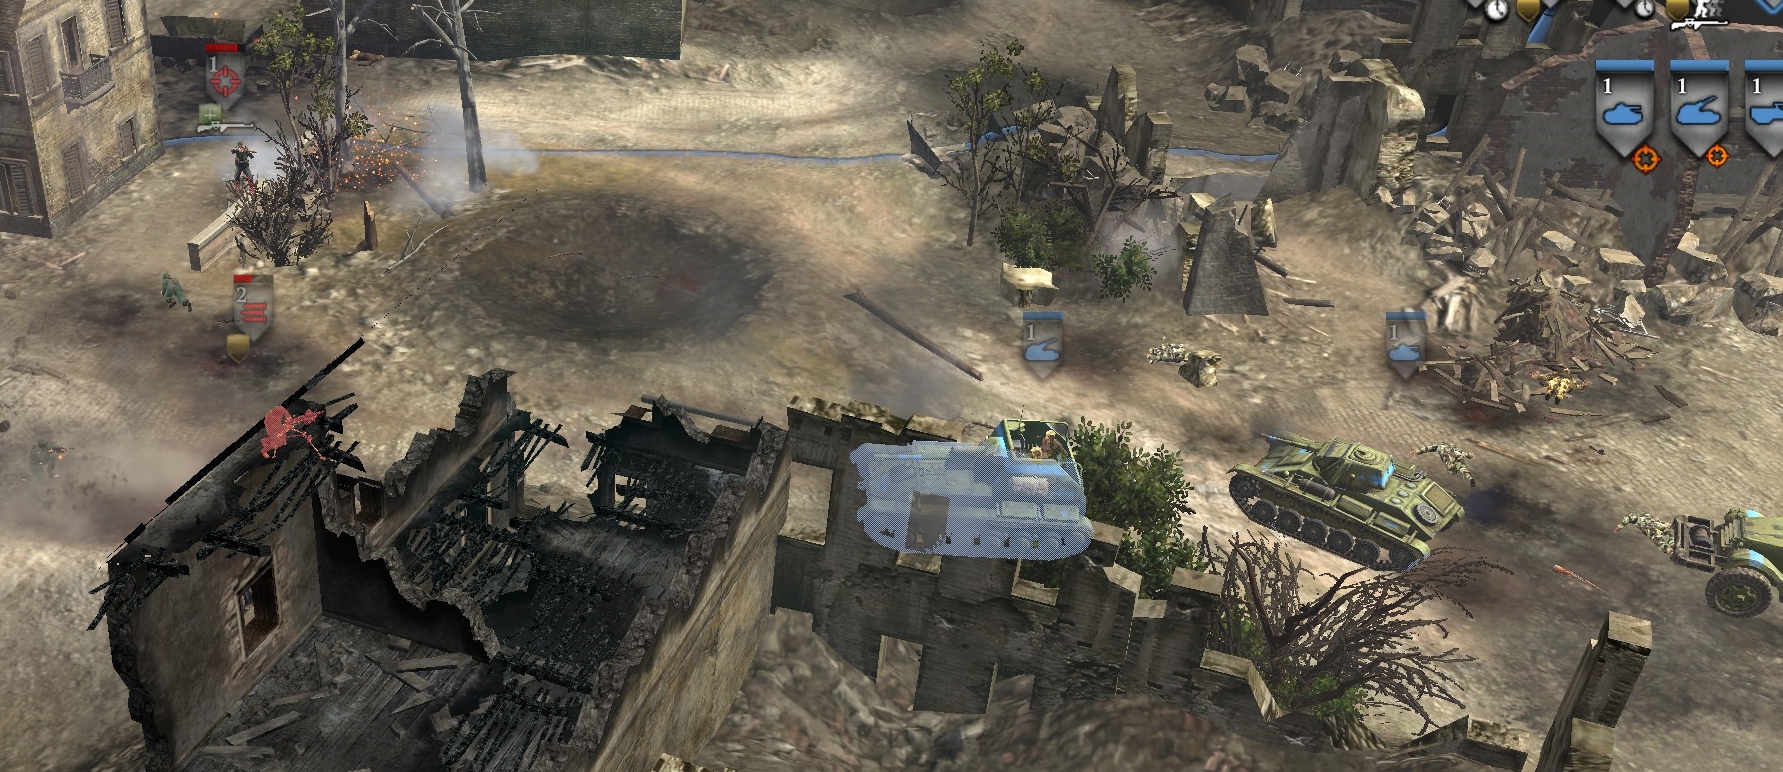
There is also a mine on the road just south of the targeted point.
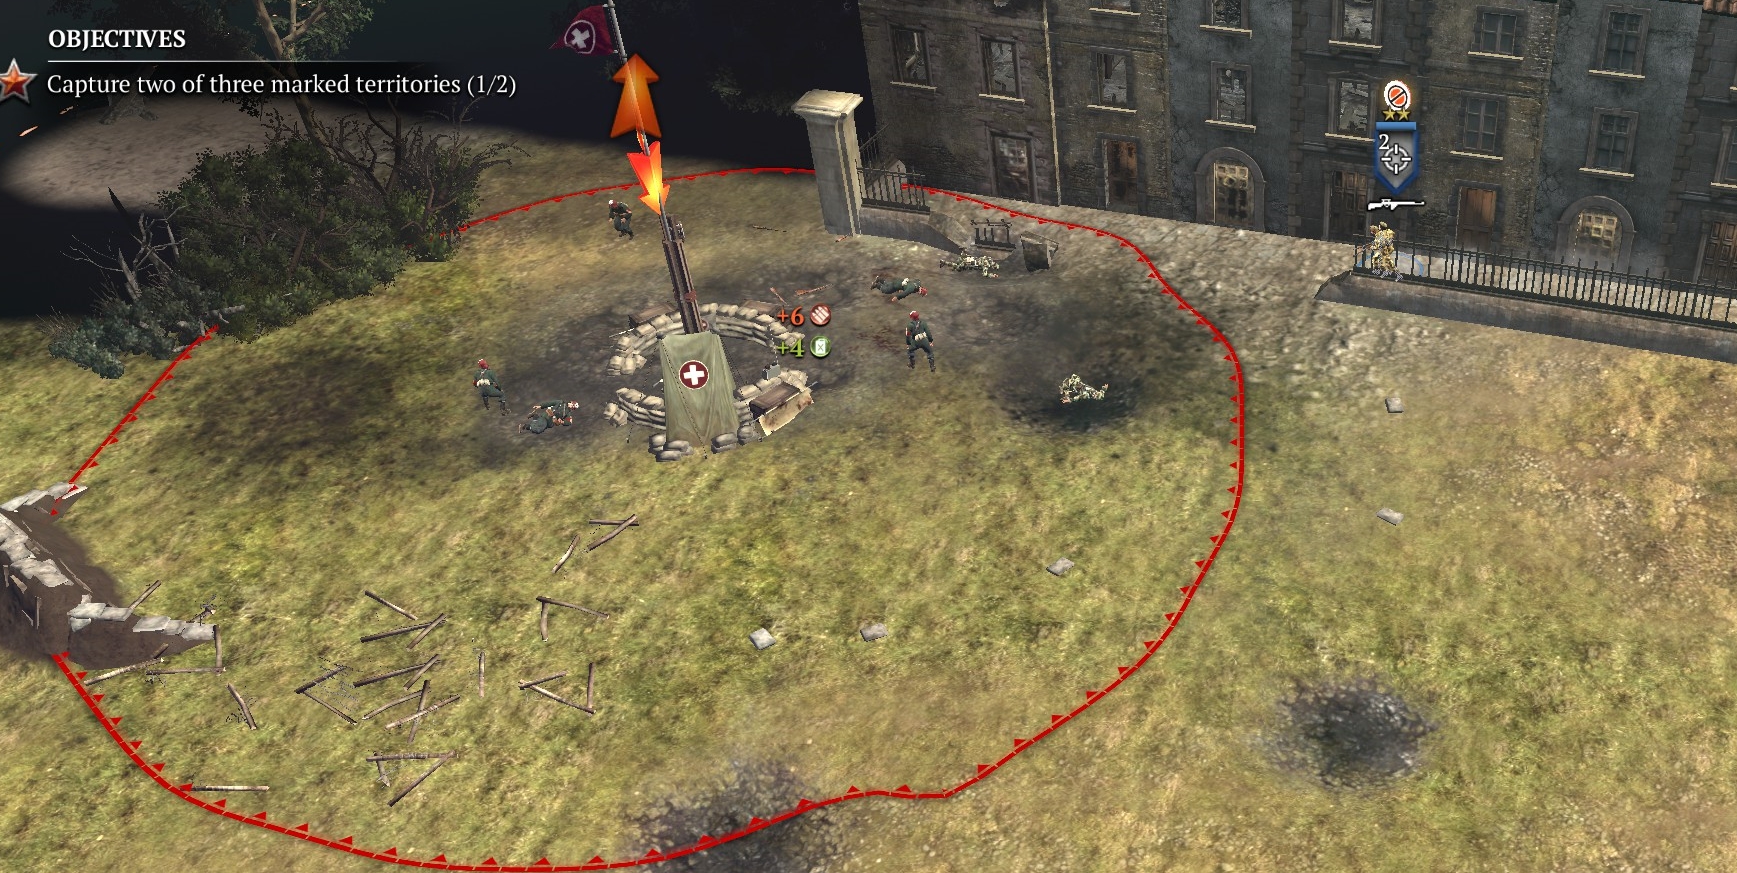
When you cap the point, it becomes a field hospital where your wounded can heal. It also draws your retreating units, which is a bit irritating since they can’t reinforce here.
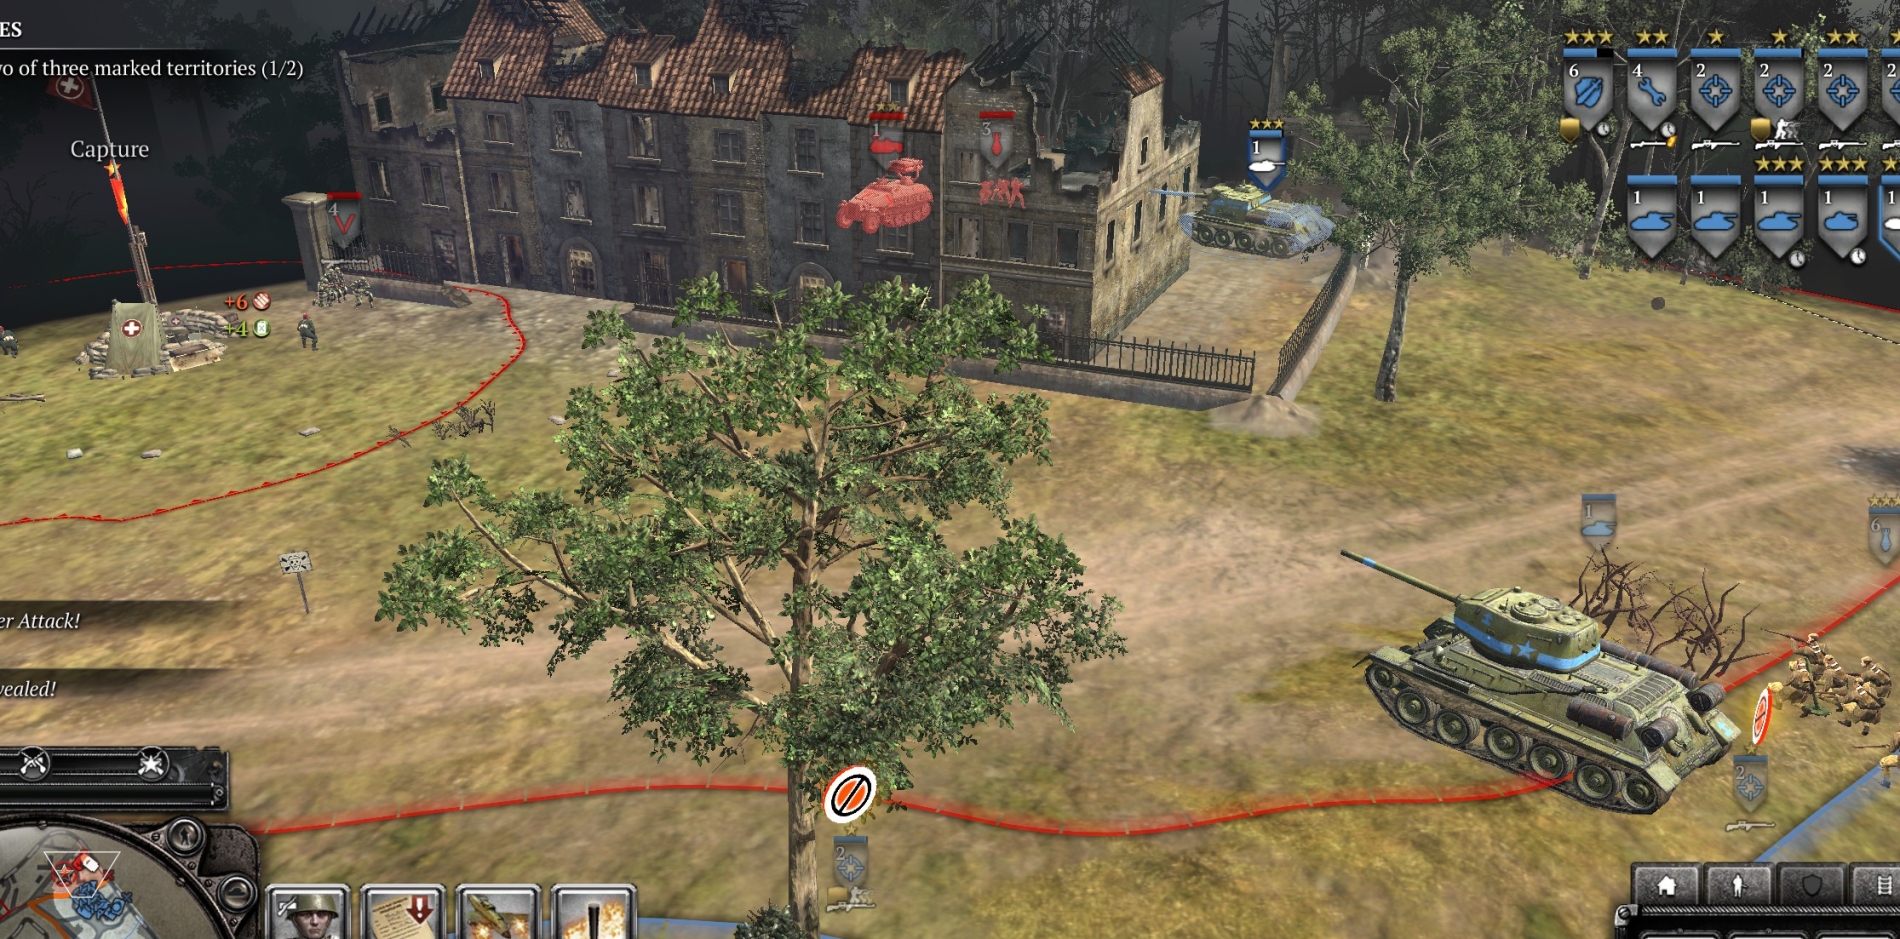
START GUARDING YOUR BASE
Easiest way to do this is to place shock troops as shown (note the pile of German pio bodies). If you do not guard your base, German pioneers (about one team every minute or so) will keep walking in and trying to lay demo charges on your main base building. Usually when they detonate the charge the pioneers blow up too, and it takes at least four of these visits/blasts to kill your base building, so it’s not absolutely critical to stop the first attack. But you will lose your base eventually if it is unguarded. Also, usually after around 10 pio attacks, a Panzer IV or Ostwind comes in and starts blasting away at your base buildings. To deal with that, just make sure you always have the pop points to bring in a Zis-3 field gun or even a T-34, which—if ordered immediately—allows you to kill the German tank before excessive base building loss/damage has occurred.
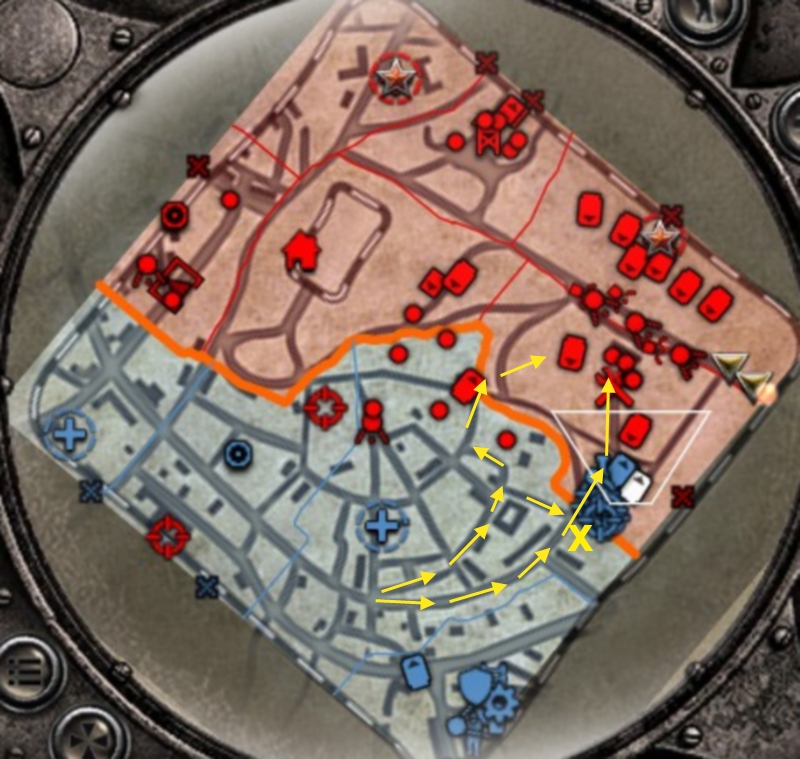
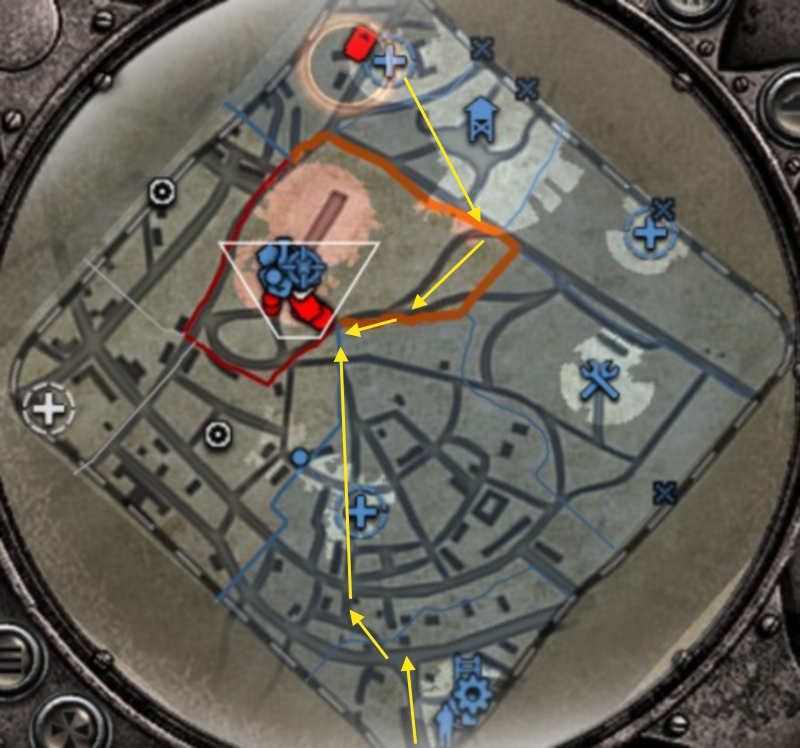
CLEAR THE ROUTE FROM THE MARKET SQUARE POINT TO THE CASTLE
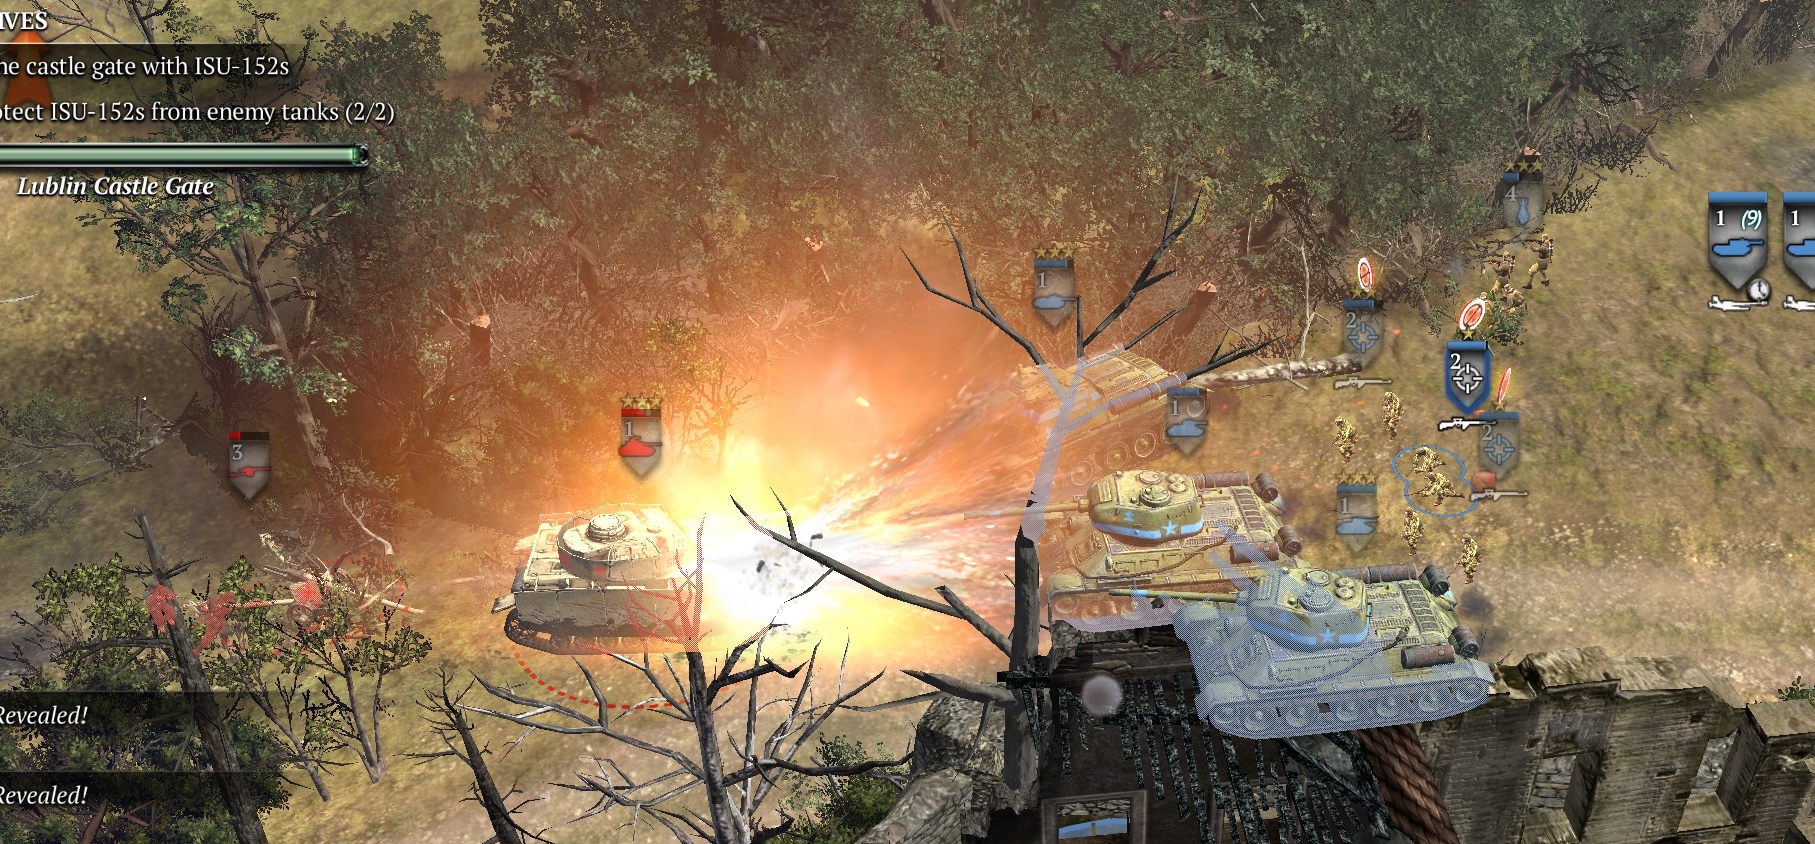
See tac map below, with arrows. This should be done after taking the market square, but it will be especially important at the end, when your ISU-152s have to get from the road beside your base all the way up to the castle. You won’t eliminate every German unit, but a thorough sweep should at least get rid of the mines, schreck infantry and Pak-40—you don’t want those ISU-152s damaged significantly before they get to work on the castle gate.
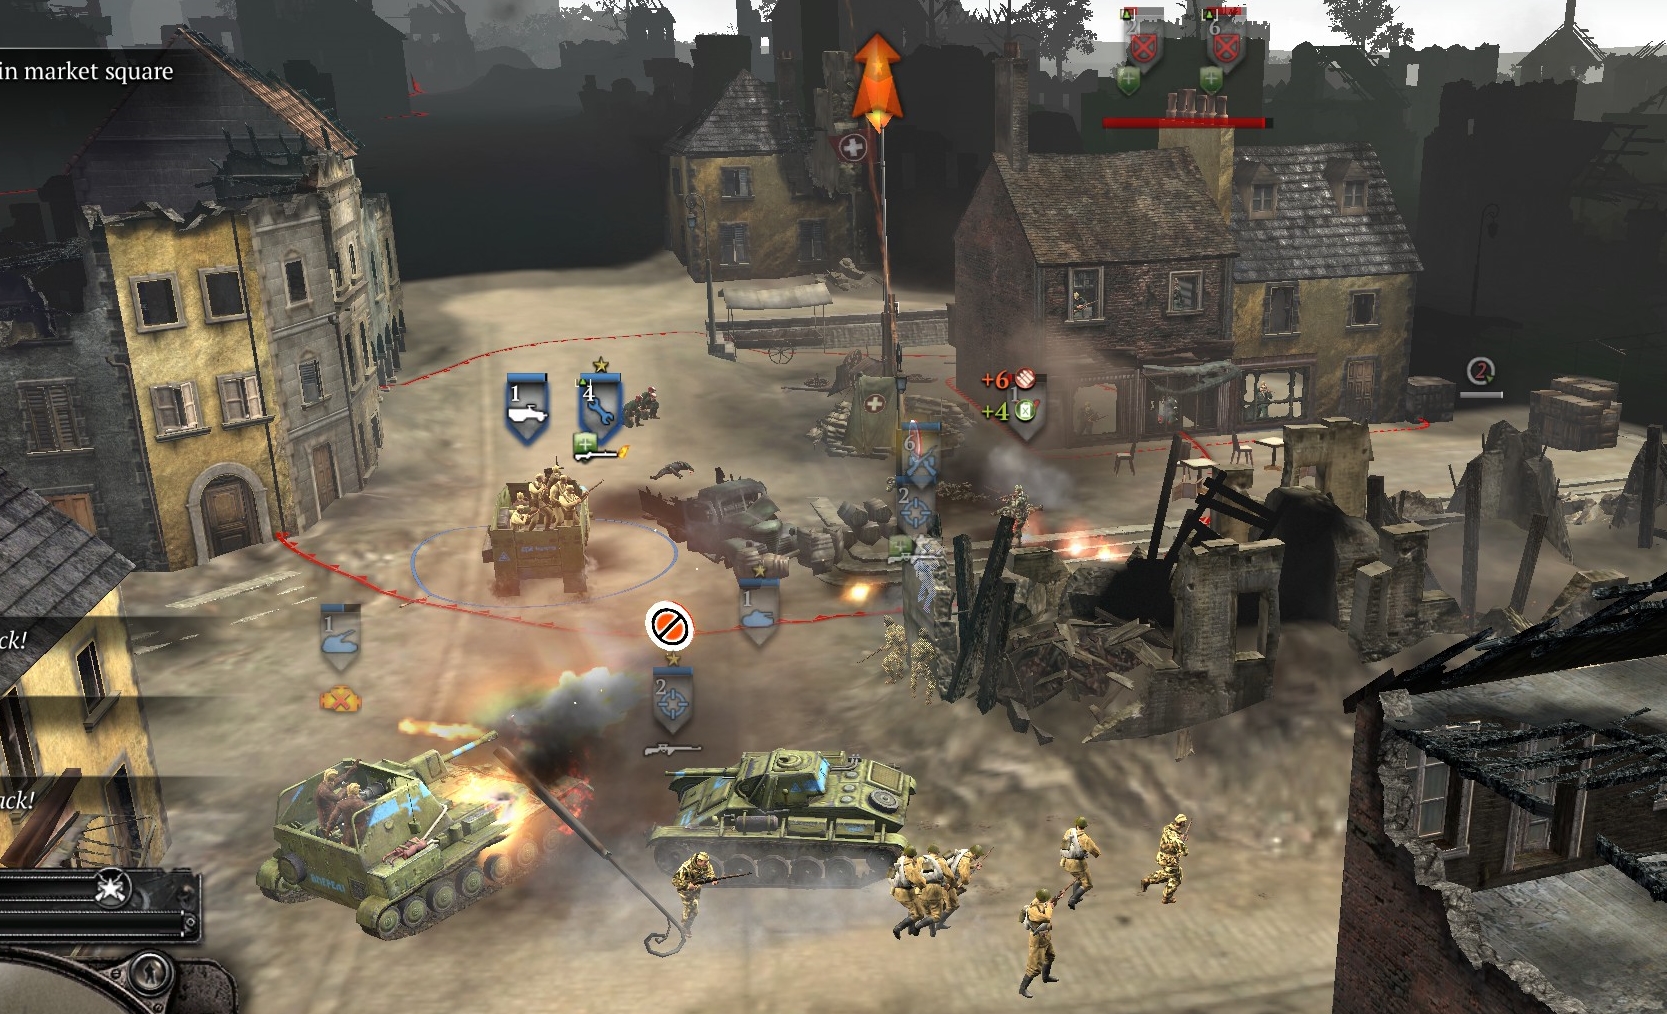
CAPTURE THE EAST VP
Note the tac map below. You should clear the paths with yellow arrows, and watch out for the Pak (and a mine in the road just past it) at the yellow “X.”
You will need to destroy at least an Ostwind and a Panzer IV near the repair station point, about 100 m north of that Pak.
After capping that repair point, clear the nearby building and fill it with snipers, in order to kill—with mortar assistance—nearby bunkers, Paks and MG42s. Also look out for any German reinforcement infantry coming up on the road from the SE.
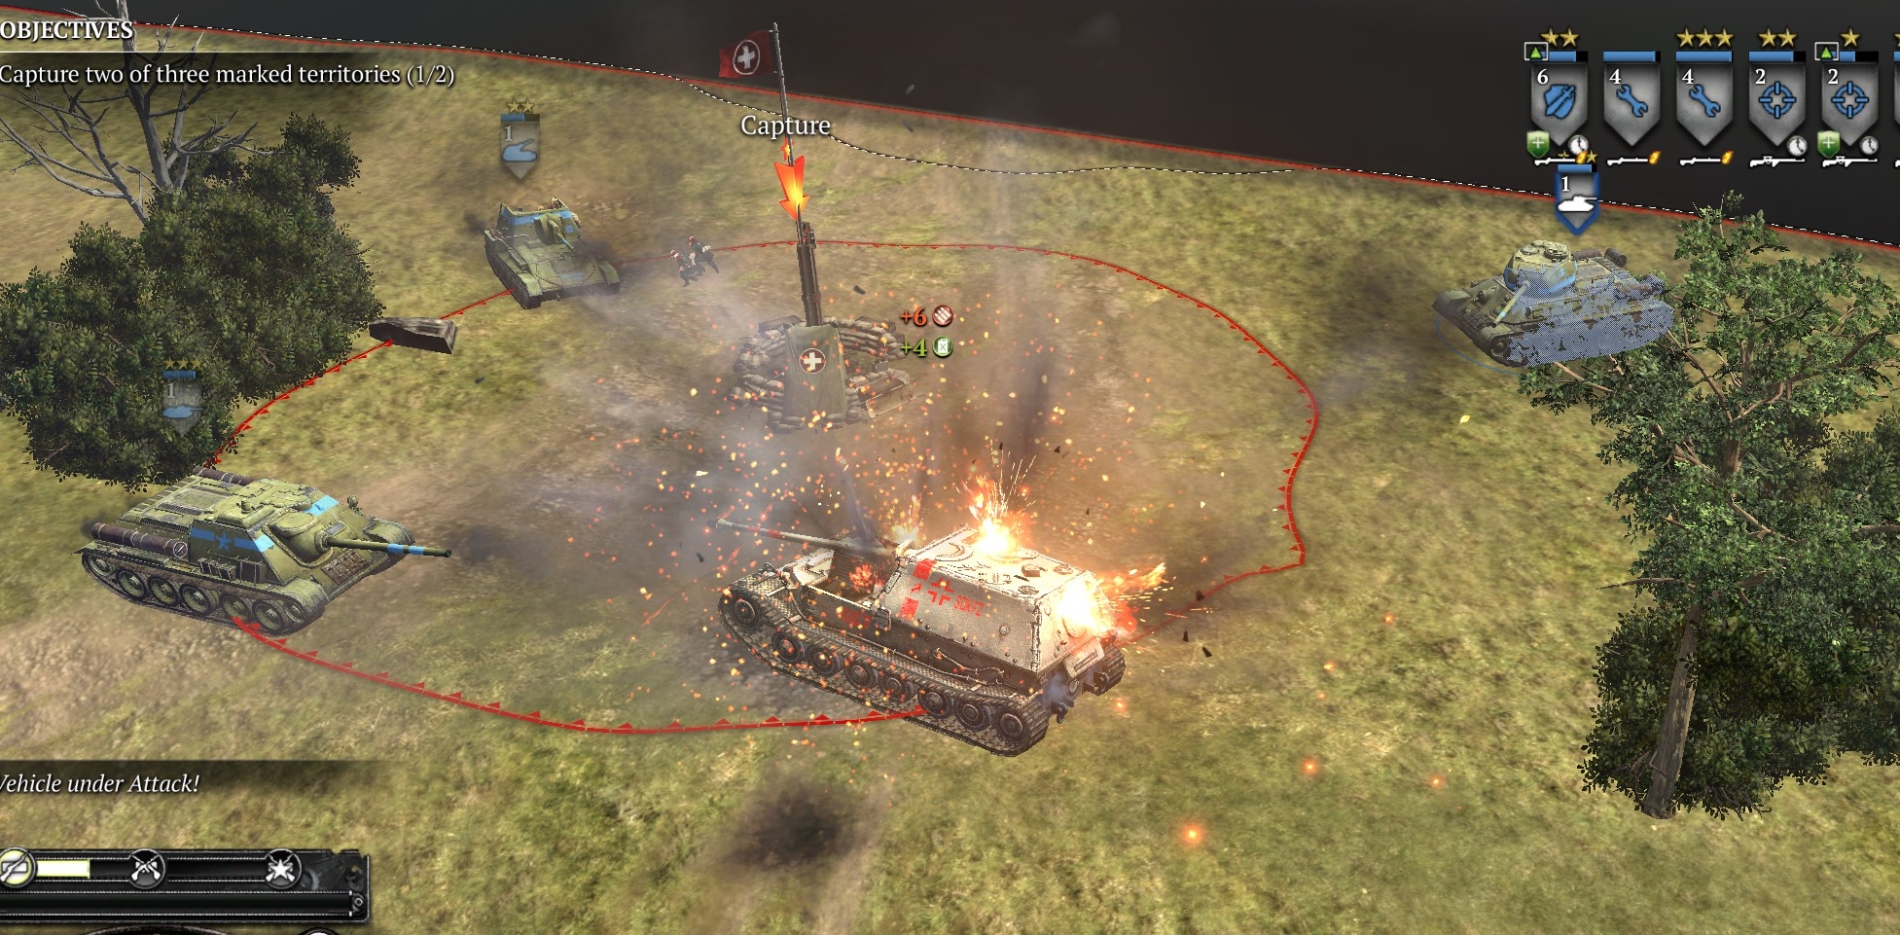
Use flanking tactics and the repair station (you will need at least four T-34s/Su-85s) to kill the half-dozen PzIVs/StuG-IIIGs at the VP, and the Elefant tank destroyer.
CAPTURE THE NORTH VP
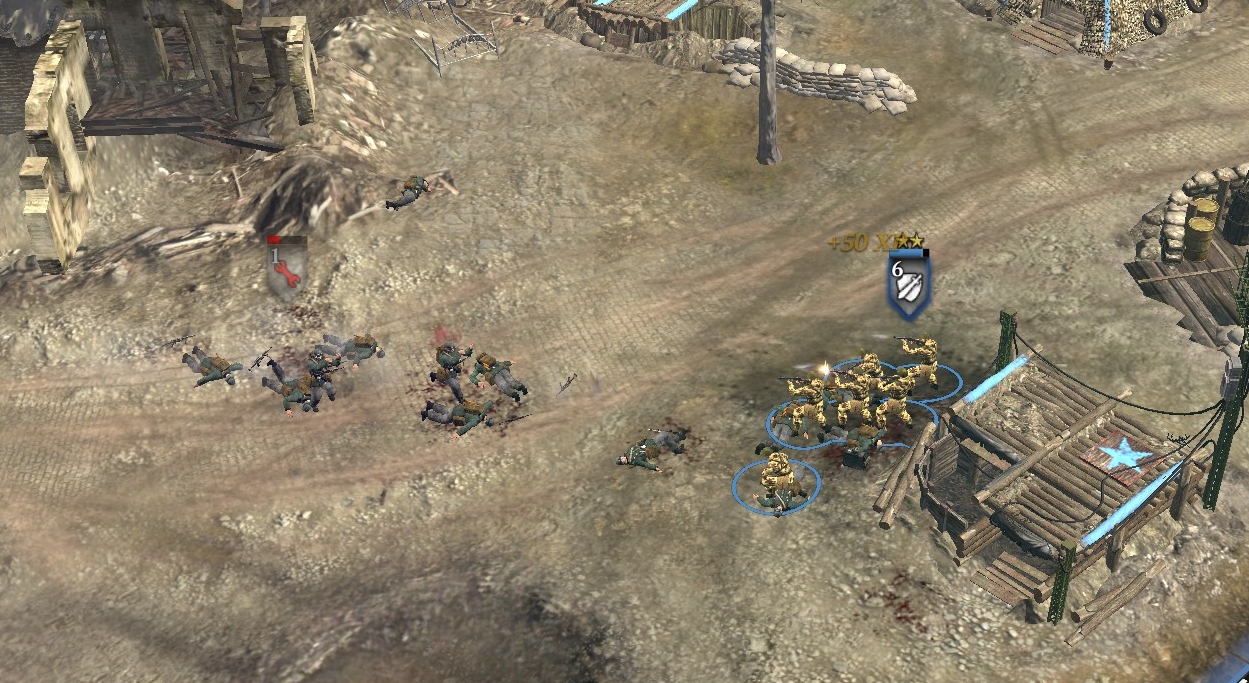
With standard tactics (minor and low-visibility units like snipers to scout, etc.) creep along the NE edge of the map to take the lookout tower point, and then approach the north VP. There is a nebelwerfer launcher and mortar team in the yard of the buildings behind the VP, so send a unit that can handle those. Otherwise do not get closer than about 15 meters from the VP, since there are vehicle and anti-personnel mines in that area.
A sniper on stealth mode, coming around the edge of the building behind the point and just barely into the point, is a good way to cap the point. You may get a message that rockets are incoming—usually you can ignore if you have already killed the nebelwerfer.
Before capping this VP, though, start moving most of your units south and then west into the city again, to a position behind a hedge SE of the castle. When you do cap this north VP, a phase-change will occur and you want to be ready. You also want to max out your pop cap before the phase change, so grab an extra Su-85 or T-34 if you can.
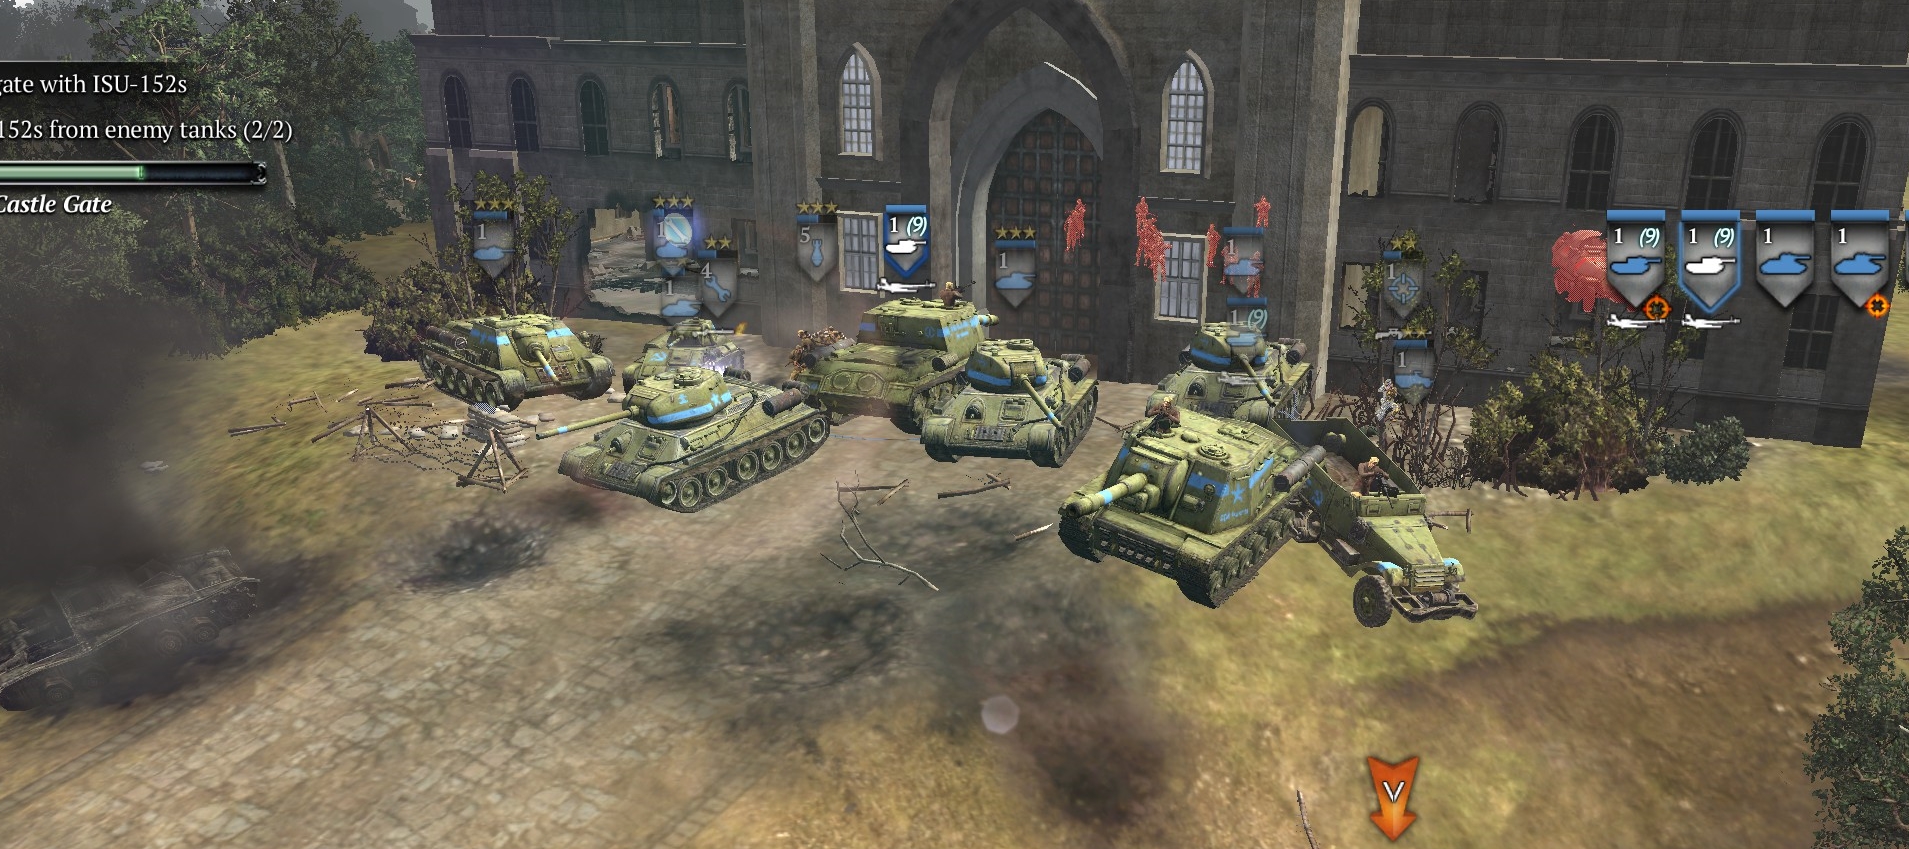
LAST BATTLE AT THE CASTLE
With the phase-change, you will get the ISU-152s at the bottom of the map, and you have to bring them to the castle gate and use their huge guns to destroy the (somehow insanely sturdy) castle gate. Some of your force can precede the ISU-152s on their northward route, but most should gather behind the aforementioned hedge.
When ready, they can get the attention of the German force guarding the castle, with a mortar barrage or whatever. German armor and Paks will come around to attack head-on, and your vetted T-34/85s and Su-85s, with snipers close behind, should handle it all reasonably easily.
You can also use your northward-moving force to flank the Germans, though this is hard to coordinate.
When you have cleared the armor and Paks guarding the gate, have one ISU-152 move forward and keep firing (attack ground) directly at the huge castle door, while everything else faces the other way to deal with counterattacks.
Note that there is a German mortar inside the castle that will try to wipe out any infantry you have at the door. You can mortar it back, though.
It takes probably 20-40 blasts from an ISU-152 to break the door—a door “damage bar” helpfully shows your progress. When the door is broken, the mission is over.
***