Your task in this mission is to clear German units from a large, fortified area on the edge of a strategically important airfield west of Caen.
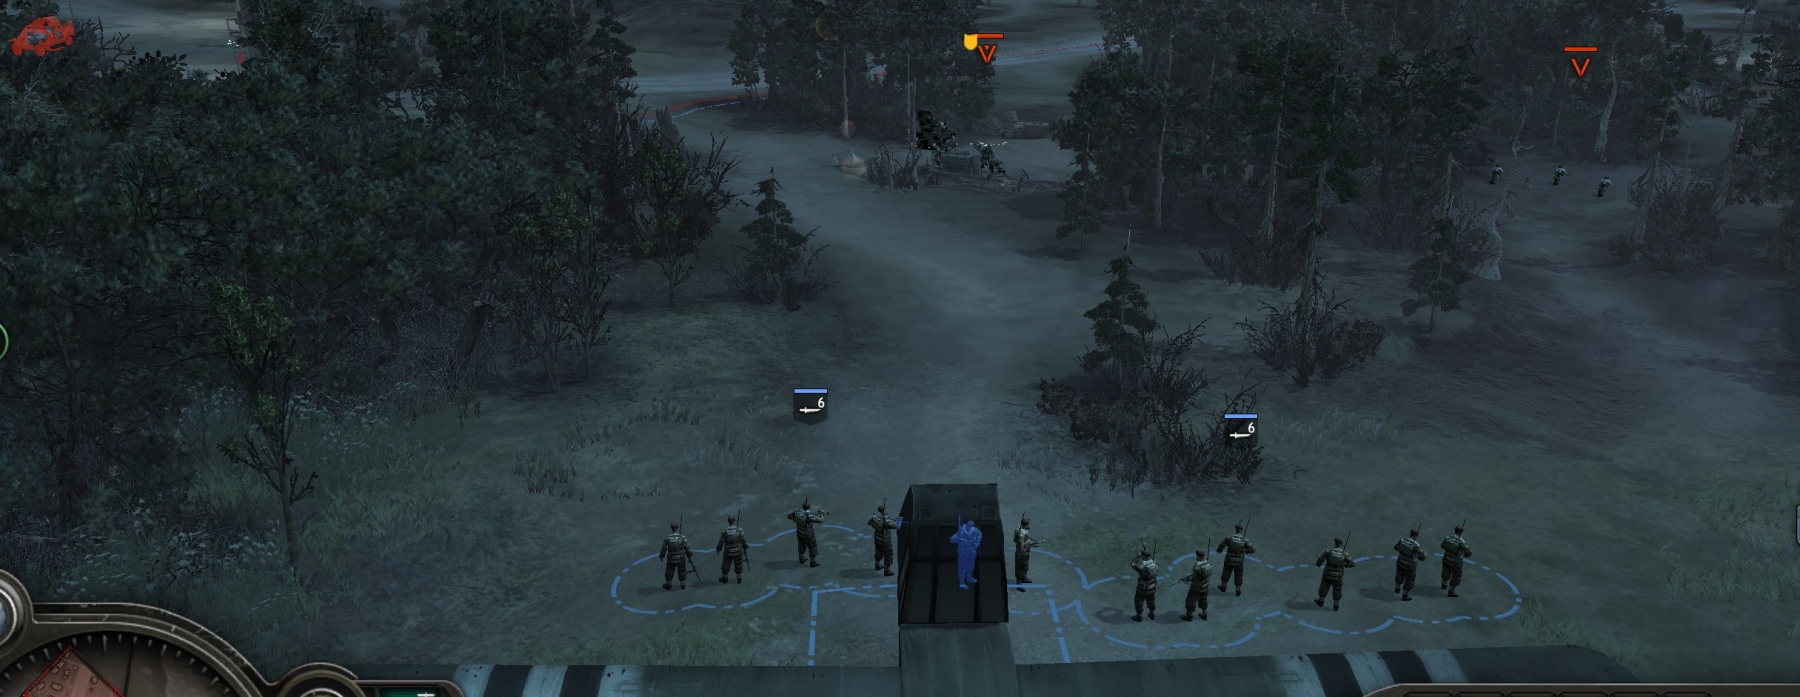
You begin in the bottom corner of the map with two British commando squads beside a glider. The glider somehow has the capacity to bring in more squads.
A few preliminary things to note:
- British commandos are superior to regular British infantry, but they are still fragile in firefights with German infantry.
- You will have no access to sappers or any of their abilities (e.g., vehicle repair) in this mission.
- There is no time-limit.
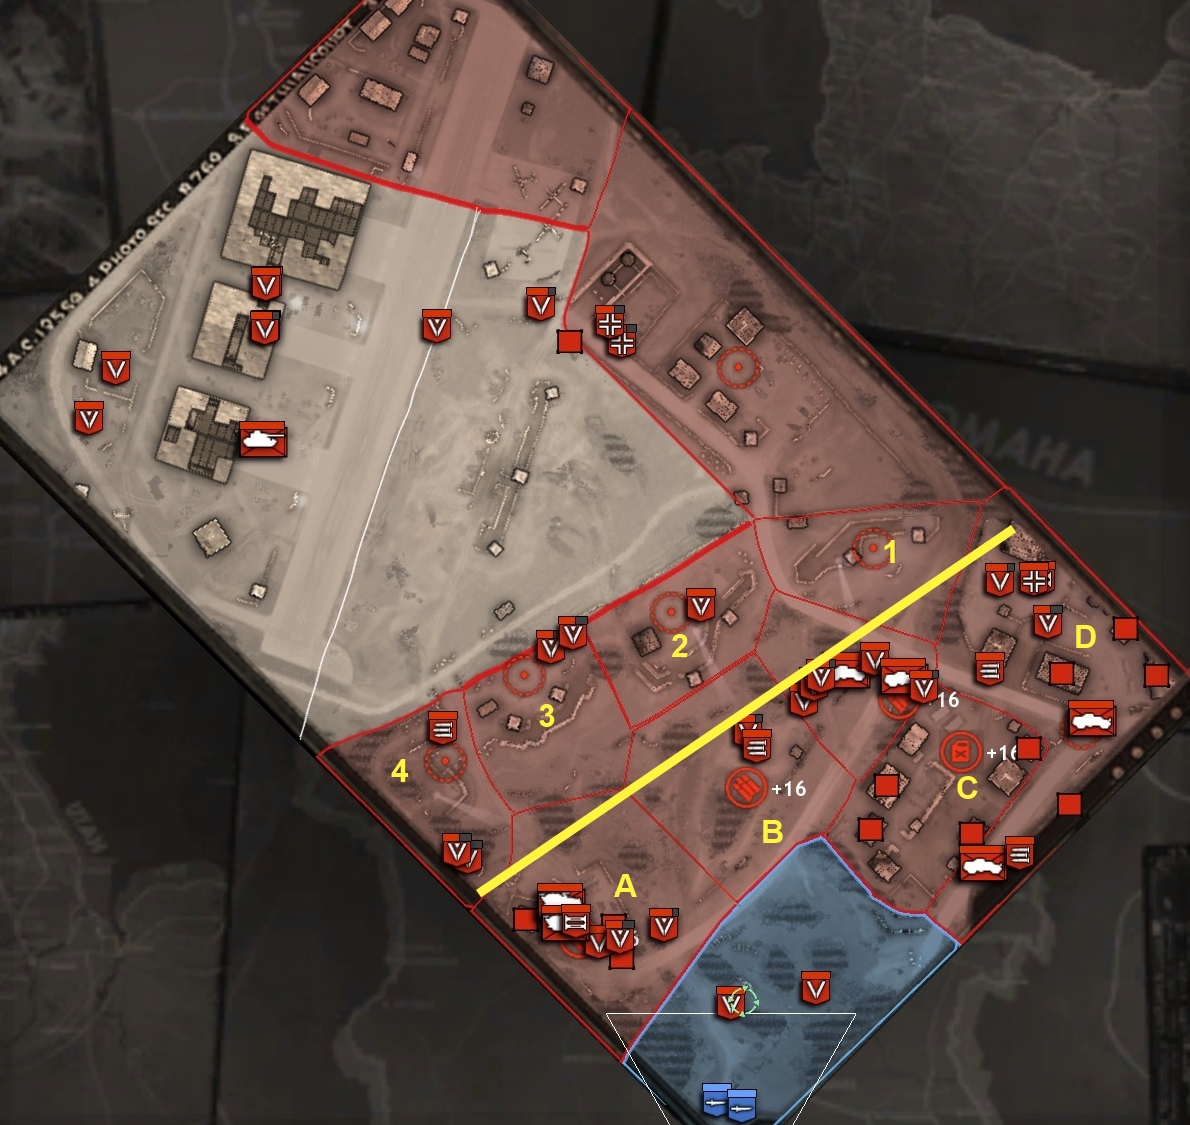
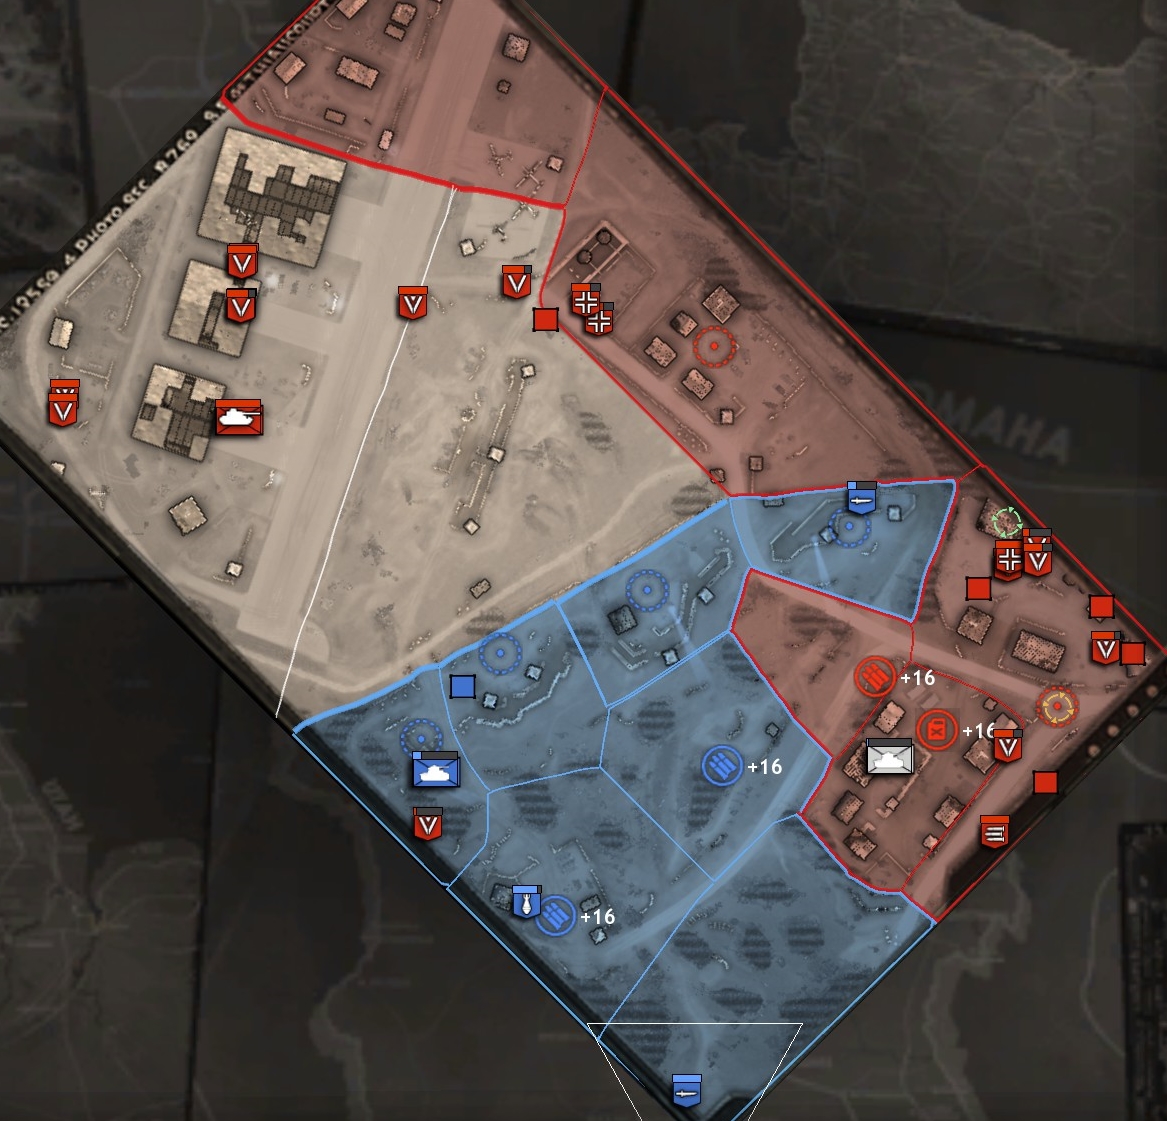
- Note (on the tac map below) the yellow line across the lower part of the map, do not venture to the northwest of those points, i.e. toward the airfield, for if you do, you will come in range of 88s in the main German defense line.
Starting tactical map (with fog-of-war turned off):
The mission has three parts or phases:
TAKING THE SOUTHWEST BASE (A)
First, bring in a third squad to max out your pop total.
Next, move your three squads more or less directly north on the path until they encounter a German grenadier squad behind sandbags.
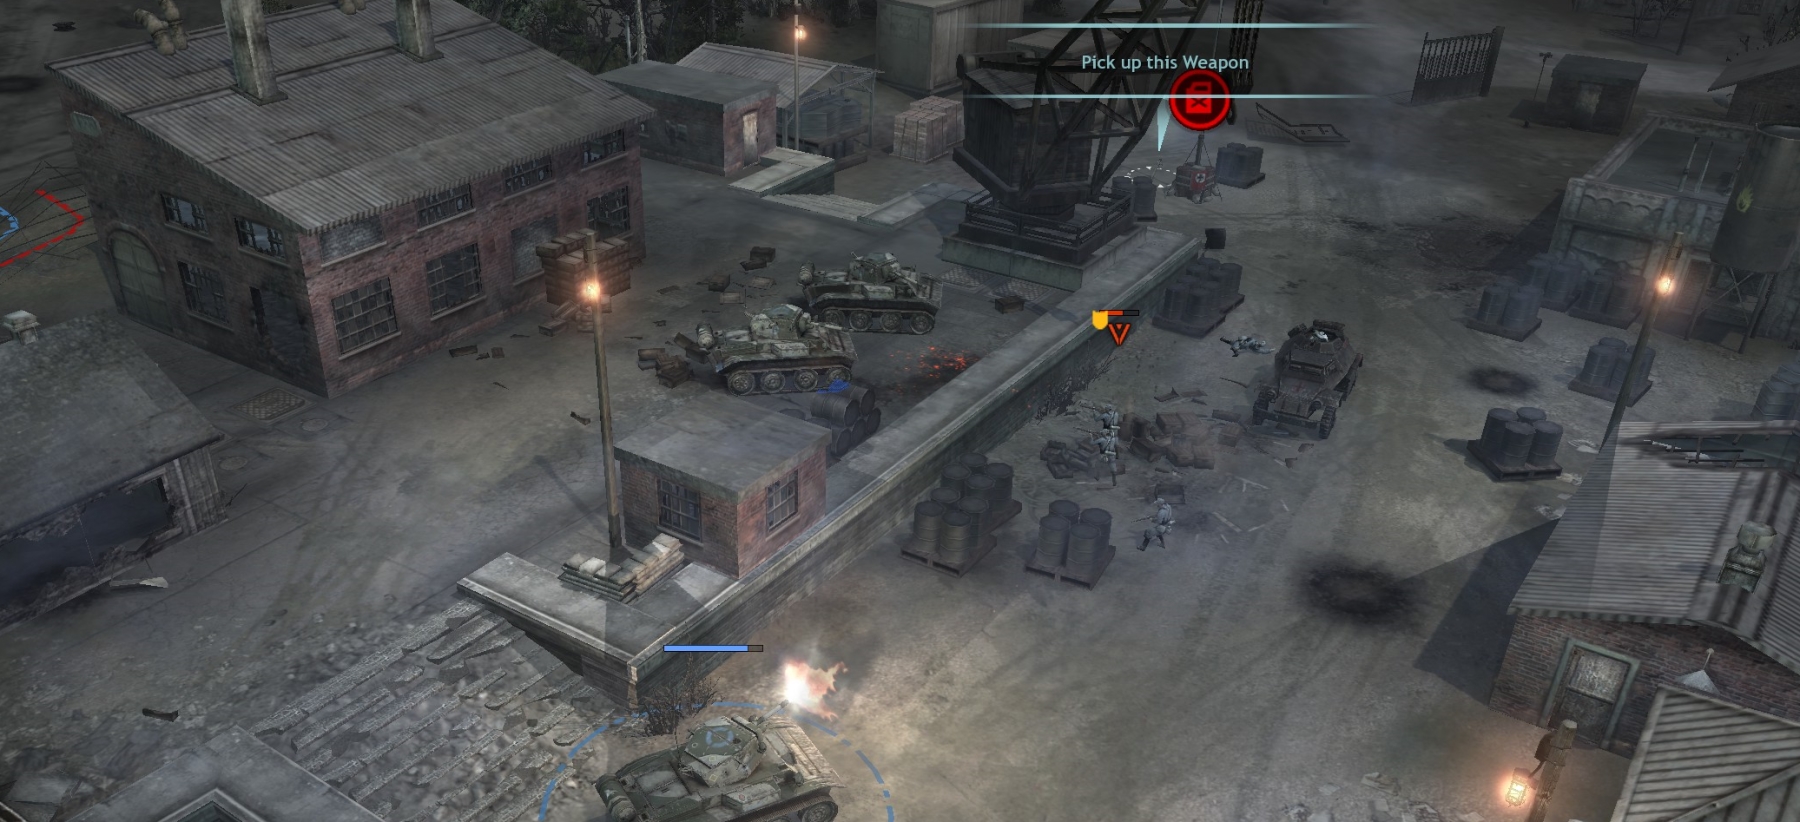
Wipe the gren squad, and grab the panzerschreck lying behind them. Another gren squad may attack from the right—wipe it too.
The main goal here is to destroy/cap a German base building, at point A on the map, that is part of the system guarding the airfield. The base building—clearly indicated by the UI—is at the back corner of a fenced compound that has a tower in front and an HMG and gren squad in the tower. The HMG initially is pointing away to the southwest (assuming north is the top of the map).
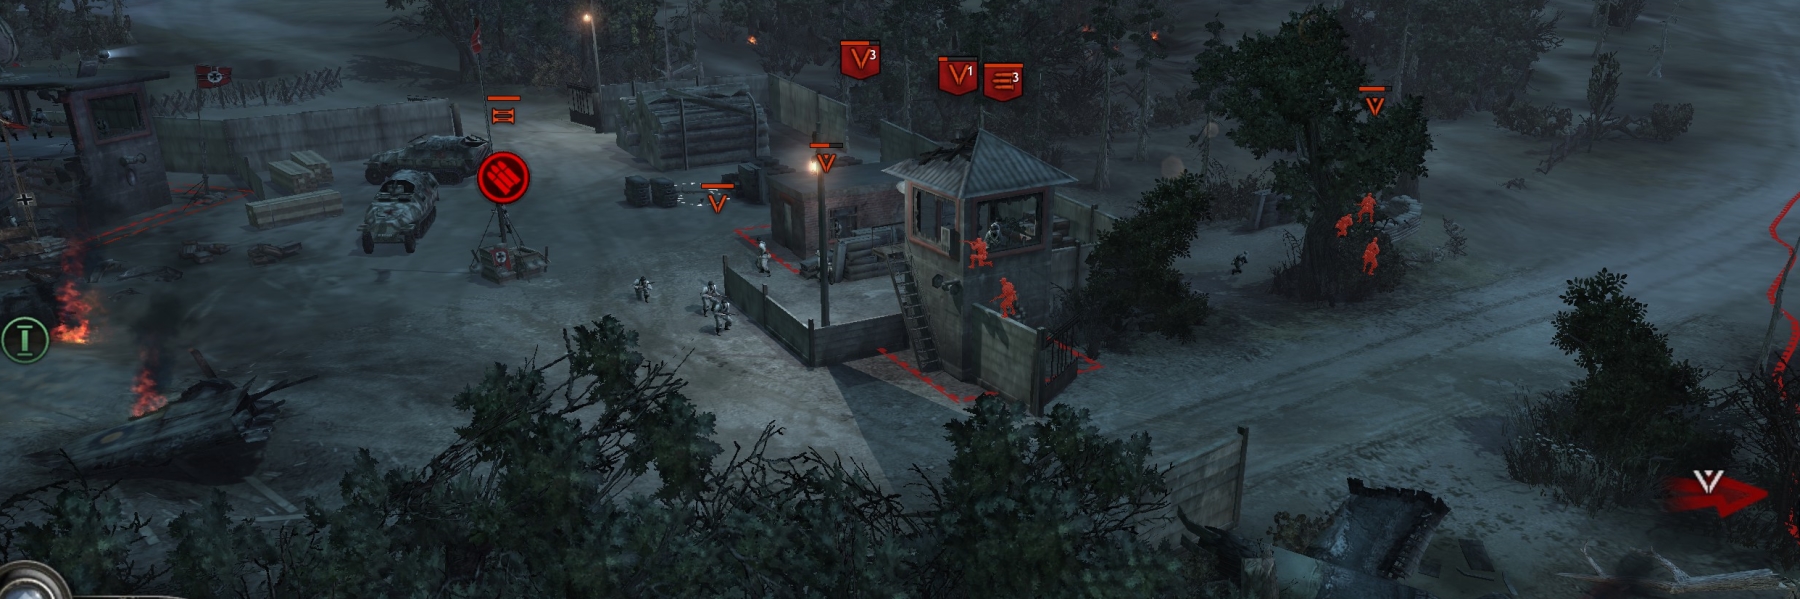
Your commandos are strong enough that they can simply move directly NW from their position in the woods and charge across the road to the HMG tower.
If any squad gets down to 2/6 strength: retreat, reinforce, return.
One squad, the one with the schreck, should continue past the tower, along the outside of the fence on the E/NE side of the compound. It should use the schreck (and another one lying inside the compound) to kill any 251s remaining in the compound.

The other two squads can toss grenades into the HMG tower to kill/disable its occupants. If the HMG remains active, your squads can retreat to the glider, then heal up and repeat until the tower has been neutralized.
When the HMG is de-crewed, run your squads into the compound and keep killing Germans till they’re all gone, retreating/reinforcing as needed. Blow up or cap (right-click on it after selecting one of your infantry units) the base building in the back corner.
TAKING THE NORTHEAST BASE (D)
The next task is to clear everything on the map up to and including another German base to the northeast.
To start this phase, you will land another glider, which disgorges mini tanks called Tetrarchs. Make sure you land this glider well inside your territory—otherwise it won’t produce more than one Tetrarch. Get a total of two or three of these armored vehicles. Upgrade them to improve their armor-piercing ability.
Heal up and reinforce your commandos.
With the Tetrarchs in the lead, and staying well clear of the bunker (and 88) to the NW, clear the muni point area (B) immediately to the NE of the base you just capped. Enemy units will include an HMG, mortar team, and one or two scout cars. You can grab a mortar when it is safe to do so after de-crewing it. LMGs and schrecks also are nice to have.
Again with the Tetrarchs leading the way, clear the area of industrial buildings (C on the tac map) to the SE. Note the additional uncrewed mortar available here.
When done with that, you will be on the doorstep of the NE base.
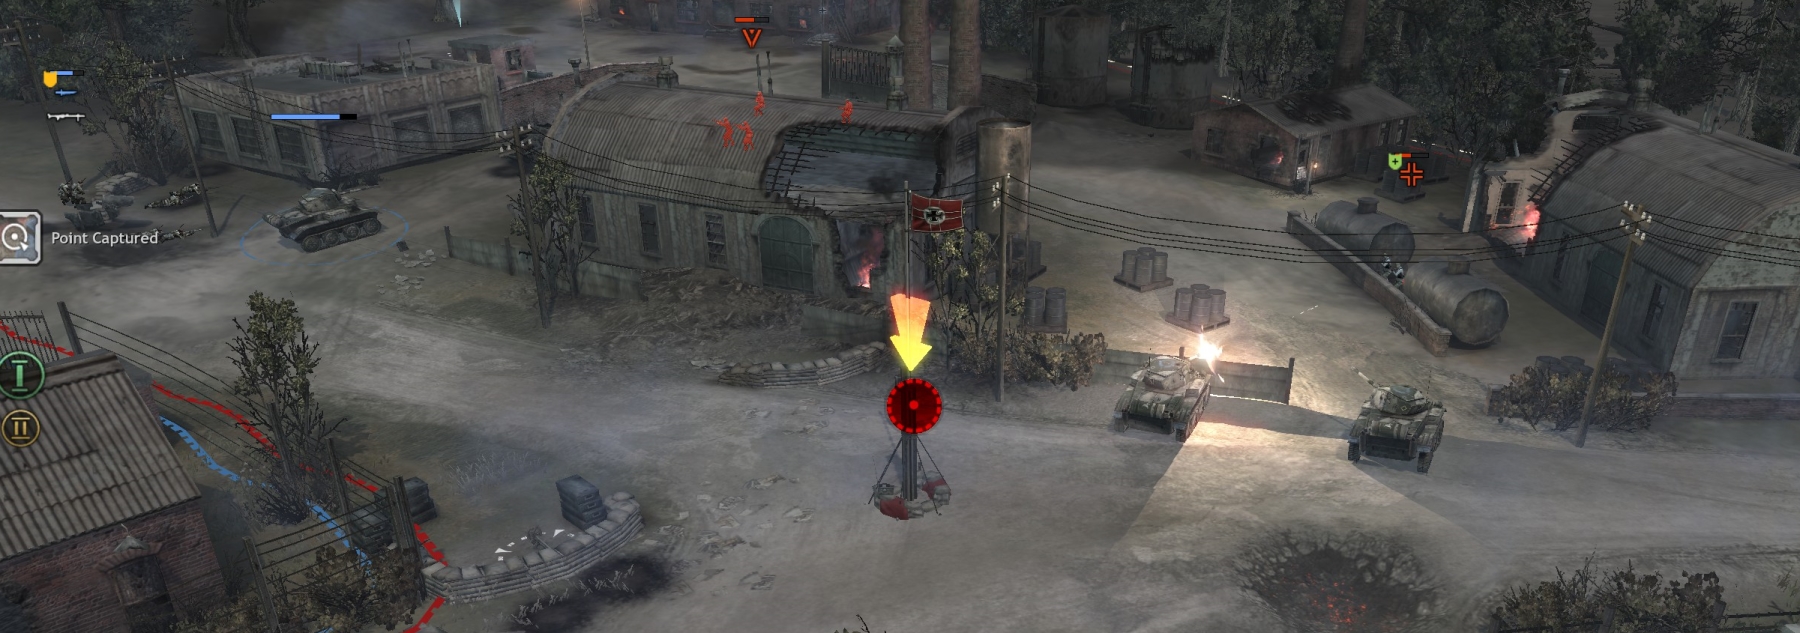
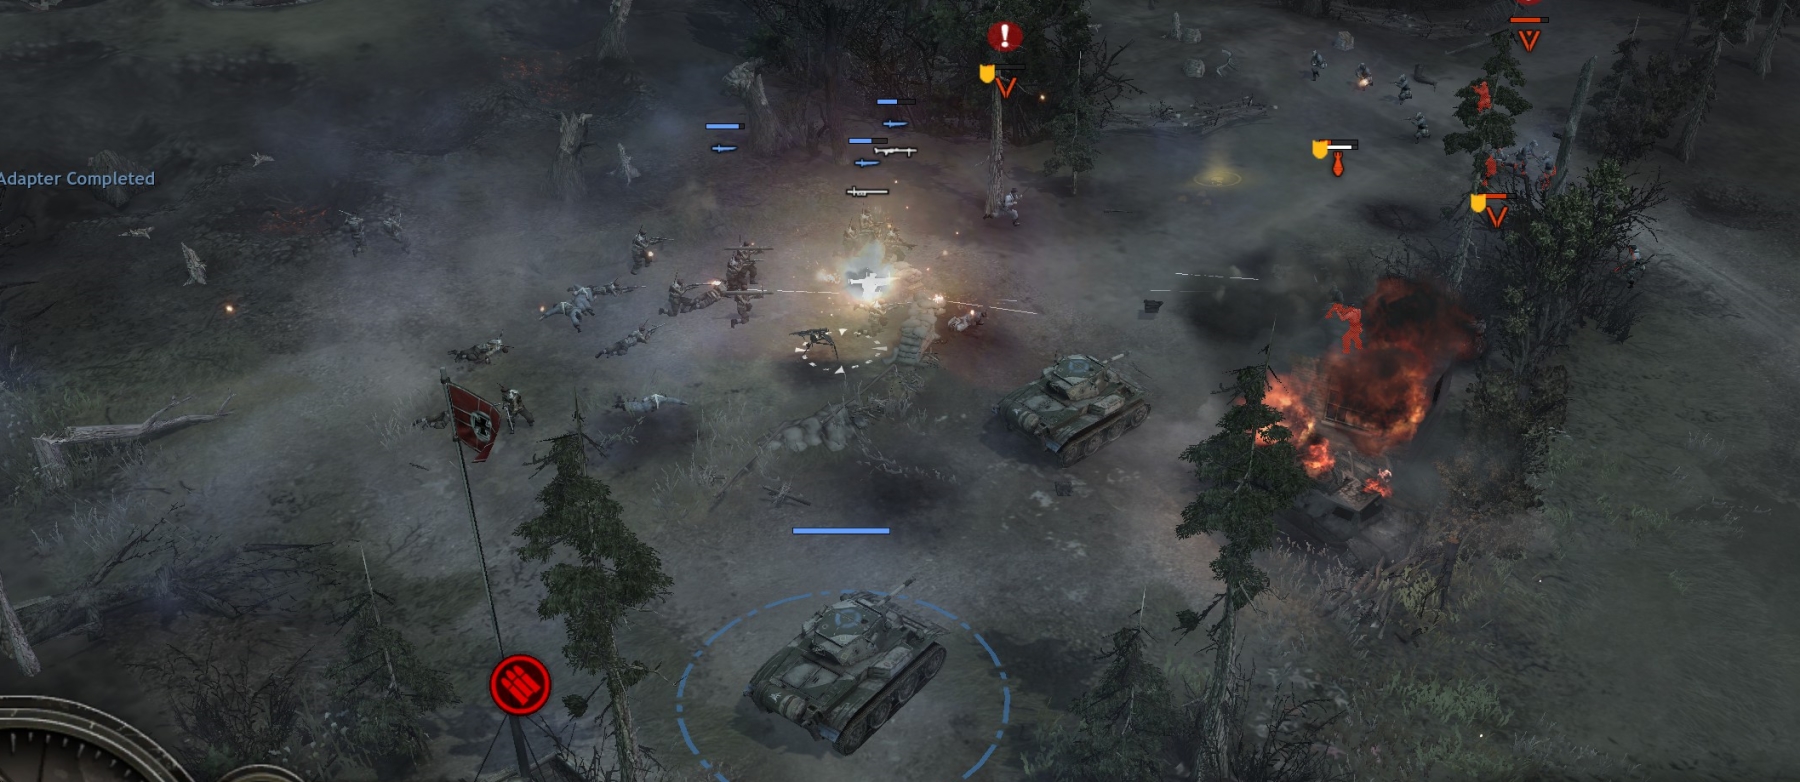
While your Tetrarchs park at the entrances and slowly reduce the defenders, one of your commando squads can cap the road point outside the base area. This triggers the entry of an infantry squad and sappers, and two Stuarts.
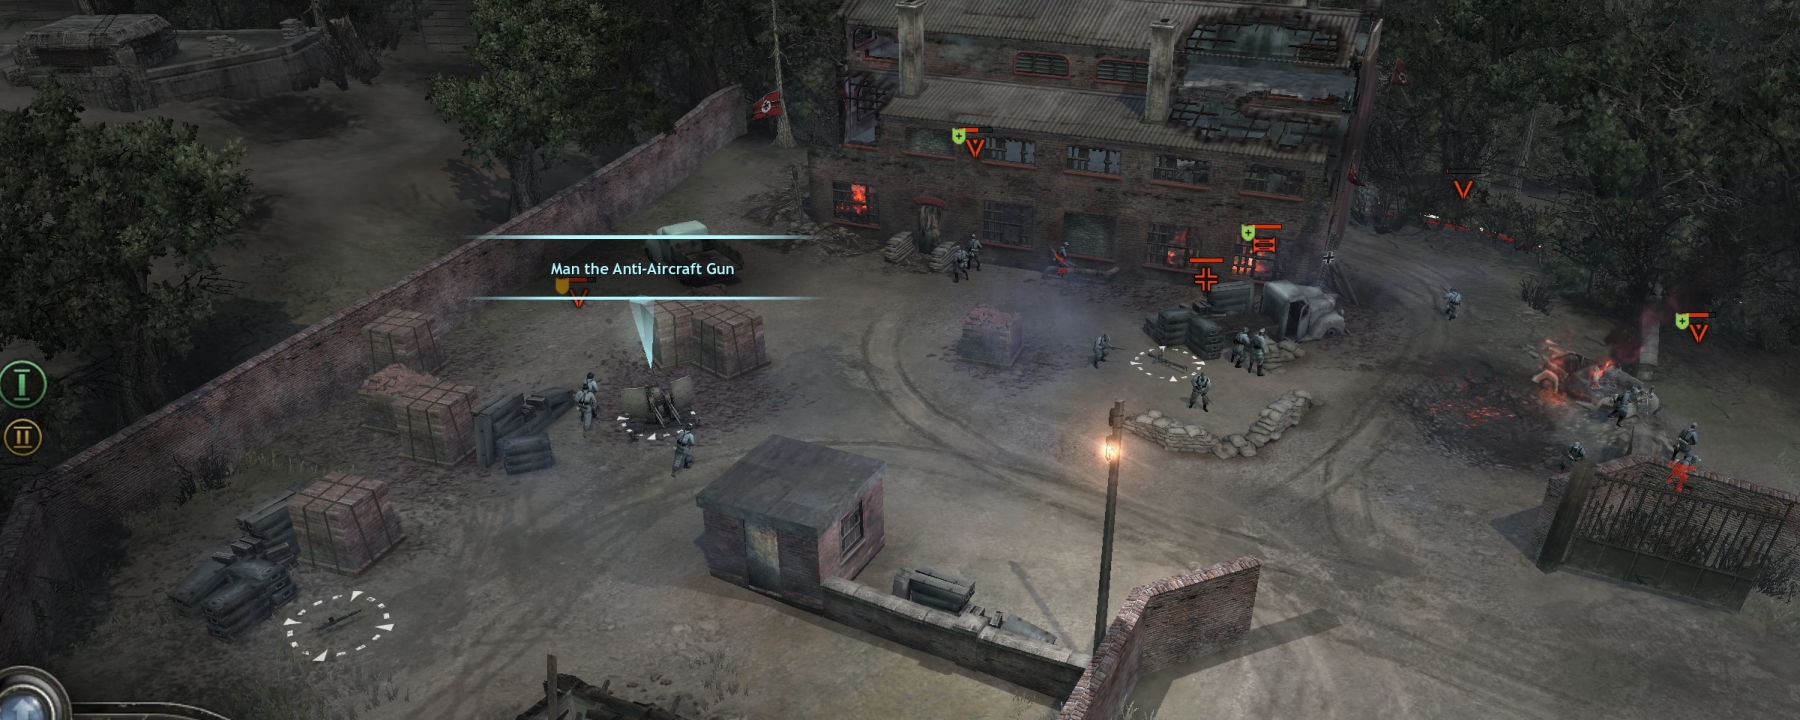
Now your combined armor can go into the base and terminate all remaining resistance. Your vehicles, with mortar support, should be able to de-crew the 20mm AA gun or prevent it from being crewed. Your units should not crew the AA gun themselves, though—it consumes pop points and won’t help in the next phase of the mission.
While you cap/destroy the base building to finish this mission phase, use your mortars (from behind the concrete fence in the base area) on bunkers in point 1 to the NW.
Crew all the panzerschrecks and MG42-LMGs you can.
WIPING THE GERMANS’ MAIN DEFENSE LINE
A bit further towards the airfield, the Germans have a line of defenses which includes HMGs, Paks, panzergrenadiers, bunkers, and 88s. The defense line includes four points (#1-4 right to left) you must clear and cap, starting with #1 on the northeast end of the line, just beyond your new base.
Note: German infantry units will regularly materialize within their concrete fortifications/trenches until you cap the point and kill all units in the immediate vicinity.
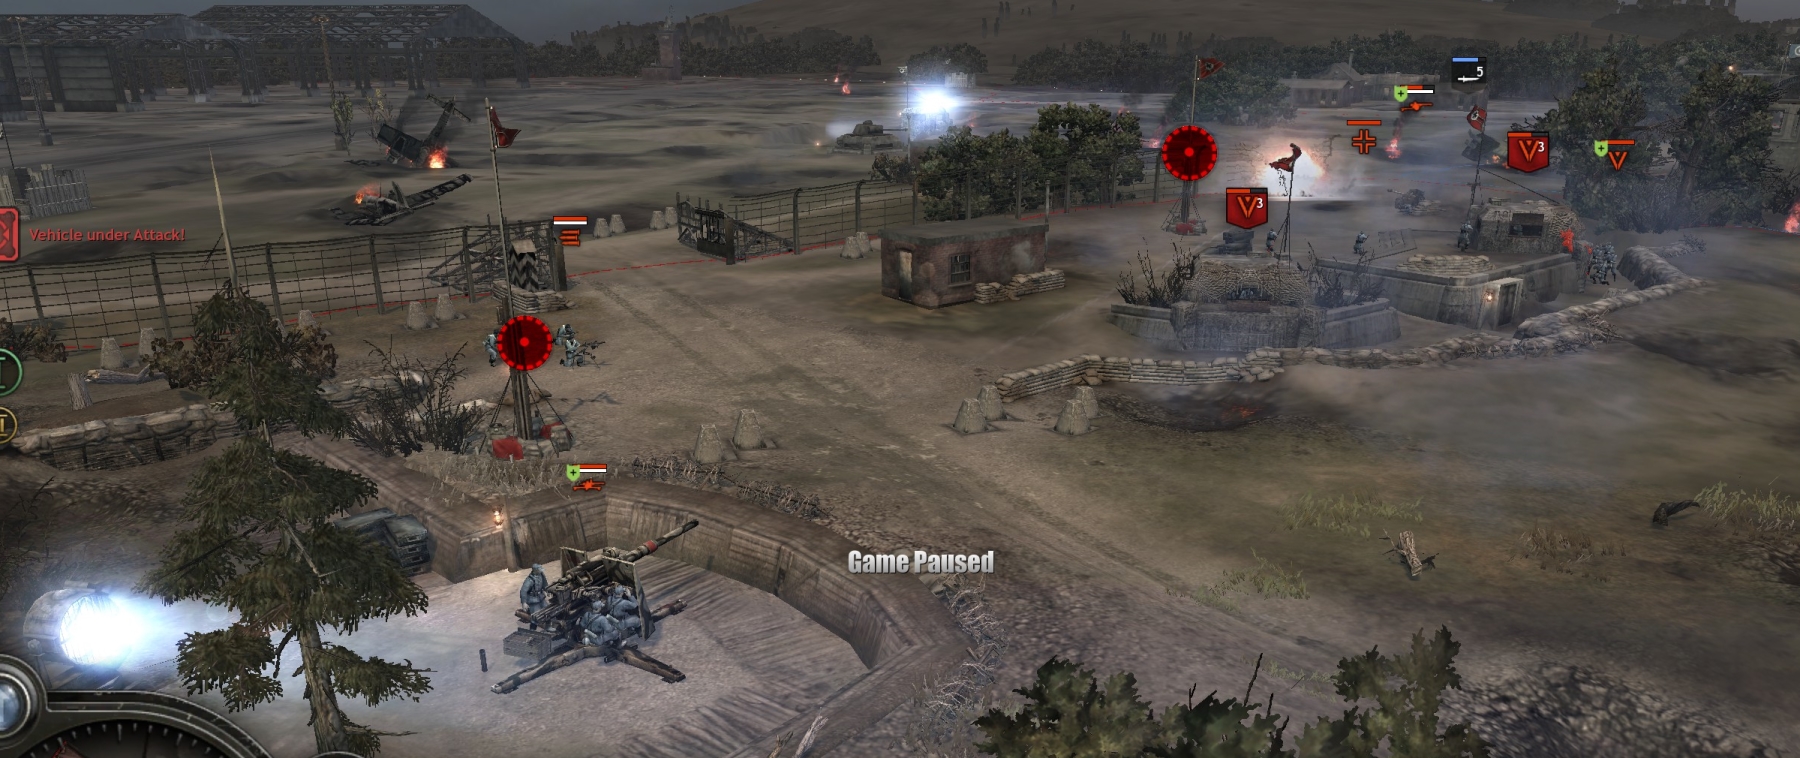
Point 1: Use your mortar(s) to destroy the bunkers and (if needed) to de-crew the 88. (In general, try not to destroy the German 88s, which will be very useful to you in the next mission.) Tanks to mop up. Cap the point. Also use your mortar, set near the fence behind point 1, to destroy the AT tower about 75m to the north—that also will help in the next mission.
![]()
Point 2: Again use your mortar(s) to de-crew any crewed weapons, and tanks to mop up what remains. Keep your units out of sight/range of the 88. While you cap the point, put an HMG or LMG squad into the large square building here for defense against the German infantry squads that sometimes attack from the north.
![]()
Point 3 and 4: Use your mortar(s), tanks and infantry, standing off at max range, to wipe the German units at point 3. Then move into range enough that your mortar(s) can de-crew the 88 at point 4. If needed, rush the 88 with infantry and grenade the crew. Cap these points.
If you want the mission medal, then, at any time during this last phase of the mission, you have to land gliders full of commandos at the UI-designated spots near and behind the airfield, first to blow up some storage tanks and second to blow up some generators. It is not difficult, with some practice. Note that you cannot reach these areas over land from the position of the rest of your force—the AI will take control of any unit you send so that it stops moving as directed, and a series of explosions will then destroy the unit, because (as the UI informs you) your unit was “walking into registered artillery.”
An alternative approach to this mission is, when you first get some Tetrarchs and crew a mortar, to take not only the muni point near your Tetrarch glider but also point #2 in the Germans’ main defense line, which is just ~50m away. From point #2 you can take point #1 and then points #3 and #4. You may have to do a lot of retreating/reinforcing, and the “Allied artillery” will seek you out when you are in that point 1-4 zone, but it is very doable.
Once you have taken points 1-4, you can take the NE base, at which point the mission skips the last phase and finishes abruptly.
***