This is a defend-your-ground mission that follows immediately from the previous (“Crucible”) mission. You will start with the units and overall map state you had at the end of the Crucible mission, including laid mines, so you can use the latter part of that mission to prepare for this one—which can save you a lot of hassle.
To win this mission, you must retain control of at least one of the three VPs on the map through a long series of increasingly powerful German armor and infantry assaults. The mission expects you to use the cathedral VP as your base, but that is not necessary; in fact, though it involves a more complex strategy, focusing your defense at the courtyard VP south of the cathedral makes it easier to destroy German SP-artillery quickly and to maintain substantial map control.
To win the special mission medal (Victoria Cross) you must destroy or force the retreat of a King Tiger at the end. But this is an odd map—really a broken mission design, in my opinion—where KTs suddenly materialize and dematerialize in certain areas under certain circumstances, so you might end up killing four or five of the things before you encounter the one at the end of the mission.
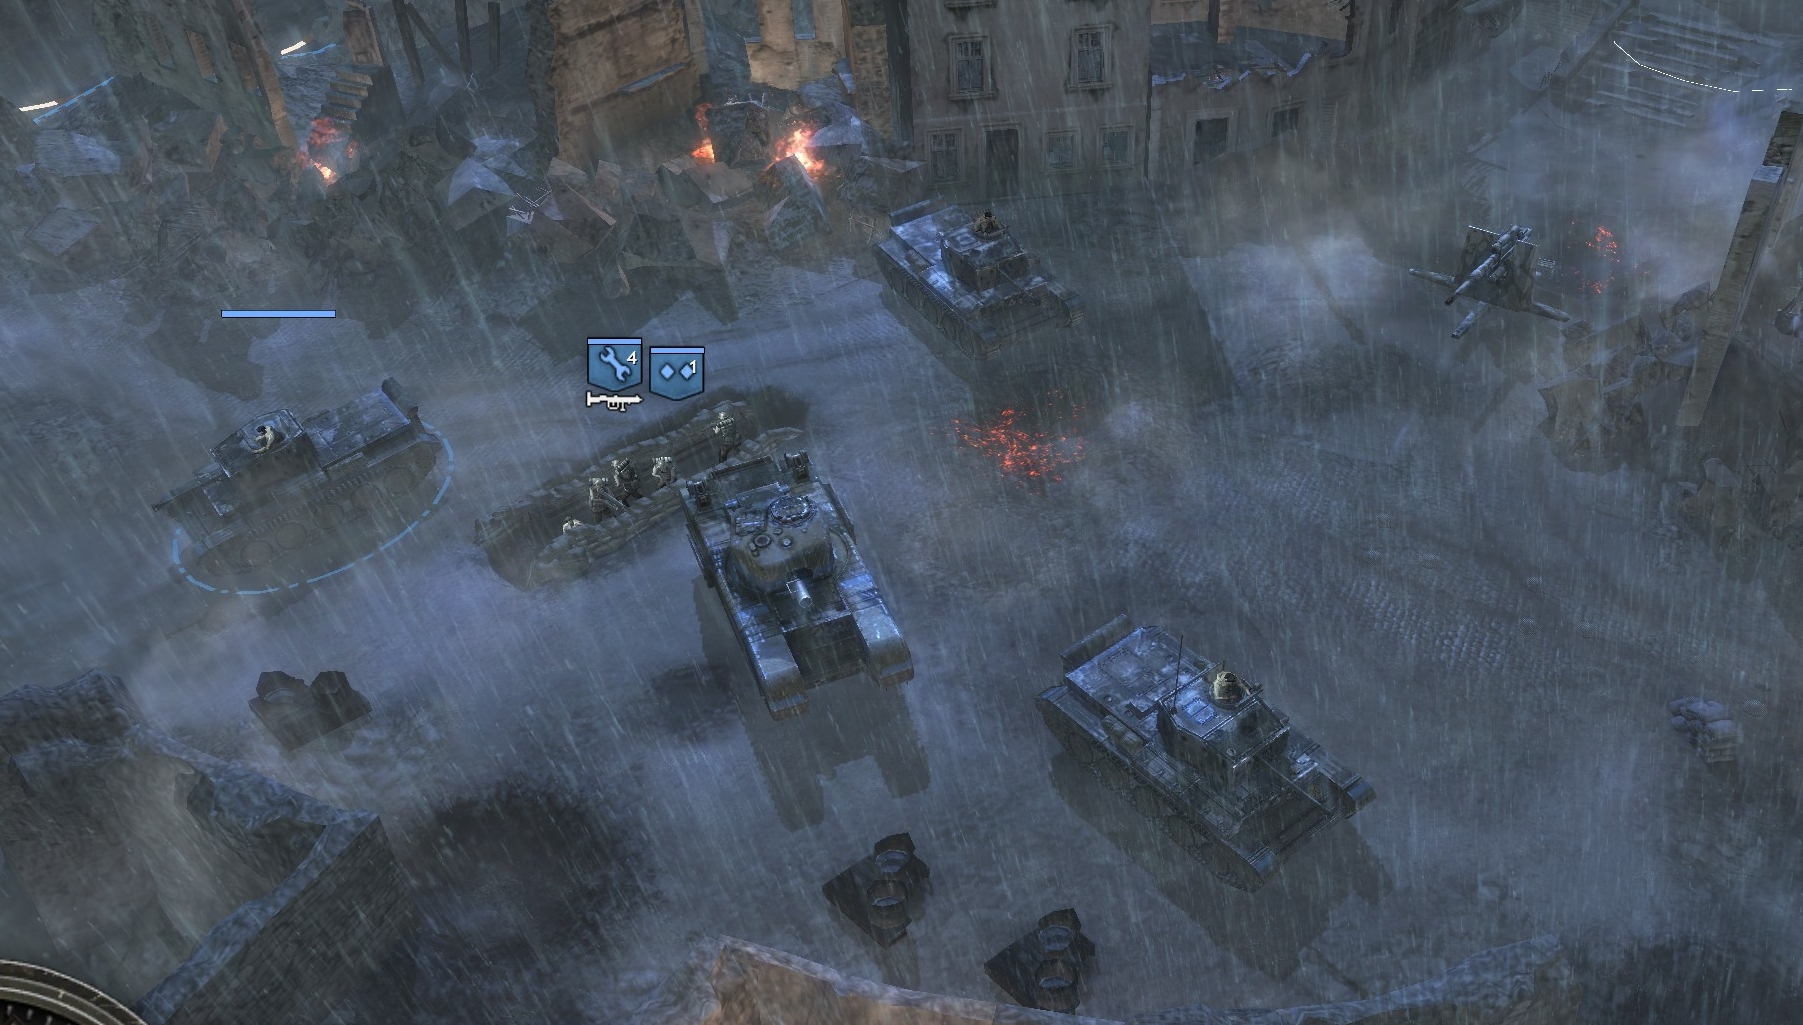
Another important feature of the mission is the attack, just one minute into the mission, of a Tiger tank supported by five panzergrenadier and pioneer teams from the southeast end of the avenue that runs to the south end of the cathedral. So the first minute of the mission is a prep phase for that attack. The second mission phase begins when the Tiger shows up, and does not end until you kill the Tiger (or fail to kill it and lose when it destroys your base buildings)—the support infantry will flee when the Tiger is dead. The third phase is the main part of the mission, which ends with a heavy-armor assault including the KT, Tigers and Jagdpanthers.
By default (if there is no record of the previous mission in the game files), you start at the cathedral with two Stuarts and three PIAT-equipped sapper teams.
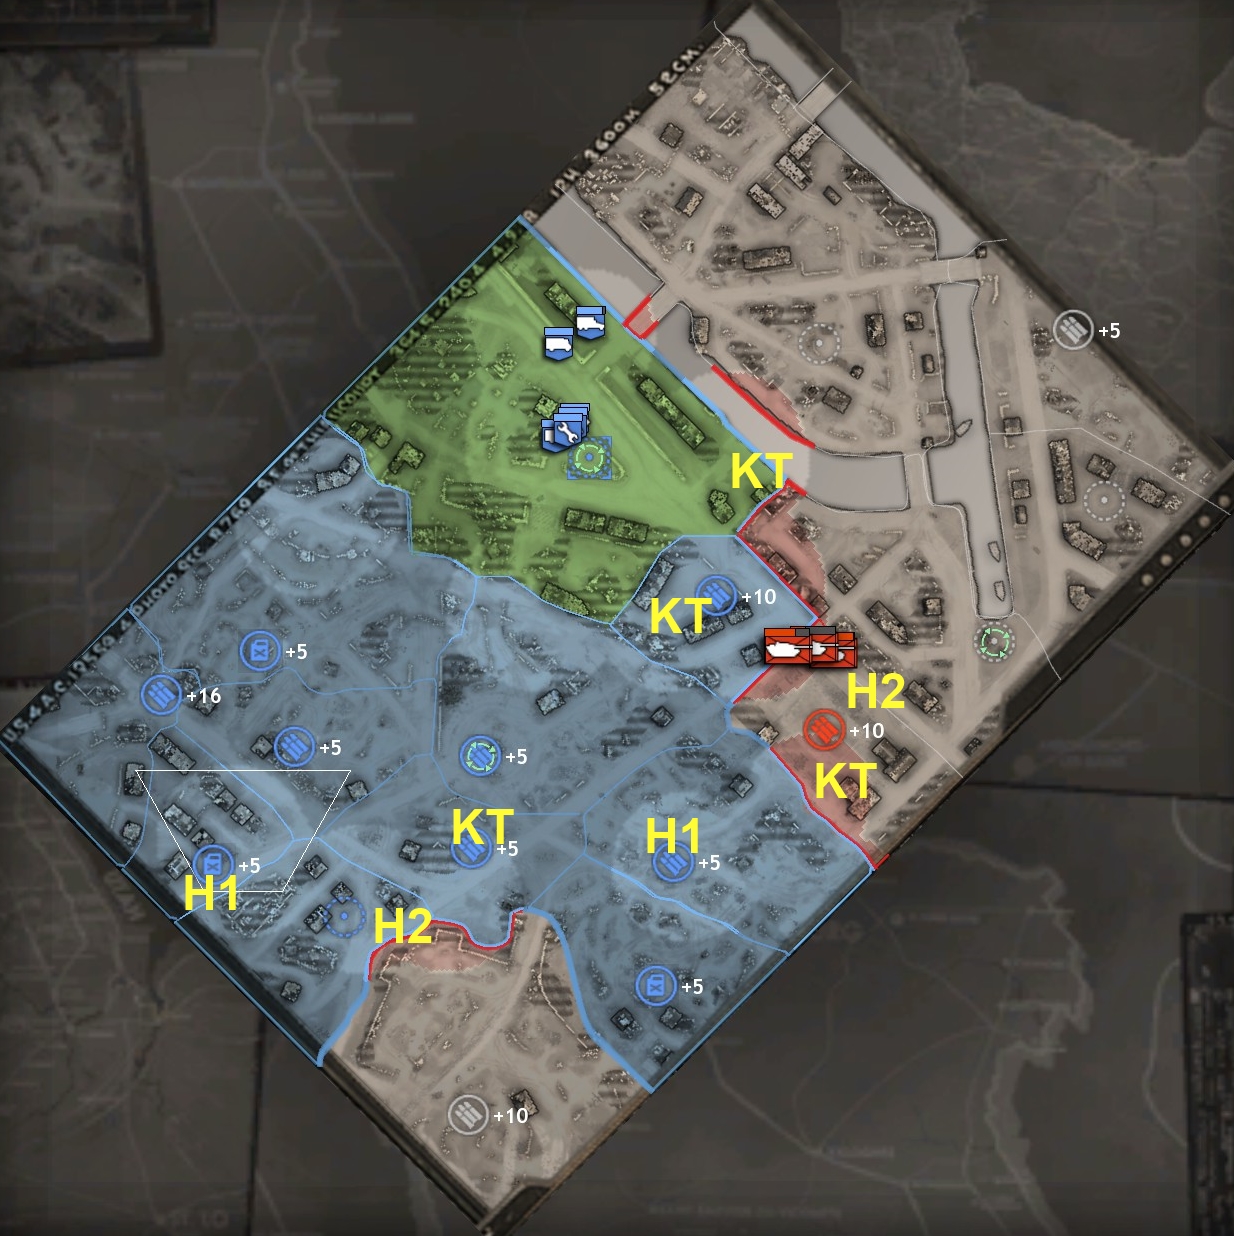
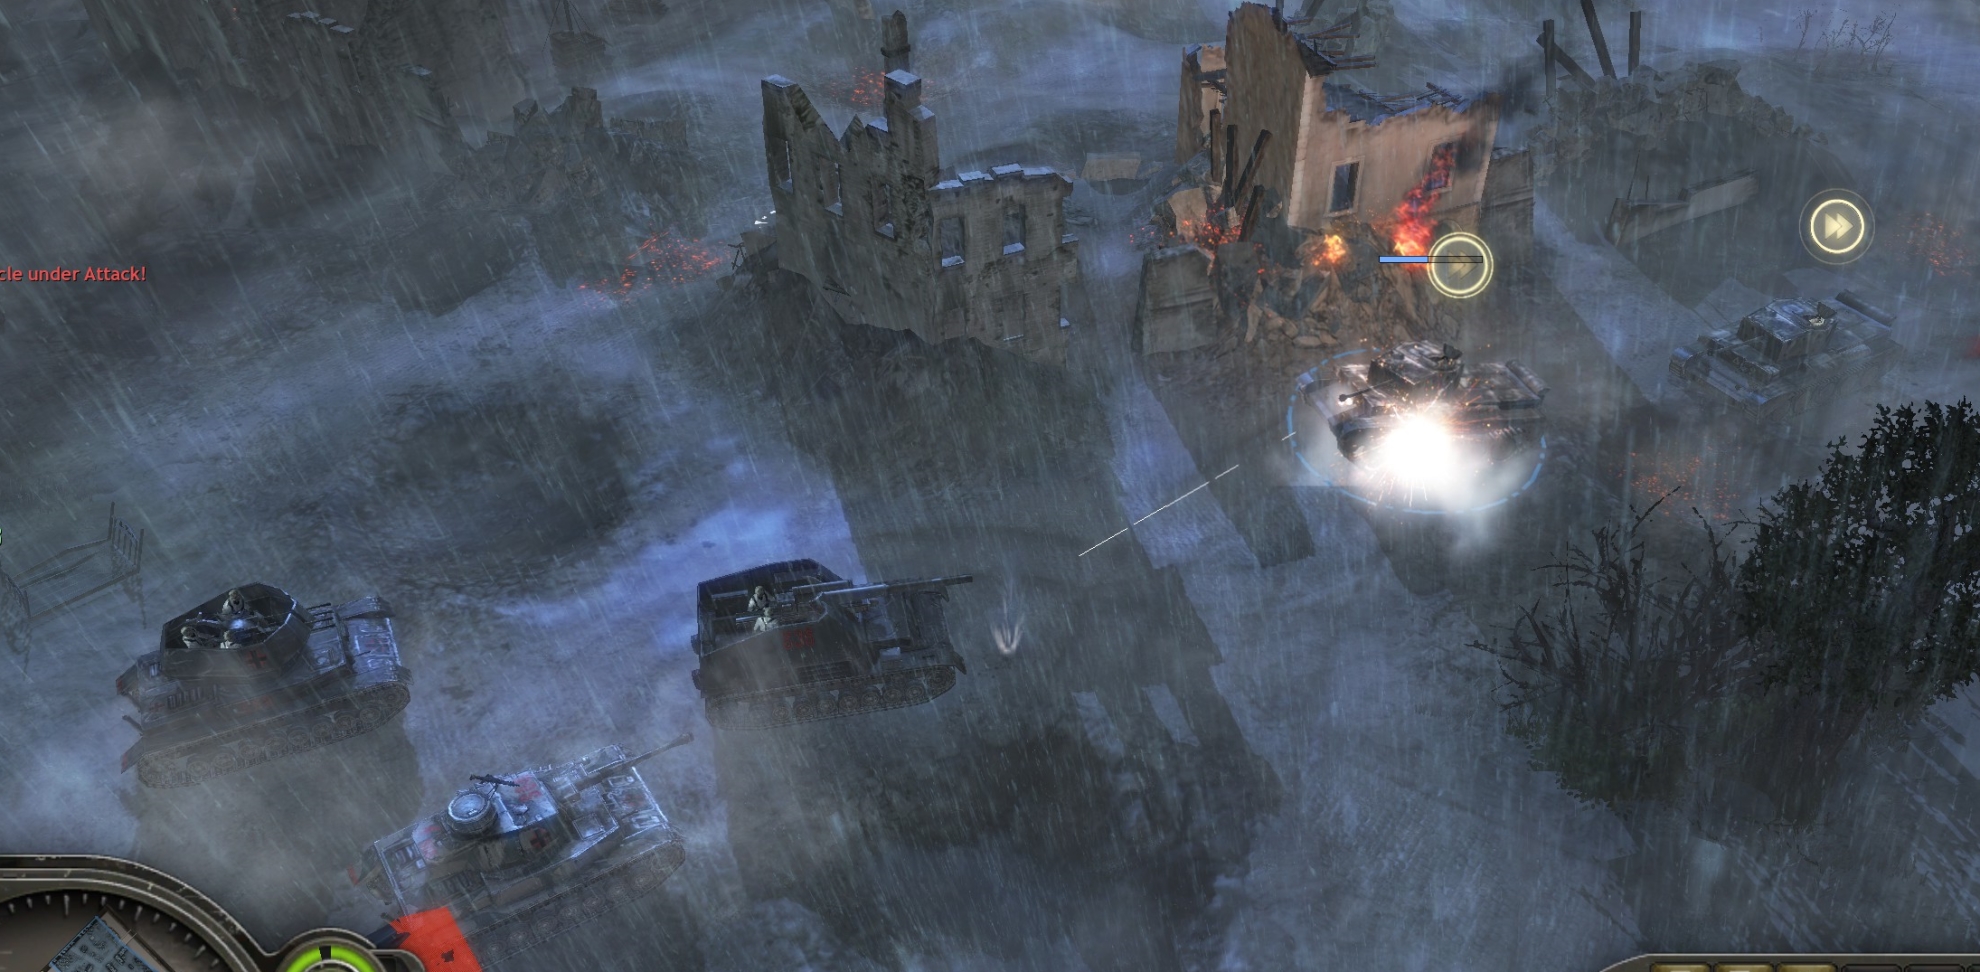
An easy, and easy-to-describe strategy for this mission is to defend the cathedral VP as follows (and see images):
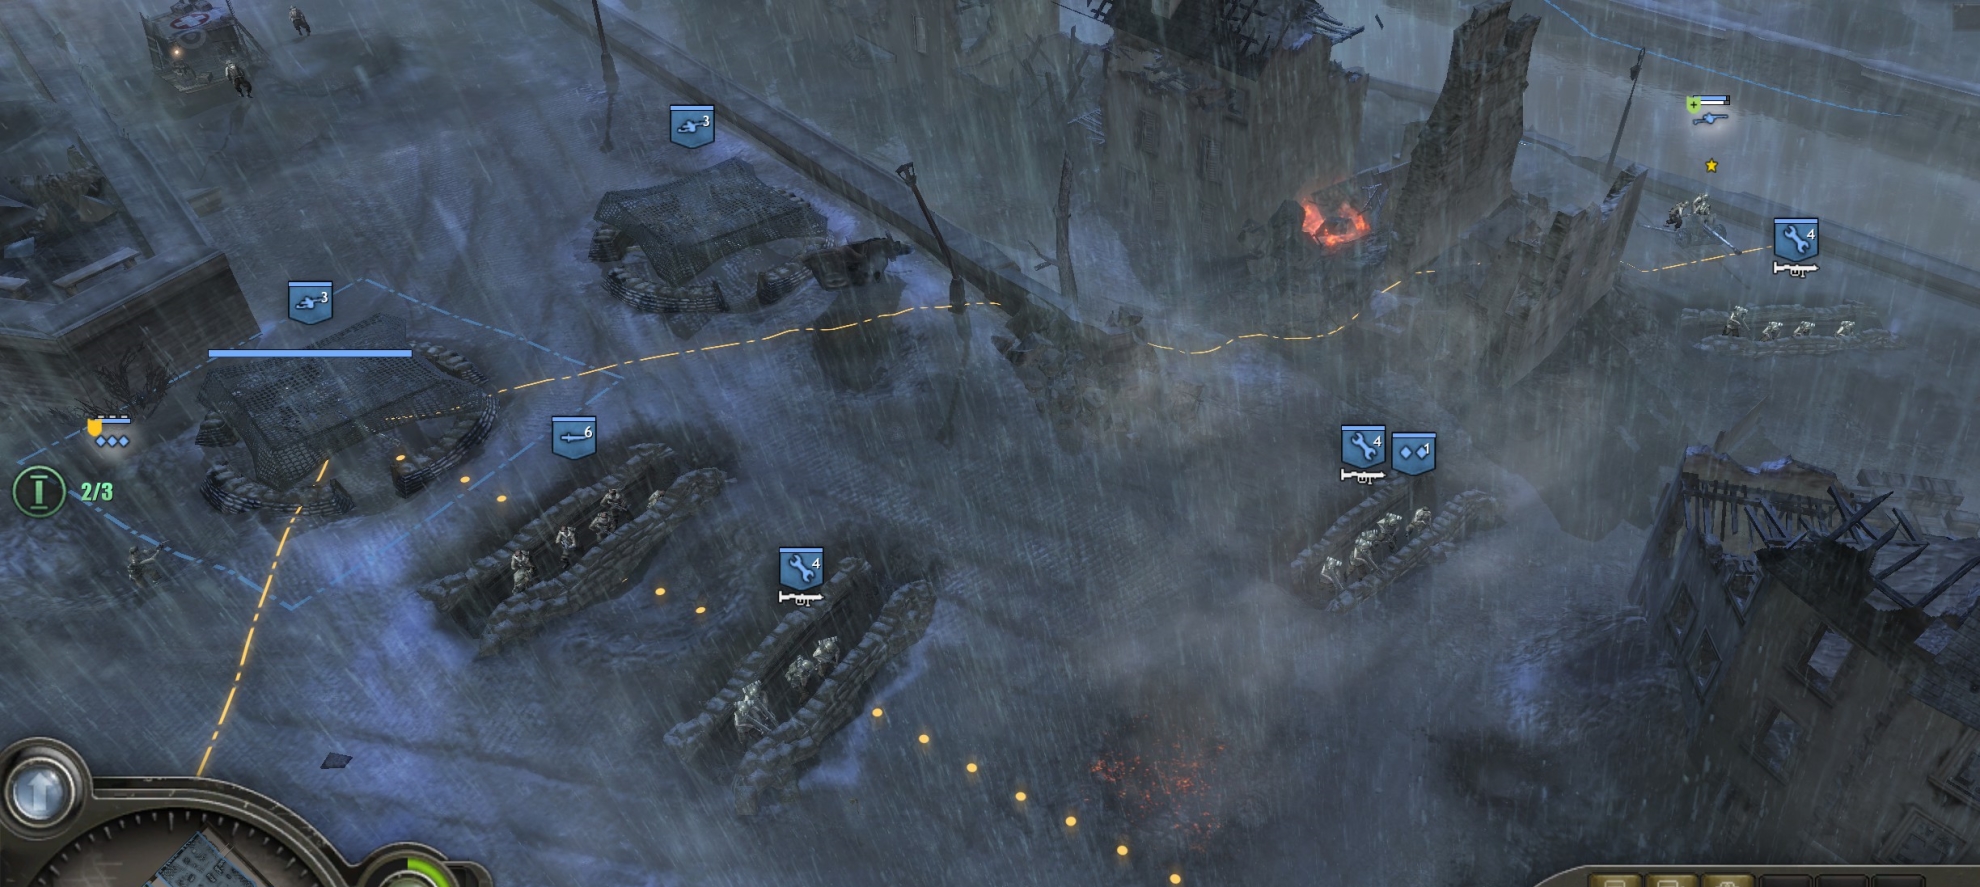
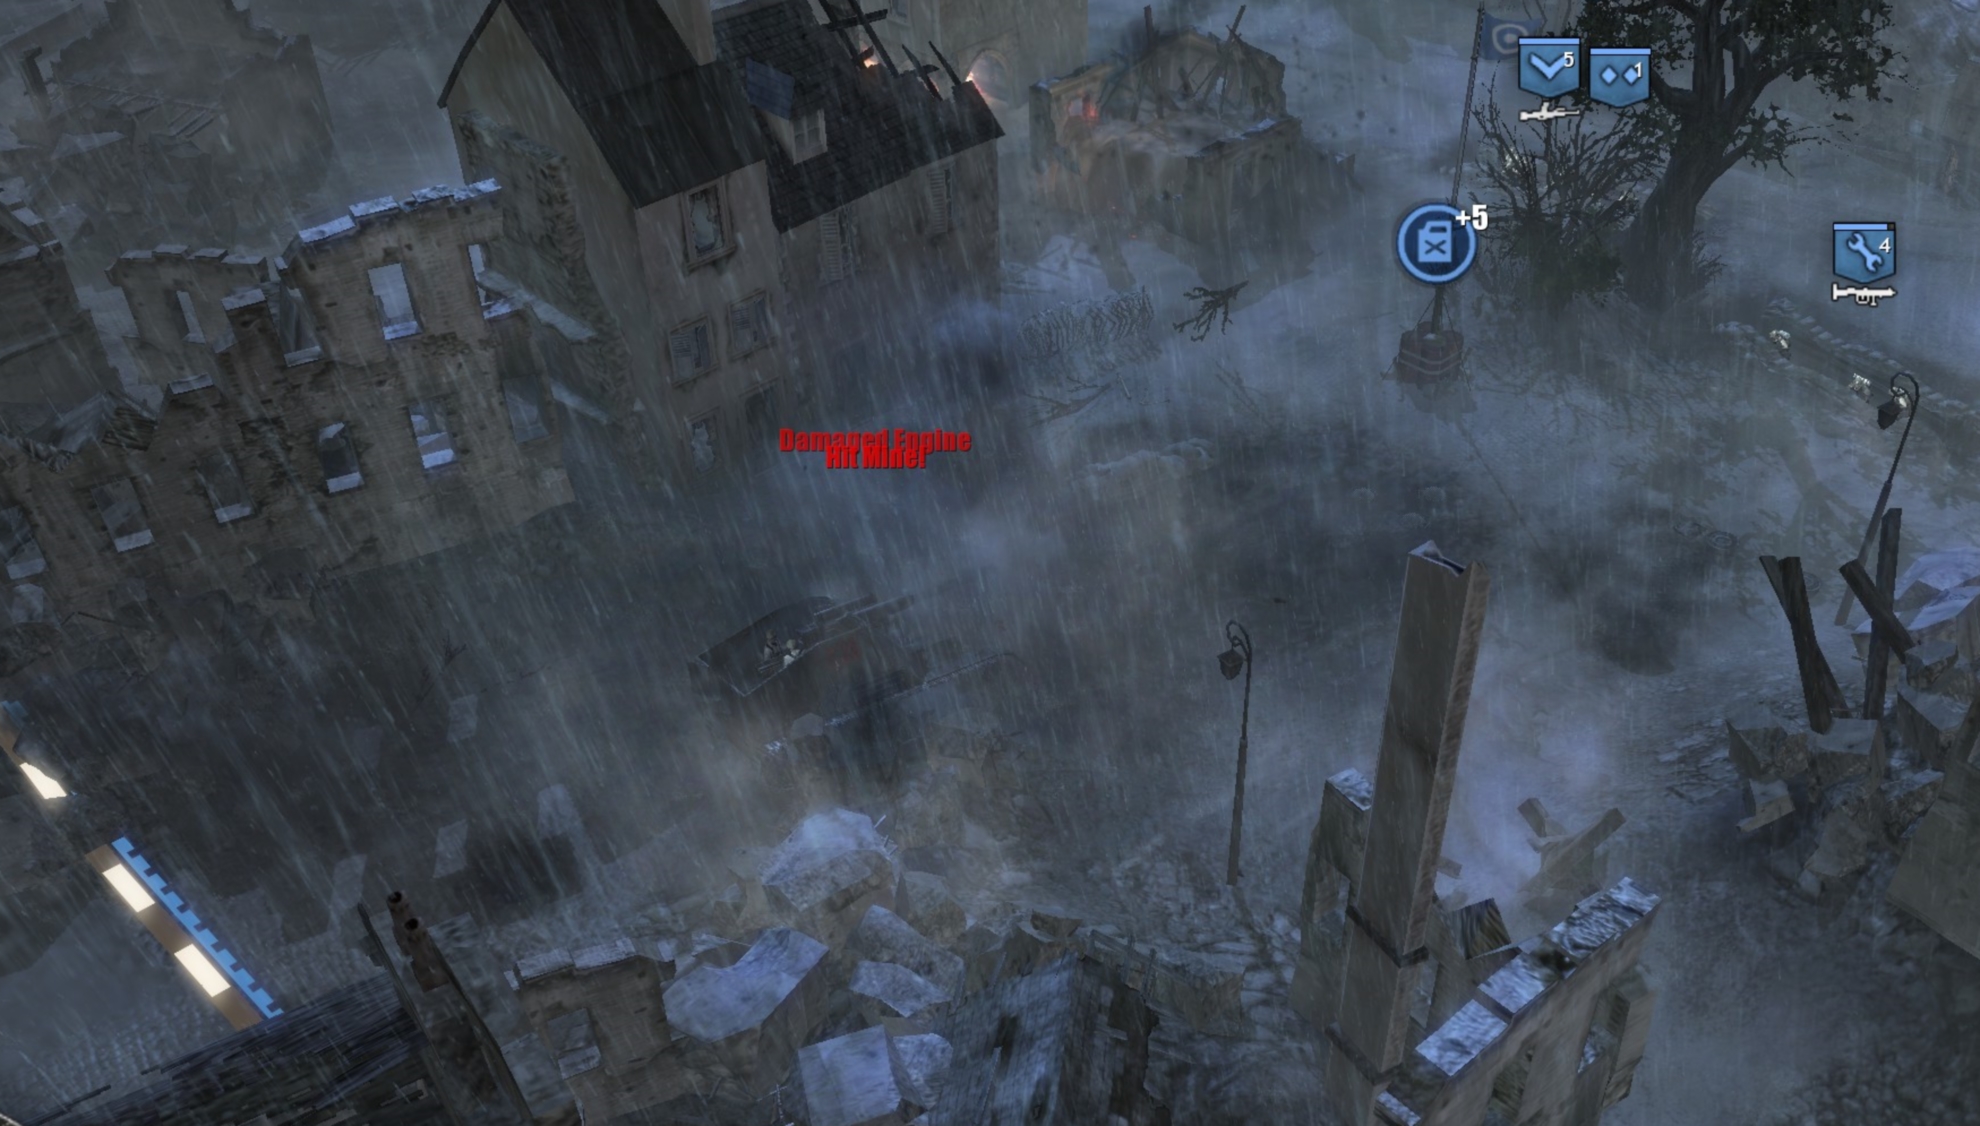
- Use your initial one minute of preparation to build two 17-pdr AT emplacements, and some slit trenches in front of them, more or less as shown in the first image below. If you want to buy extra prep time by immobilizing the Tiger, plant two or three mines on the aforementioned avenue, far enough away from the cathedral area that the immobilized Tiger won’t be able to hit any of your defenses.
- Suicide (against the Tiger) any of your low bang-for-buck units such as crewed MG42s, to free up pop-cap. Also delete (using PIAT-sappers) any 25-pdr units that are poorly positioned.
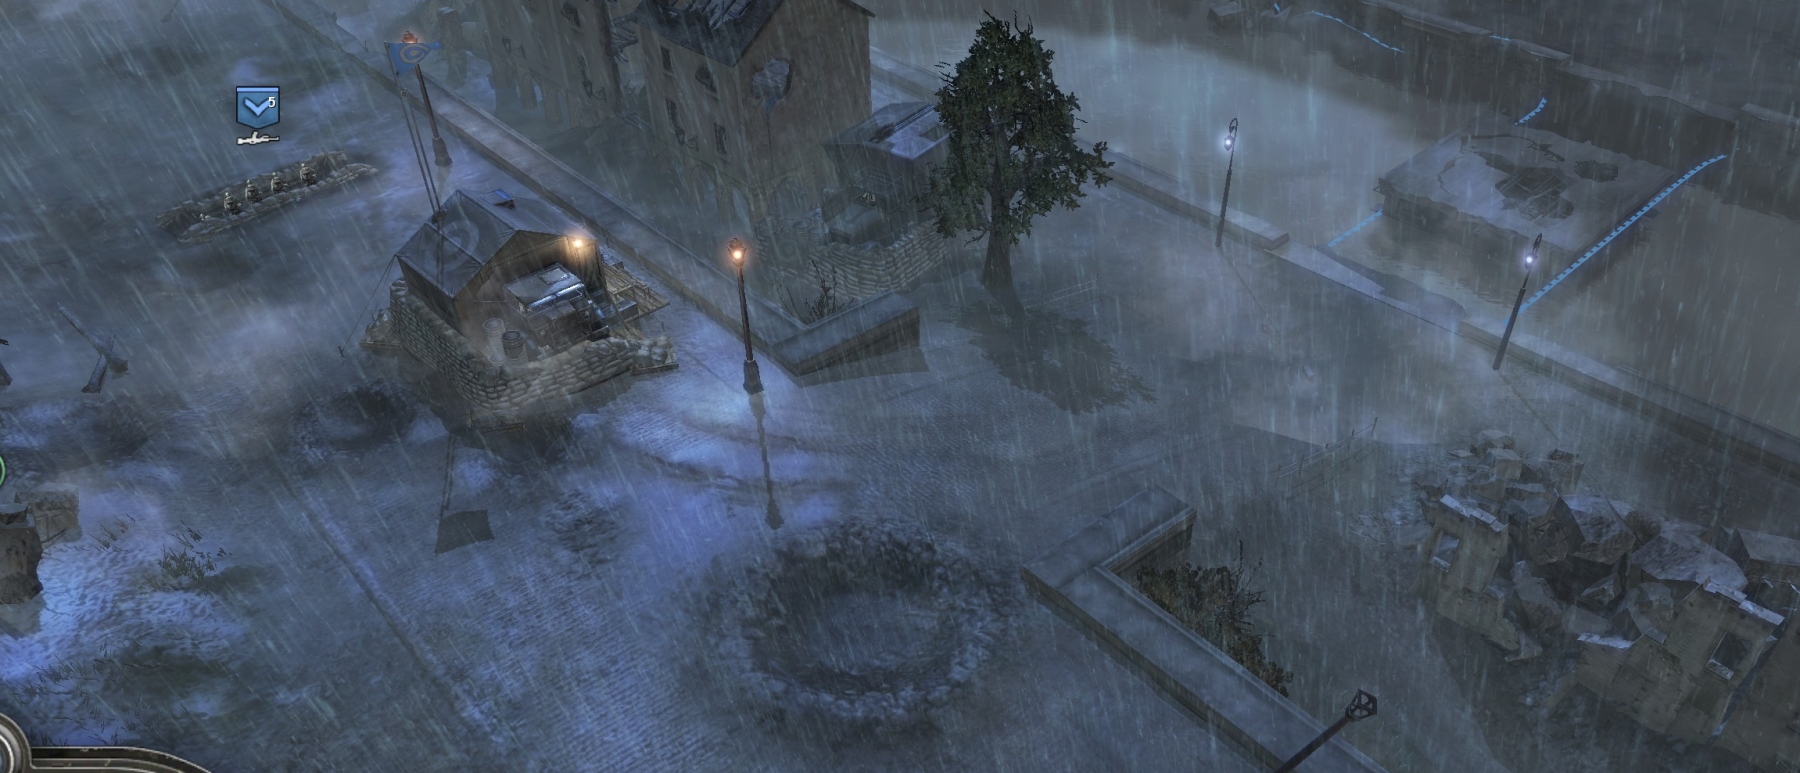
- Set up other defenses around the cathedral more or less as shown in the images below.
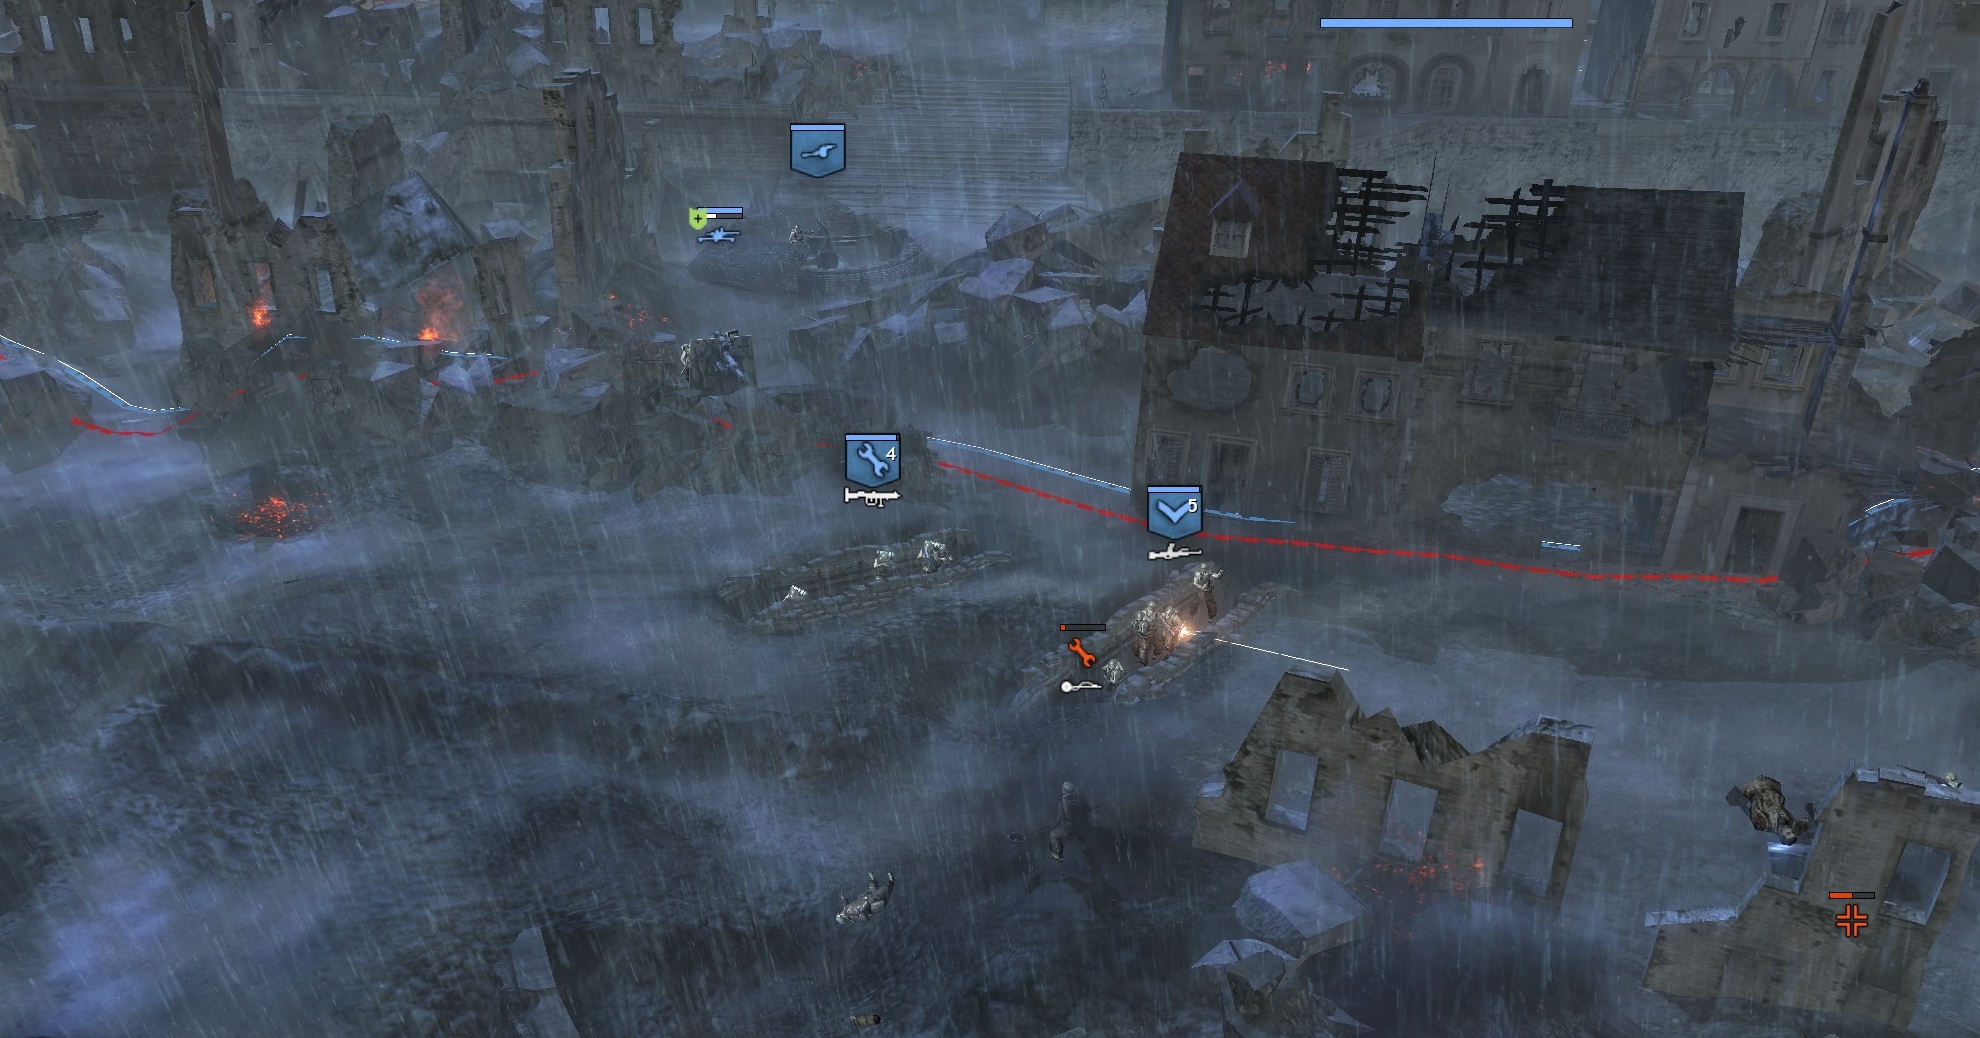
- Note on the tac map the uppermost spot marked “KT,” which is next to the canal to the east of the cathedral. Before killing the Tiger, or immediately afterwards, put a team of PIAT-sappers in a slit trench there. If you don’t, a KT will materialize in that space and start blasting away at your defenses and base buildings. Ditto for the “KT” spots below that on the tac map—a KT will usually materialize around those spots if you try to build new defenses there or even send (or even retreat) units through there during the main mission phase.
- Build one or two artillery emplacements along the south side of the cathedral area. Their overwatch barrage mode is especially useful in providing support against German infantry. They also can sometimes take out one or both German Hummels (see below).
- When you are given a choice of commander ability categories, choose the Royal Artillery Support category which gives you some officer call-in artillery capability and extends the range of any mortar and 25-pdr emplacements.
- Use sappers, AT guns, commandos, artillery or any other demolitions or heavy-weapons unit you have to destroy the bridge to the northeast of the cathedral, denying the Germans that attack route.
- Crew surviving 88s south of the cathedral only if they are truly needed and only after building everything else you need, since they are so expensive in pop-cap (8 plus the cost of infantry, compared to just 3 for a 17-pdr).
- Ignore UI commands to attack points on the map that the Germans have taken.
- Two German Hummels will arrive on the map mid-mission (usually the first UI warning about “Tigers” occurs just after their arrival). When defending the cathedral you don’t have great options for killing these long-range artillery vehicles, though you should kill them as they will damage you a lot otherwise. One option is to build four Cromwells (as soon as your basic cathedral defenses are in place) and park them at the far west-southwest corner of the cathedral area, ready to drive down and attack one Hummel then the other as soon as they arrive (the Hummels will be visible intermittently on the tac map). You are unlikely to get any of your Cromwells back from this Hummel-hunting mission, but that may come as a relief, since they are nightmarishly slow and weak and, apart from Hummel-hunting, quite useless on this map. An equally viable anti-Hummel option is, at the start of the mission, to put pairs of PIAT-sappers (or one sapper team and one Bren-equipped rifle section) in slit trenches within PIAT range of the four H1/H2 positions on the tac map below. (The leftmost H1/H2 positions are the usual parking sites for the Hummels, the rightmost H1/H2 positions the alternate sites.) One PIAT-sapper team in a trench is sometimes enough, but two is almost always enough.
- After the Hummels are destroyed, the mission should be mostly a turkey-shoot, as the main part of the German armor attack from the southeast into the teeth of your 17-pdrs, PIAT-sappers, and artillery barrages.
The mission is nearing its end when the UI tells you to “eliminate the King Tiger.” As noted above, this is unlikely to be the first KT you encounter on this map, so it should be no big deal by then. In any case, when you kill it, drive it off, or merely hold it off for a few minutes, the other remaining German units will retreat (if they are not immobilized) and the UI will inform you—sometimes after a delay of a minute or two—the “situation has been resolved” in Caen, ending the mission.
You can play this mission in many other ways, for example by using the Courtyard VP area for your HQ and setting up a much wider area of defense, e.g., putting your east-side defenses (17-pdr fronted by entrenched Bren-infantry can handle almost anything) close to the road entry points along the east side of the map. Using this strategy, your 17-pdrs often will destroy the Hummels within seconds of their arrival.
***