The last two Caen missions were a bit crazy. This one jumps the shark. You start with only the small force you had at the end of the last mission, and after about a minute a Tiger comes in with supporting infantry from the bottom edge of the map. You can kill the Tiger easily enough, if you’re prepared. But more armor will come, and among the intensifying cascade of attacks you’ll face another five or six Tigers, three or four King Tigers, a couple of Jagdpanthers, and very many Panthers, Panzer IVs, Wirblewinds and Hetzers (for some reason no StuG IVs).
The Germans should absolutely annihilate you. But they don’t because, as is typical in COH1, they come at you mostly piecemeal and are just not aggressive about capping VPs. In fact, if you ignore all the UI “advice” and just follow the suggestions below, you should find this mission one of the easiest of the Caen campaign.
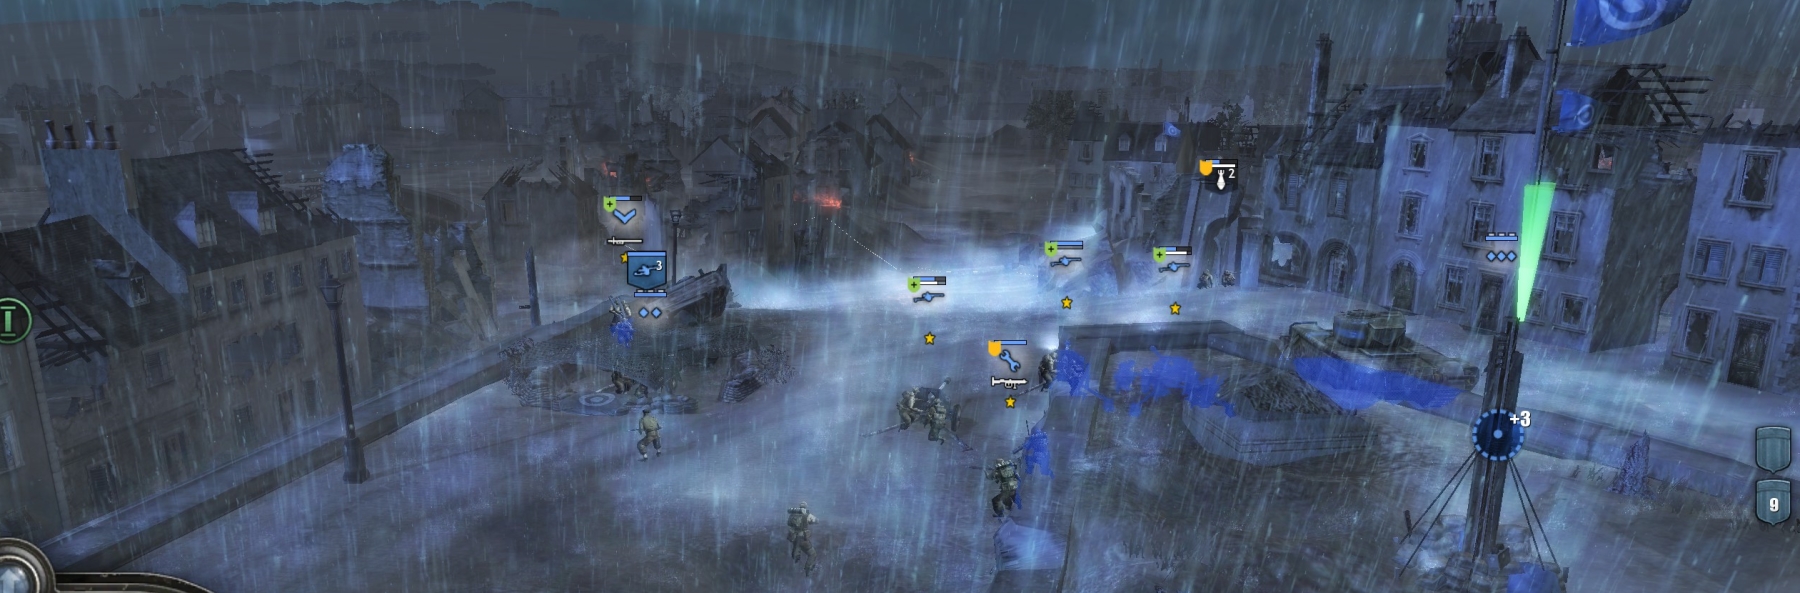
To win, the German force must cap all three VPs. Failing that, the British force wins. So instead of spreading your weak force across the map as the UI suggests (even commands), you should stay at just one VP and defend it. Your starting units might not be ideal for a defensive battle, but very soon, as low-value units are lost, you can replace them with high-value ones, and even a little way into this mission you should be able to handle all German attacks without much effort.
The high-value units in this point defense mission are emplacement weapons like the 17-pdr AT gun, Bofors gun, HMG, and mortar—even 25-pdr artillery if you want to splurge. Sappers upgraded with PIATs and infantry squads upgraded with Brens (or German MG42 LMGs) or carrying panzerschrecks are also good value. Captured Pak-38s are OK to use at the start, but are easily wiped by Tigers and King Tigers even at long ranges. Below the cathedral point there may also be an intact 88 you can re-crew.
Apart from your VP defense, you should try to assemble (if you don’t have them at the start) a mobile force of at least three or four Cromwells and/or Firefly Shermans. You will use these for one very important side mission, which is to kill the two German Hummel SPGs that enter the map about midway through the mission. The Hummels are guarded by Panzer IVs, Tigers and Wirblewinds, and sometimes seem temporarily immune to direct tank fire, and of course they will never come near your static VP defenses—they will shell those defenses, with 99% accuracy despite no spotters, from across the map. So you will proactively have to go out and hunt them down. Position this mobile Hummel-hunting force where they can get quickly to the west side of the map—the Hummels’ lair.
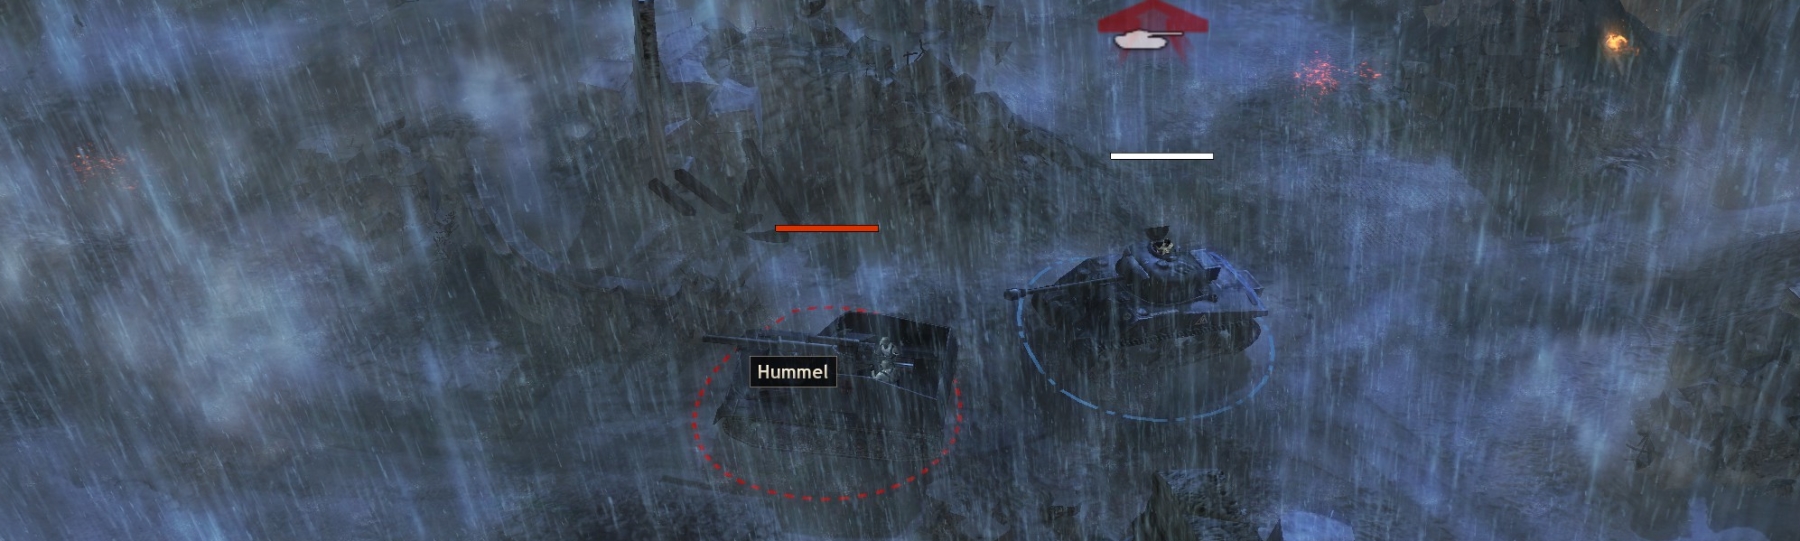
Once you kill the Hummels (or force them to withdraw due to heavy damage), you should suicide most/all of your tanks—they are extremely nerfed and much too expensive compared to 17-pdrs for example. In fact, at the start, if you have a lot of tanks (say, Churchills) and have maxed your pop cap, you should send one or two of them down to the map edge where the first Tiger enters, and let them die—freeing up pop cap—while softening up the Tiger for the eventual kill.
Apart from all that, the mission can be a bit boring. You don’t have the ability to lay tank traps and the Germans swarm the map with instant-mine-clearing pioneers, so you can’t really funnel the enemy into kill zones, but still, you have more than enough firepower and pop cap for the job. Six 17-pdr emplacements, for example, costs just 18 towards your pop cap of 100. (And remember you can quickly re-face 17-pdrs in any direction.)
It’s easy enough to defend the cathedral, where your base trucks probably are at the start. But a good alternative is the “courtyard” VP near the center of the map. You will have more space to place defenses, and will be closer to the Hummels’ parking places. You will have to move your base buildings there, if you don’t want them destroyed.

The mission is in its final phase when the UI tells you to “eliminate the King Tiger.” This will be the third or fourth KT you’ll face, so it should be no big deal by then. In any case, when you kill it, the other remaining German units then or after a short delay will all suddenly retreat and the UI will inform you the “situation has been resolved” in Caen.
A few more things to bear in mind:
- When you are given a choice of commander ability categories, choose the Royal Artillery Support category which gives you some officer call-in artillery capability and can extend the range of your mortar and 25-pdr emplacements. The Priest SPGs are not worth the pop cap they take up, and most other commander abilities have no value at all.
- Lay mines only in places that are covered by your anti-infantry units or emplacements; as noted above, the Germans in this mission bring in swarms of mine-clearing pioneer teams, so your mine-laying will be wasted wherever they can go.
- You can use artillery to bombard bridges to deny their use to the Germans—useful in blocking off the NE approach to the cathedral, for example.
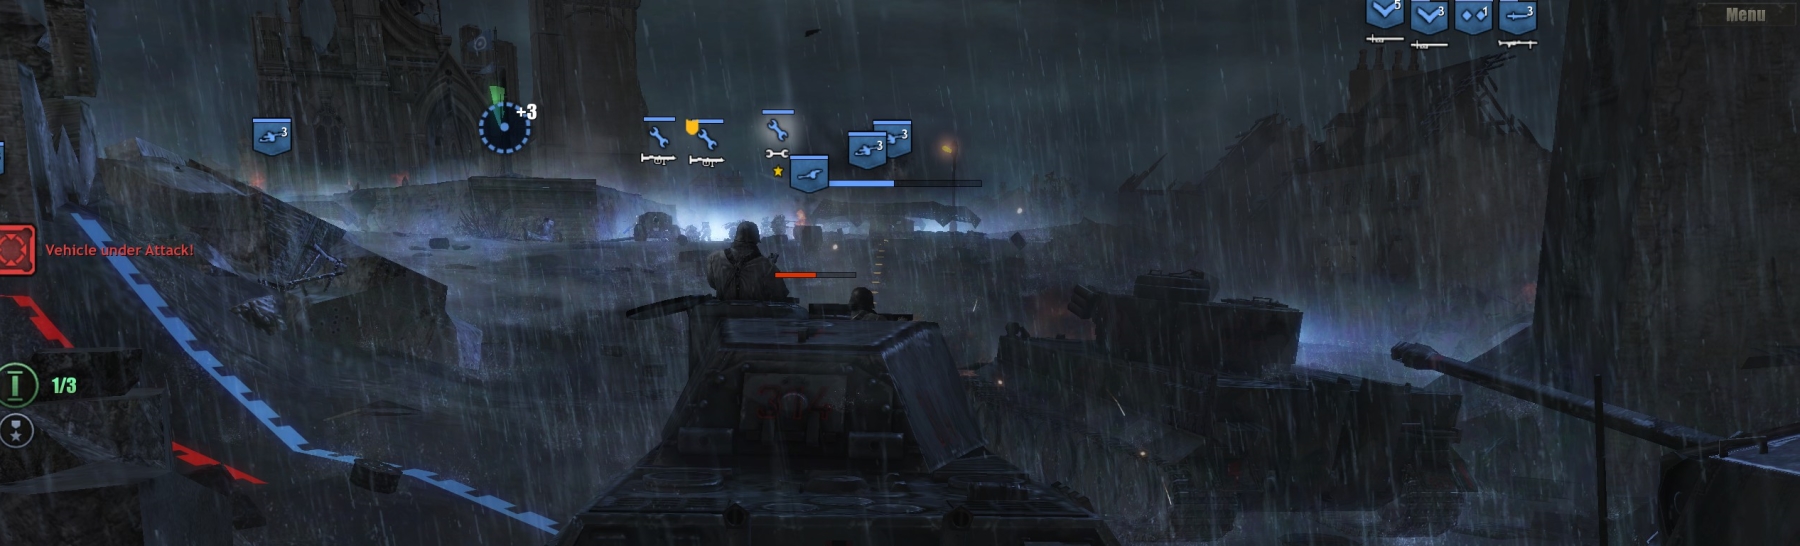
- Make sure you cover all approaches to your VP; the Germans will “know” in advance exactly what your weak spots are. Also, be prepared for both armor and infantry.
- Sometimes when a German tank is coming in from the edge of the map you will damage it very quickly—but instead of taking more damage and blowing up, it will just disappear, and maybe will reappear later on some other part of the map, as if it magically “withdrew” from the map due to being overmatched. Also, the first King Tiger often materializes on pavement ~100 meters to the SE of the front of the cathedral, beside the canal—no amount of mines placed in that area or approaches will affect it beforehand.
***