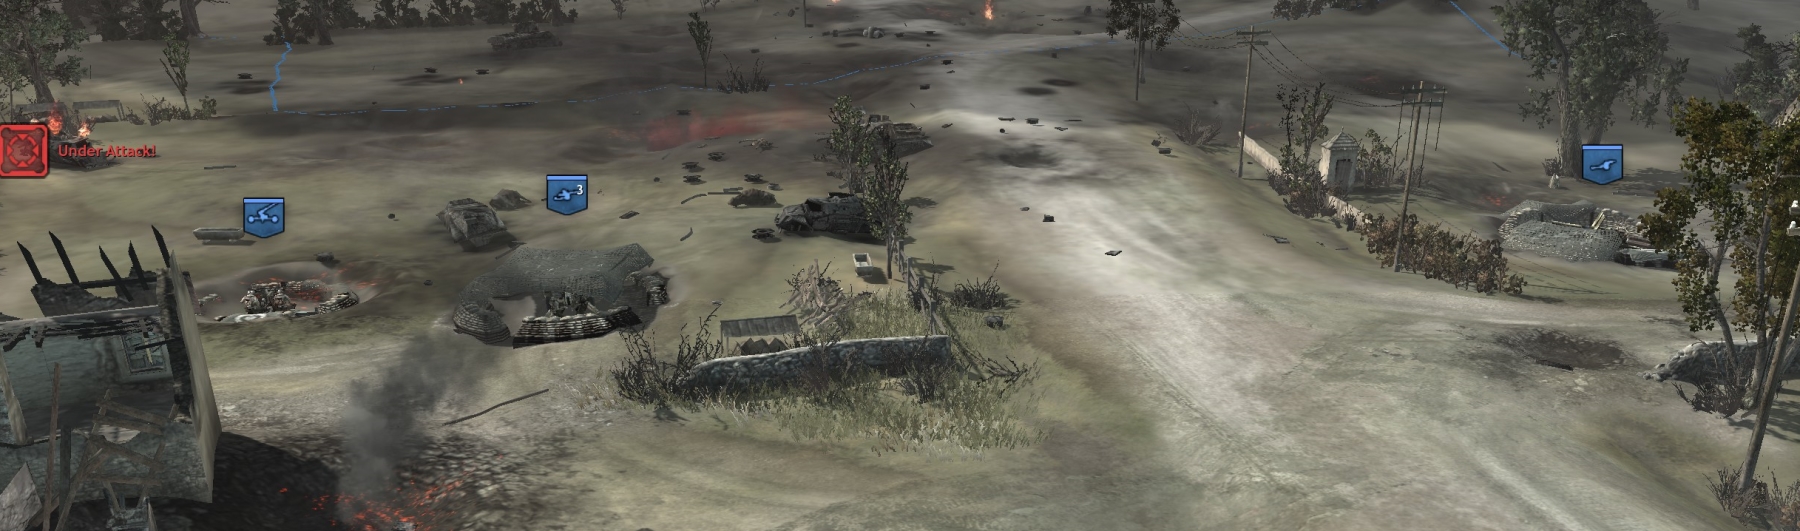
As in the main Normandy campaign, German units in the Caen mini-campaign are buffed and player units are nerfed. Indeed, British infantry squads are good only for scouting, point-capping and attacking Pak crews, unless they have acquired a schreck, HMG, or other heavy weapon.
The start of this mission is mostly a scripted tutorial, making it a chore to get through rather than something you’d ever want to replay. It’s mainly a case of follow-the-instructions, although you should know that it is buggy, and will, for example, ask you to build something with your sappers (engineers) without make it clear where you can build it—the visual indicator and the enabling of the build location may come only after a long delay.
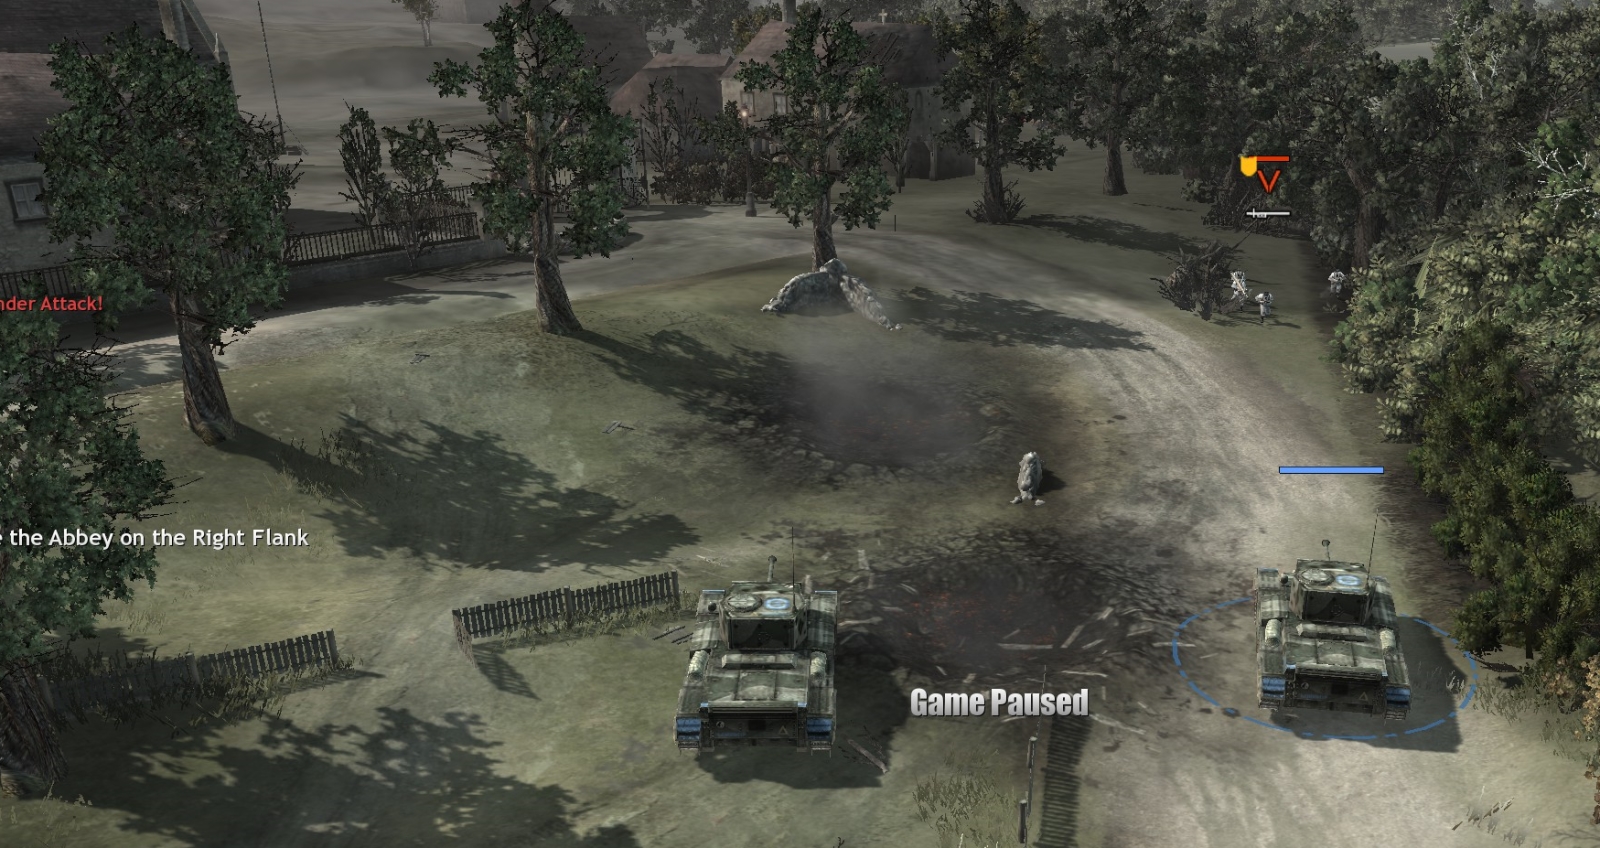
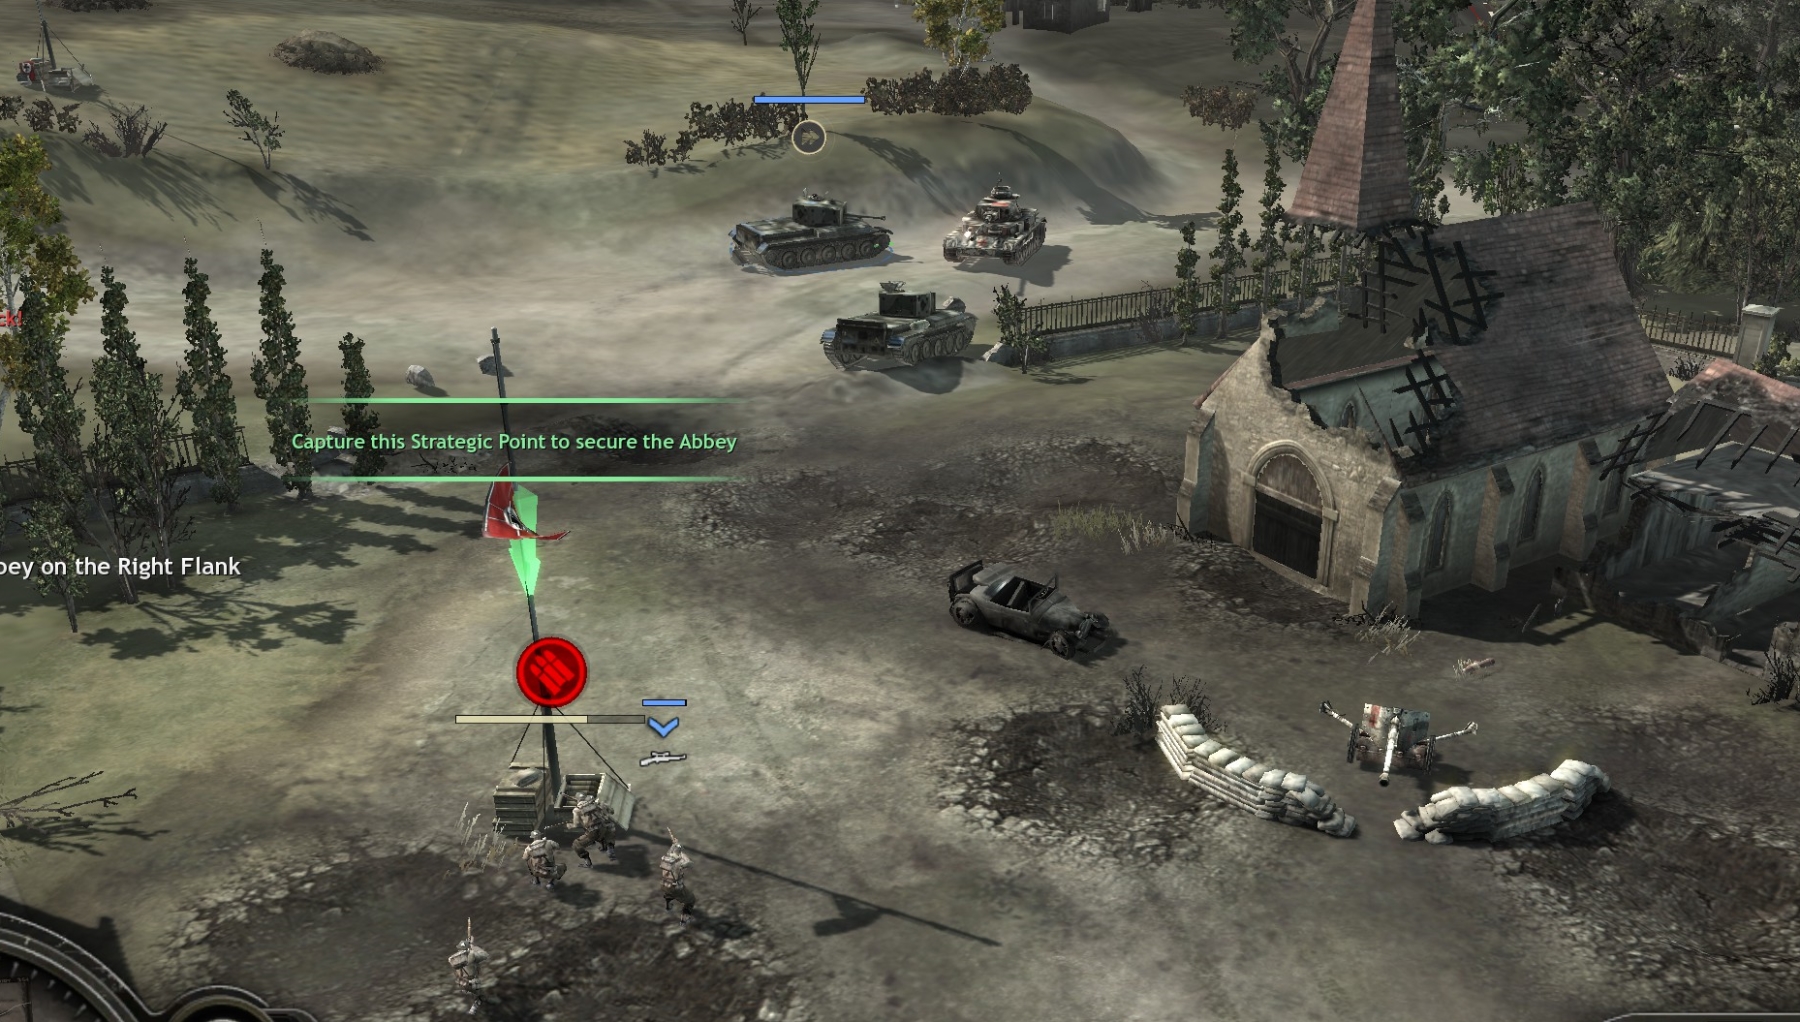
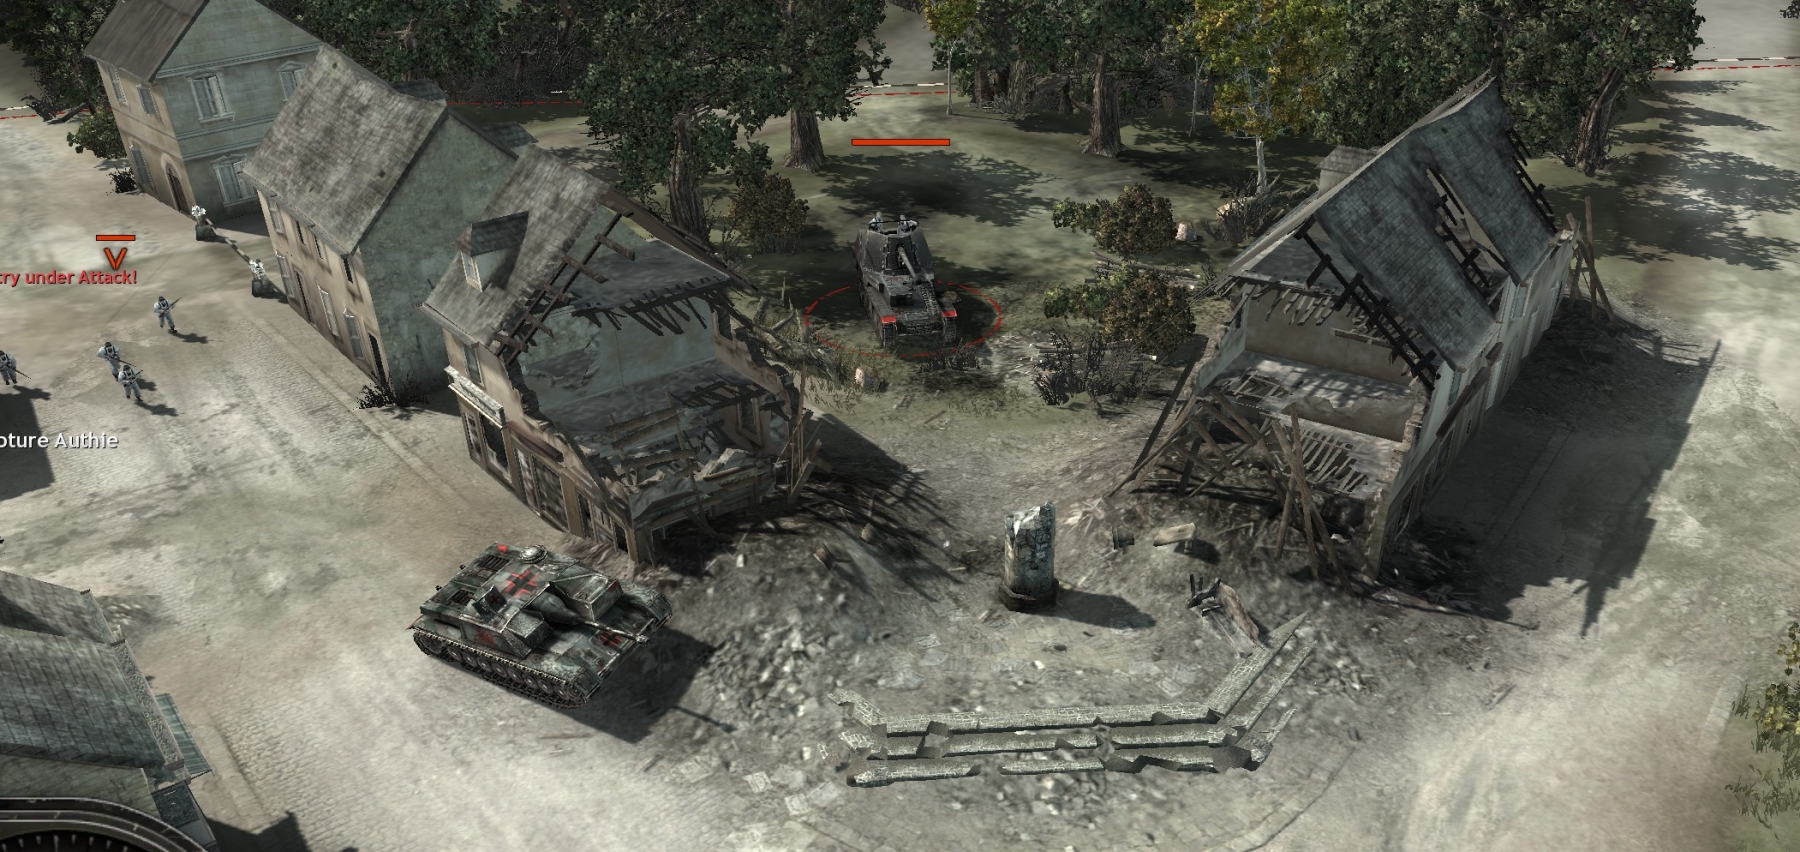
Once you get past the initial defensive tutorial bit, your first real task will be to send a couple of tanks (Cromwells) with supporting infantry (and artillery support from two existing 25-pdr emplacements) to destroy a small German garrison at an abbey. Just outside the southern gate of the abbey are two or three German infantry squads, at least one of them schreck-equipped.
Inside, near the munitions point, are a mortar team, an HMG and a Pak-38. Just to the north of the abbey a Panzer IV will materialize when you cap the point and move to exit the north gate. Use artillery on all of them and try to spare your Cromwells—which take damage very easily and take a long time to repair. (You get only one sapper squad in this mission, and somehow it can be reduced by casualties in the initial phase even if it is behind cover.) Now and in the next phase when you set up your new forward base nearby, use your infantry squads to crew the Pak and mortar from the abbey, and any HMG from near the forward base. Also have one of your squads gather any schrecks from their deceased German owners.
After you set up your forward base, you’ll be working your way up toward Authie town, where a variety of German armored vehicles await.
You can start by sending a couple of tanks and squads (including any schreck squad) around to the west, to start pushing into the town and capping points. That area has some HMGs and small AT halftracks; the latter can three- or four-shot your Cromwells but cannot withstand a two-tank attack. You can also get a lot done with your captured mortar.
The rest of your units (hopefully including two Cromwells and at least one captured Pak) can stand in the field across from your new forward base to defend against the German attacks that come down the main road from the town. Remember that you have artillery too.
Keep your sappers safe.
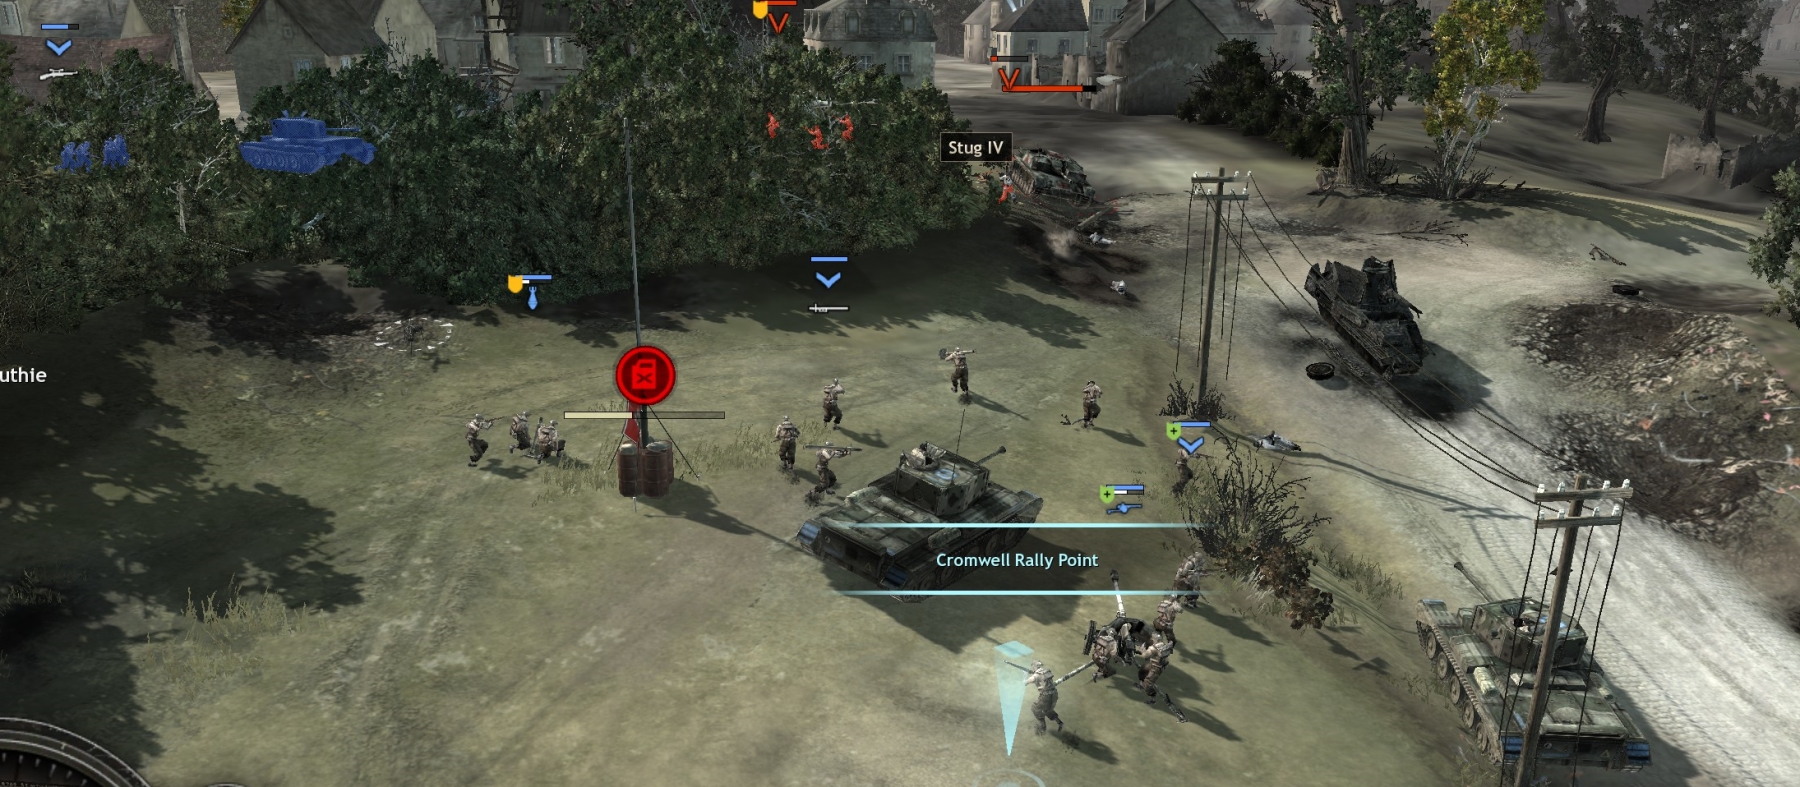
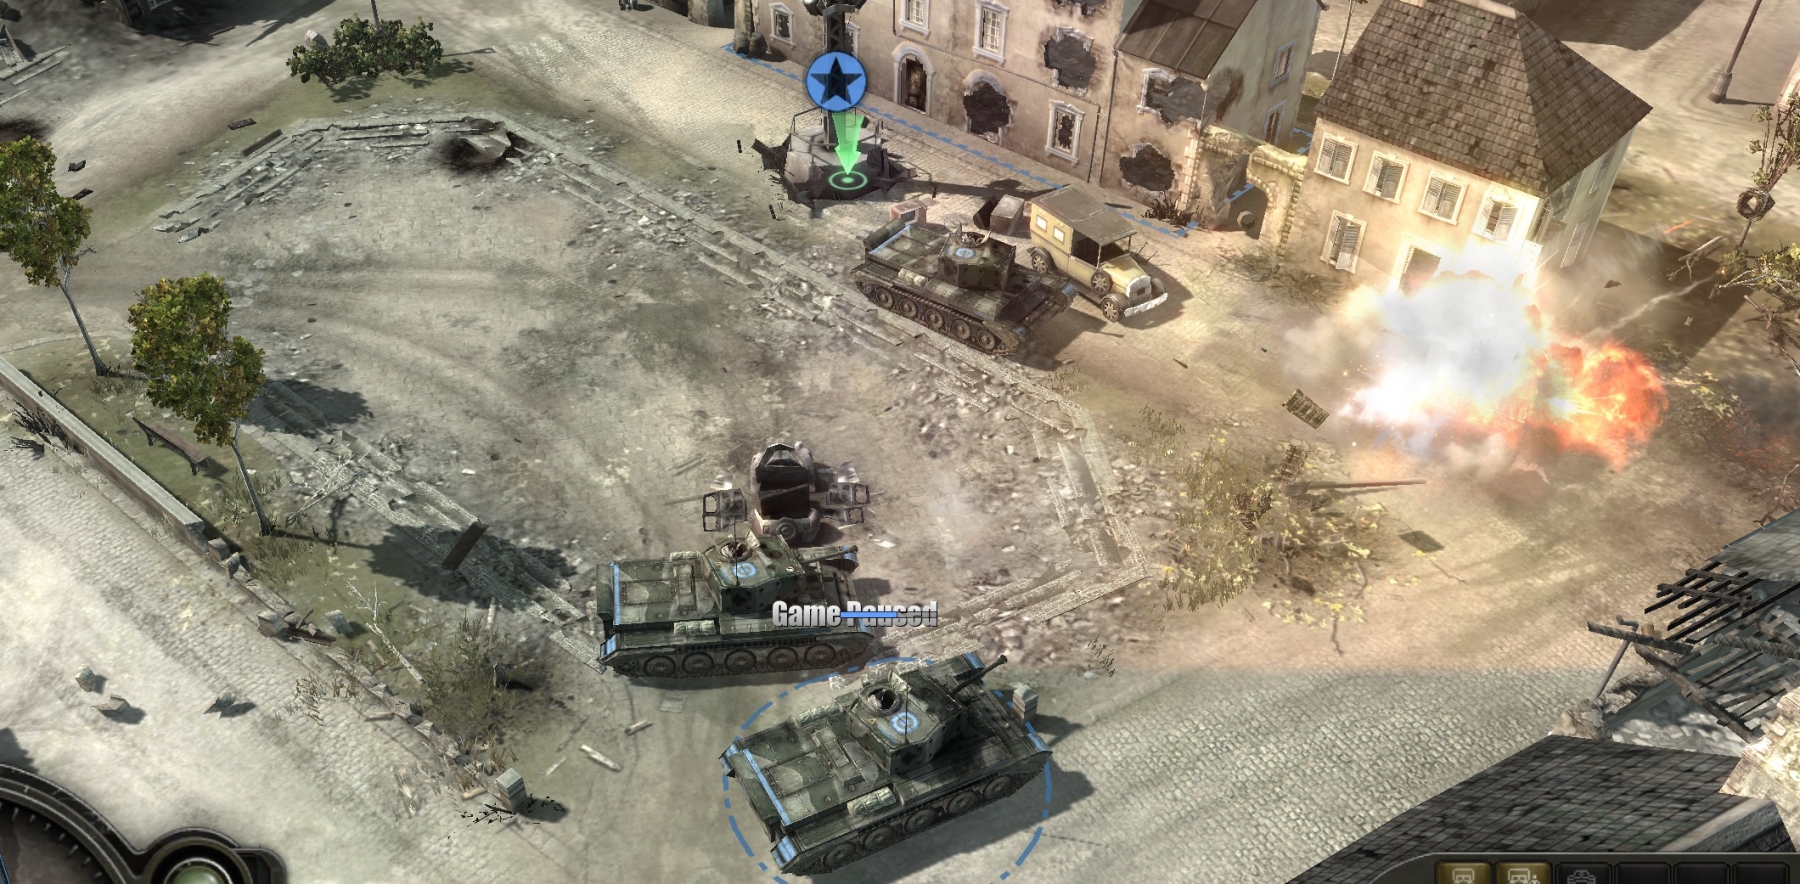
When your first two tanks and supporting units have cleared the west side of Authie, they can use their overdrive function to rush and flank the Marder III lurking in the yard at the back of the village. At the same time (assuming you have destroyed any Paks in their way with artillery) your Cromwells near your base can surge forward into the town square—if they had done so before, the Marder would have two-shotted each one from extreme range.
Your four Cromwells can now gather in the town square and take out the HMG in the town hall. As you make progress, more German armor (StuG IV, Marder III) and infantry reinforcements will come in from the road at the back of the village. An HMG and a schreck squad in a building overlooking the counterattack route can be helpful.
At the very end, when you are capping or are about to cap the point in the town square, infantry plus two German vehicles (Marder III, StuG IV) will come in on the northwest road and coordinate with a Panzer IV coming from the very top of the map to hit your town square vehicles from two sides. Be ready for that. When you kill that Panzer IV, the other German units retreat and the mission ends.
To win the mission medal you must already have capped all the other points on the map when you cap the town square point.
***